• Welcome to ClassicBroncos! - You are currently viewing the forums as a GUEST. To take advantage of all the site features, please take a moment to register. It's fast, simple and absolutely free. So please join our community today!
    If you have problems registering or can't log into your account, please contact Admin.

Copy of instructions ? Toms offroad Interior Bar, Plate Style Family 6-Point, 66-77 Ford Bronco

hyghlndr

Contributor
Bronco Guru
Joined
Jan 19, 2009
Messages
5,040
Loc.
Hockessin, Delaware
Hi, I found the general installation video and it mentioned to follow the instructions. Mine is new and I don't see instructions or bolts. Any one have a copy of the instructions? I did not see them link on the website and are closed now I believe.

Thanks
 

Colo77Bronco

Contributor
Sr. Member
Joined
Oct 10, 2004
Messages
612
Loc.
Colorado Springs
I did not get any instructions either. Would be super helpful to have an exact location where to put the plates as opposed to eyeballing it and making sure they are level. Also, in the video, they mention locating the windshield cross bar a the height you want up and down for dash pad or not. Then later they say the hoops that go down to attach to them are already precut at the end if you had put that bar lower it would potentially make that hoop unloved and wonky. I am getting ready to assemble the bar in the next few weeks. I think I will attach the cross bar at the windshield last.

I'd also love to hear if anyone tried to install the plates with fenders in place.
 

DirtDonk

Contributor
Bronco Guru
Joined
Nov 3, 2003
Messages
47,641
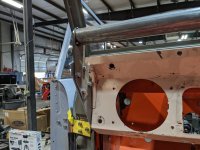
I’ll have to look at how that’s built again. I always like the concept, and generally speaking, a windshield crossbar can be moved up or down quite a bit. As long as everything else cooperates.
Even though going up might block a little of the lower windshield, it doesn’t necessarily block your view.
As you look down through the windshield, most of what you see for the first few inches of glass is hood.
Seems like moving it up or down could also help you with the layout of a custom dash panel.
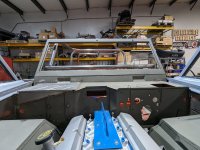
I doubt that many are planning something like that though. Guessing most would stick with the stock dash.
But I’ve always liked the thought of adding a pod with real gauges in it.
 

gnsteam

Contributor
Bronco Guru
Joined
Jan 29, 2010
Messages
3,538
Loc.
Lincoln NE
My cage did not come with instruction either. Tom’s installation video was all we used to fit it together. I will say that my cage did not line up as nice as the one in the video. So we had to make adjustments and concession with the placement of the over head outer bars. Not really a big deal, still looks OK. As for the lower windshield bar. We positioned the bar on the center line of radiused end of the kick panel plate. So basically at the highest point. At that position the overhead bars come out level or parallel with the floor. Hear are a few pictures. I can take additional pictures of the cage if needed. It is out of the Bronco, awaiting paint.
 

Attachments

  • PXL_20231113_215035888.jpg
    PXL_20231113_215035888.jpg
    197.7 KB · Views: 75
  • PXL_20231110_214229666.jpg
    PXL_20231110_214229666.jpg
    209.8 KB · Views: 71
  • PXL_20231113_215045964.jpg
    PXL_20231113_215045964.jpg
    169.8 KB · Views: 65
  • PXL_20231110_214603197.jpg
    PXL_20231110_214603197.jpg
    208 KB · Views: 61
  • PXL_20231113_214820424.jpg
    PXL_20231113_214820424.jpg
    196.9 KB · Views: 64
  • PXL_20231113_215053198.jpg
    PXL_20231113_215053198.jpg
    204.3 KB · Views: 65
  • PXL_20231110_214448694.jpg
    PXL_20231110_214448694.jpg
    233.3 KB · Views: 61
  • PXL_20231113_215019491.jpg
    PXL_20231113_215019491.jpg
    184.8 KB · Views: 60
  • PXL_20231113_215025435.jpg
    PXL_20231113_215025435.jpg
    180.3 KB · Views: 54
  • PXL_20231110_214222806.jpg
    PXL_20231110_214222806.jpg
    178.9 KB · Views: 74

hunter1

Contributor
Jr. Member
Joined
Feb 2, 2013
Messages
263
Loc.
Maryville, Tn
I built my own. Just adjust to what fits you.
 

Attachments

  • IMG_1616.jpeg
    IMG_1616.jpeg
    177.6 KB · Views: 46
  • IMG_1615.jpeg
    IMG_1615.jpeg
    95.3 KB · Views: 47
  • IMG_1614.jpeg
    IMG_1614.jpeg
    118 KB · Views: 47
  • IMG_1613.jpeg
    IMG_1613.jpeg
    116.9 KB · Views: 44
  • IMG_1612.jpeg
    IMG_1612.jpeg
    119.2 KB · Views: 48

Colo77Bronco

Contributor
Sr. Member
Joined
Oct 10, 2004
Messages
612
Loc.
Colorado Springs
My cage did not come with instruction either. Tom’s installation video was all we used to fit it together. I will say that my cage did not line up as nice as the one in the video. So we had to make adjustments and concession with the placement of the over head outer bars. Not really a big deal, still looks OK. As for the lower windshield bar. We positioned the bar on the center line of radiused end of the kick panel plate. So basically at the highest point. At that position the overhead bars come out level or parallel with the floor. Hear are a few pictures. I can take additional pictures of the cage if needed. It is out of the Bronco, awaiting paint.
Looks great. What are your opinions on the cross bar location and actual visibility?

It looks like the edge of the plates on yours are lined up perfectly with the back edge of the seam where the weatherstripping goes on the lower portion. On the video they have about 3/8' of that seam visible. I wanted to move the plates forward enough to fully get that section of weatherstrip to seat fully.

Wish they'd have left more material on the ends of the bars for fine tuning so that dash bar could be lower. I am definitely running the dash bar as I am not using a car stereo and using a nice bar mount for my iPad to use for nav and sound.
 

bigmuddy

Contributor
Bronco Guru
Joined
Dec 28, 2004
Messages
7,026
Loc.
Marthasville Missouri
I built my own. Just adjust to what fits you.
Hunter, did you use a shallow headed bolt on the pipe that runs side to side in front of the dash?

I am having some clearance issues at the narrow sections between the bolt heads and when the door closes.
 

bigmuddy

Contributor
Bronco Guru
Joined
Dec 28, 2004
Messages
7,026
Loc.
Marthasville Missouri
Looks great. What are your opinions on the cross bar location and actual visibility?

It looks like the edge of the plates on yours are lined up perfectly with the back edge of the seam where the weatherstripping goes on the lower portion. On the video they have about 3/8' of that seam visible. I wanted to move the plates forward enough to fully get that section of weatherstrip to seat fully.

Wish they'd have left more material on the ends of the bars for fine tuning so that dash bar could be lower. I am definitely running the dash bar as I am not using a car stereo and using a nice bar mount for my iPad to use for nav and sound.
A local friend of mine built a copy and we decided to sit the bar as close to the bottom of the dash pad as we could get and still allow for installation.
 

hunter1

Contributor
Jr. Member
Joined
Feb 2, 2013
Messages
263
Loc.
Maryville, Tn
Hunter, did you use a shallow headed bolt on the pipe that runs side to side in front of the dash?

I am having some clearance issues at the narrow sections between the bolt heads and when the door closes.
No, I haven't yet, but will when I do the final install. Probably use what is called an elevator bolt. super flat head with very good tensile strength. the clearance is really close on the passenger side, but does clear barely with a standard hex head bolt.
 

hunter1

Contributor
Jr. Member
Joined
Feb 2, 2013
Messages
263
Loc.
Maryville, Tn
No, I haven't yet, but will when I do the final install. Probably use what is called an elevator bolt. super flat head with very good tensile strength. the clearance is really close on the passenger side, but does clear barely with a standard hex head bolt.
This is the clearance between the inside of the door and bolt head on the passenger side. door is closed and in the latched position. IMG_1622 (1).jpg
 

bigmuddy

Contributor
Bronco Guru
Joined
Dec 28, 2004
Messages
7,026
Loc.
Marthasville Missouri
Thanks for sharing, mine has standard bolt heads and I need something thinner, the passenger side is good the driver side is close enough that popped a small bit of paint. Hmmm, what to do...
 

hunter1

Contributor
Jr. Member
Joined
Feb 2, 2013
Messages
263
Loc.
Maryville, Tn
I'd say those would do it. Very similar to an elevator bolt.
Those are similar to an elevator bolt, maybe a little thicker head. I think shear strength is what you'd be concerned with. would be much pull on those bolts the way they are used.
 

Attachments

  • Amazon.co (1).jpg
    Amazon.co (1).jpg
    83.8 KB · Views: 3

gnsteam

Contributor
Bronco Guru
Joined
Jan 29, 2010
Messages
3,538
Loc.
Lincoln NE
Looks great. What are your opinions on the cross bar location and actual visibility?

It looks like the edge of the plates on yours are lined up perfectly with the back edge of the seam where the weatherstripping goes on the lower portion. On the video they have about 3/8' of that seam visible. I wanted to move the plates forward enough to fully get that section of weatherstrip to seat fully.

Wish they'd have left more material on the ends of the bars for fine tuning so that dash bar could be lower. I am definitely running the dash bar as I am not using a car stereo and using a nice bar mount for my iPad to use for nav and sound.
I, really don't think the height of the dash bar will cause any visibility issues. But I do agree, it would look a better a bit lower. Here are a few more pictures of the kick panel plates. We did our best to place them as described in the video. A 1/4" back from the door opening. I'm not going to run a dash pad. Which will give me lots of room to get creative with. I too am not installing a dash stereo. So the dash bar opens up a lot of possibilities for accessory mounts.
 

Attachments

  • PXL_20231110_214202836.jpg
    PXL_20231110_214202836.jpg
    141.5 KB · Views: 35
  • PXL_20231110_214210806.jpg
    PXL_20231110_214210806.jpg
    159.5 KB · Views: 32
  • PXL_20231110_214448694.jpg
    PXL_20231110_214448694.jpg
    233.3 KB · Views: 30
  • PXL_20231110_214215605.jpg
    PXL_20231110_214215605.jpg
    153.9 KB · Views: 31
  • PXL_20231110_214222806.jpg
    PXL_20231110_214222806.jpg
    178.9 KB · Views: 28
  • PXL_20231110_214500590.jpg
    PXL_20231110_214500590.jpg
    177.9 KB · Views: 27
  • PXL_20231110_214509938.jpg
    PXL_20231110_214509938.jpg
    209.9 KB · Views: 28
  • PXL_20231110_214158152.jpg
    PXL_20231110_214158152.jpg
    182.8 KB · Views: 35
OP
OP
H

hyghlndr

Contributor
Bronco Guru
Joined
Jan 19, 2009
Messages
5,040
Loc.
Hockessin, Delaware
My cage did not come with instruction either. Tom’s installation video was all we used to fit it together. I will say that my cage did not line up as nice as the one in the video. So we had to make adjustments and concession with the placement of the over head outer bars. Not really a big deal, still looks OK. As for the lower windshield bar. We positioned the bar on the center line of radiused end of the kick panel plate. So basically at the highest point. At that position the overhead bars come out level or parallel with the floor. Hear are a few pictures. I can take additional pictures of the cage if needed. It is out of the Bronco, awaiting paint.

Do you or anyone else know the distance between these bars (inside to inside), this is between the rear hoop and center hoop? For some reason this bar is missing, I just have the two front longer ones.
 

Attachments

  • PXL_20231113_215045964.jpg
    PXL_20231113_215045964.jpg
    214.8 KB · Views: 10

gnsteam

Contributor
Bronco Guru
Joined
Jan 29, 2010
Messages
3,538
Loc.
Lincoln NE
Do you or anyone else know the distance between these bars (inside to inside), this is between the rear hoop and center hoop? For some reason this bar is missing, I just have the two front longer ones.
If no one else posts an answer. I can get you the dimension next Tuesday. I am out of town.
 

gnsteam

Contributor
Bronco Guru
Joined
Jan 29, 2010
Messages
3,538
Loc.
Lincoln NE
Do you or anyone else know the distance between these bars (inside to inside), this is between the rear hoop and center hoop? For some reason this bar is missing, I just have the two front longer ones.
I got home a day early. The distance is 27", inside of the tubes, mid hoop to rear hoop. Note, my cage is fully welded.
 
Top