• Welcome to ClassicBroncos! - You are currently viewing the forums as a GUEST. To take advantage of all the site features, please take a moment to register. It's fast, simple and absolutely free. So please join our community today!
    If you have problems registering or can't log into your account, please contact Admin.

Money Pit - Phase III

OP
OP
KyleQ

KyleQ

Bronco Guru
Joined
Apr 24, 2008
Messages
5,480
Yesterday started at 7AM and is just finishing up - progress report.

Setup the hydro steering linkage, got is all straightened out and tack welded my mounts together.


Cut my tyrackbar down to size and realized my 1" DOM is 1/2" wall so I had to have a buddy machine out the inside so I could weld everything back together.


Built a platform for the steering valve to sit on - hugs the frame and uses one of the mounting holes.


Obviously installed the trackbar and got all that stuff welded up- painted the axle after everything was done.
 
OP
OP
KyleQ

KyleQ

Bronco Guru
Joined
Apr 24, 2008
Messages
5,480
We got a decent amount of stuff done today - started off by gutting the factory fuel lines and running all new steel lines from tank to fuel pump including a new fuel filter setup. After we ran fuel line I gutted the e-brake crap, taped up and fixed the wiring and tucked it out of harm's way. Next we stuck the axle back under the truck, bolted the Cage arms for the last time and put them up on the truck, bolted in the track bar and slung the coils in it all for the last time as well.

Threw the ram, brakes and brake lines on there - was mocking up all the lines and such and ran into a problem - I'm short 2 fittings and need another 45* fitting to make everything fit without kinking.


For those that are interested - here is my final drive shaft angle with a 90' Dana 60.

At full droop without tires on the axle it doesn't bind - so I think it will be ok.

Tomorrow I call up PSC and see if I can get the fittings I need overnighted and call up Ballistic Fabrication and get some 3/4" hiem spacers overnighted as well... unless someone knows of a local place to get em.
 
OP
OP
KyleQ

KyleQ

Bronco Guru
Joined
Apr 24, 2008
Messages
5,480
Tonight I got all of my high pressure lines cut and install ends on them - kinda mocked up the final install. I measured perfectly as I only has 3" of spare hose when I was done...


While I was getting that mess installed Dad was installing the custom rear brake lines - those turned out very good as well, we bled the lines and had NO leaks - not bad for two hacks in a garage :D


The pictures make it look like a beat to hell rust bucket, but it is just the flash making things look worse... Very much looking forward to Gilbert - and actually wheeling this, even if it is through the ditch in my front yard.
 

mudford

Full Member
Joined
Jun 7, 2005
Messages
170
Loc.
Midland, MI
I wish I was making as much progress as you have been. Yours is really coming together. I would like to get dana 60's under my project eventually, with the same suspension. So keep documenting everything you are doing to make it easier for me!
 
OP
OP
KyleQ

KyleQ

Bronco Guru
Joined
Apr 24, 2008
Messages
5,480
looking good.. when's it going to be finished?

Umm - I have to drive it a very short distance the the exhaust shop tomorrow :-X I am wheeling it this Friday - Monday.

so whats in store for all the parts you pulled off?

Ya know - I have a local friend who is supposed to buy the axles and suspension lift that I had under the truck, not sure how long I can hold out for him...

I wish I was making as much progress as you have been. Yours is really coming together. I would like to get dana 60's under my project eventually, with the same suspension. So keep documenting everything you are doing to make it easier for me!

Hehe - this progress has cost me alot. I have been in the garage every available moment after work, weekends, holidays, etc etc. I am getting burnt out, I'm beat to hell, my hands and arms are stained to the point where they still look dirty after scrubbing until it hurts and I have not spent and "quality" time with my girlfriend in over 2 months... I am glad I am doing it right the first time - but I hate being under a time deadline. I need to button this thing up so I can drive it tomorrow - and have it trail worthy by Friday morning... Still not sure how much sheet metal I'll have to cut to clear the tires and full stuff - I'll bring an air cutoff wheel and my powertank on the trail for adjustments ;D The pictures I have posted here are just the tip of the iceburg - I've got well over 400 pictures of this project posted on my photobucket. http://photobucket.com/1ton74
 
OP
OP
KyleQ

KyleQ

Bronco Guru
Joined
Apr 24, 2008
Messages
5,480
I got out of the garage around 2AM this morning - I'm going to pay for this later... ZzzZZzzZZZzzzZzzz.

Last night had it's highs and it's lows. I'll start with the good and move to the bad.

I got stuck at work very late and it took 1:45 to get home from work due to fun traffic. When I got home Dad already had the floor bolted in (the pan we made) and was working on the rear bumper. I don't have any pics from last night - was too busy working to take any. The rear bumper is 3X2 .25 wall and the frame rails were messaged to fit the tubing so it can be bolted through the frame and fulled welded to the ends. We also drilled and mounted the 1" thick by 5" long steel block and put a large piece of angle as a backing plate that will also be welded to the frame. The block will be fully welded as well as bolted - so it should pass tech anywhere we go. I am very confident it will be more then enough - and I overbuild things a bit :D

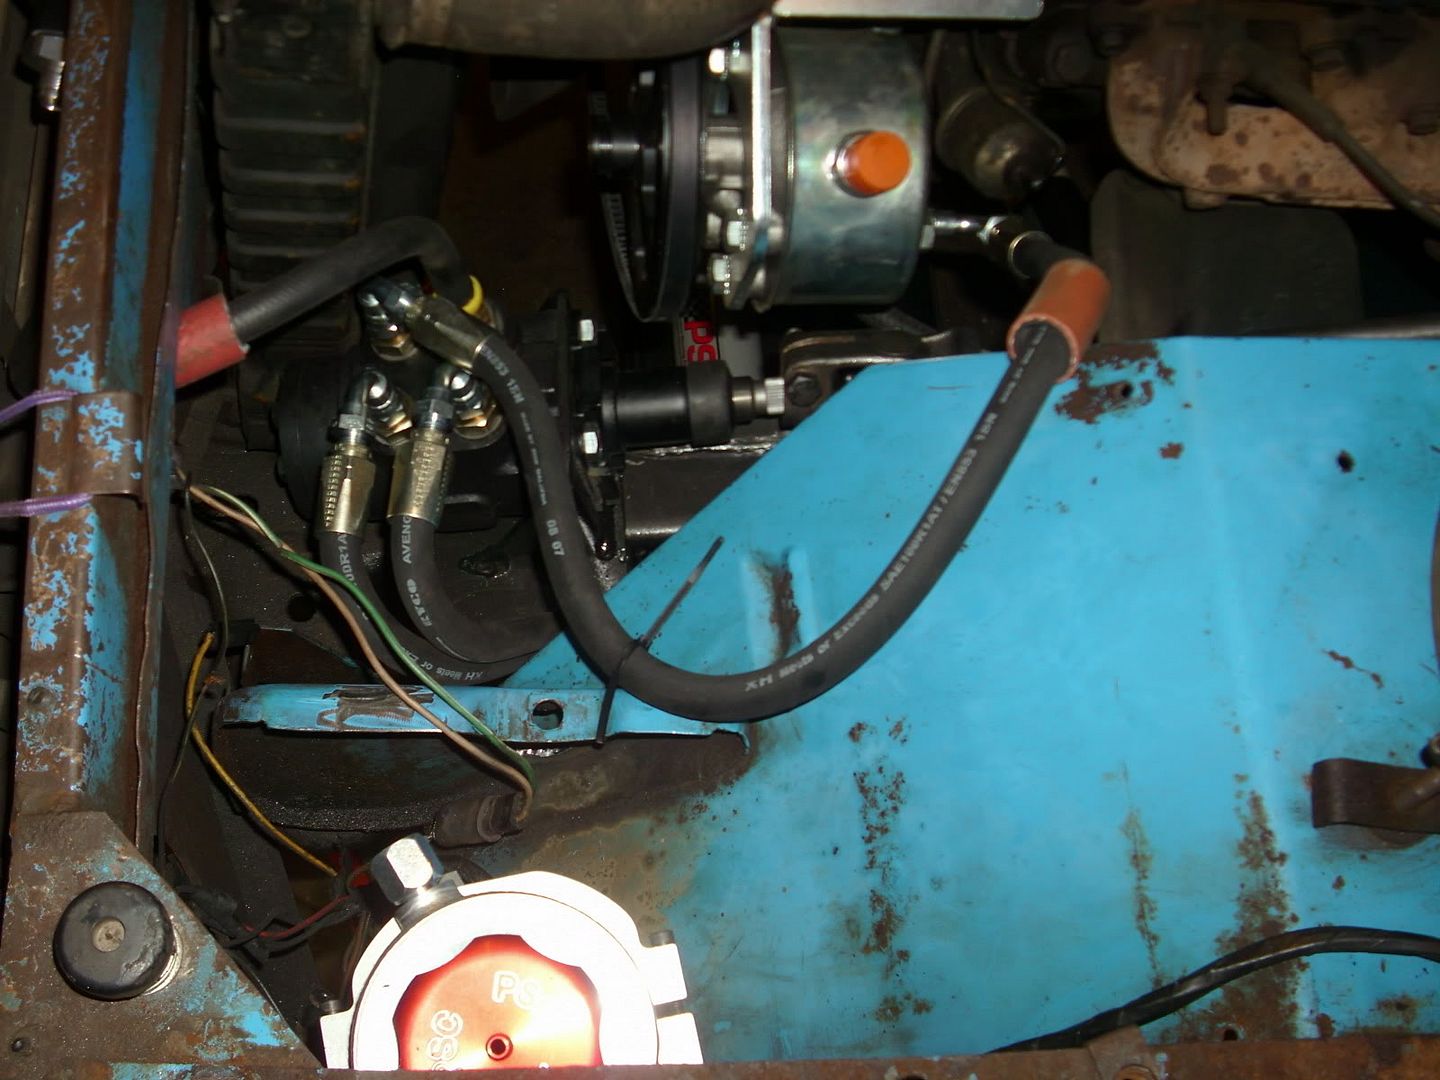
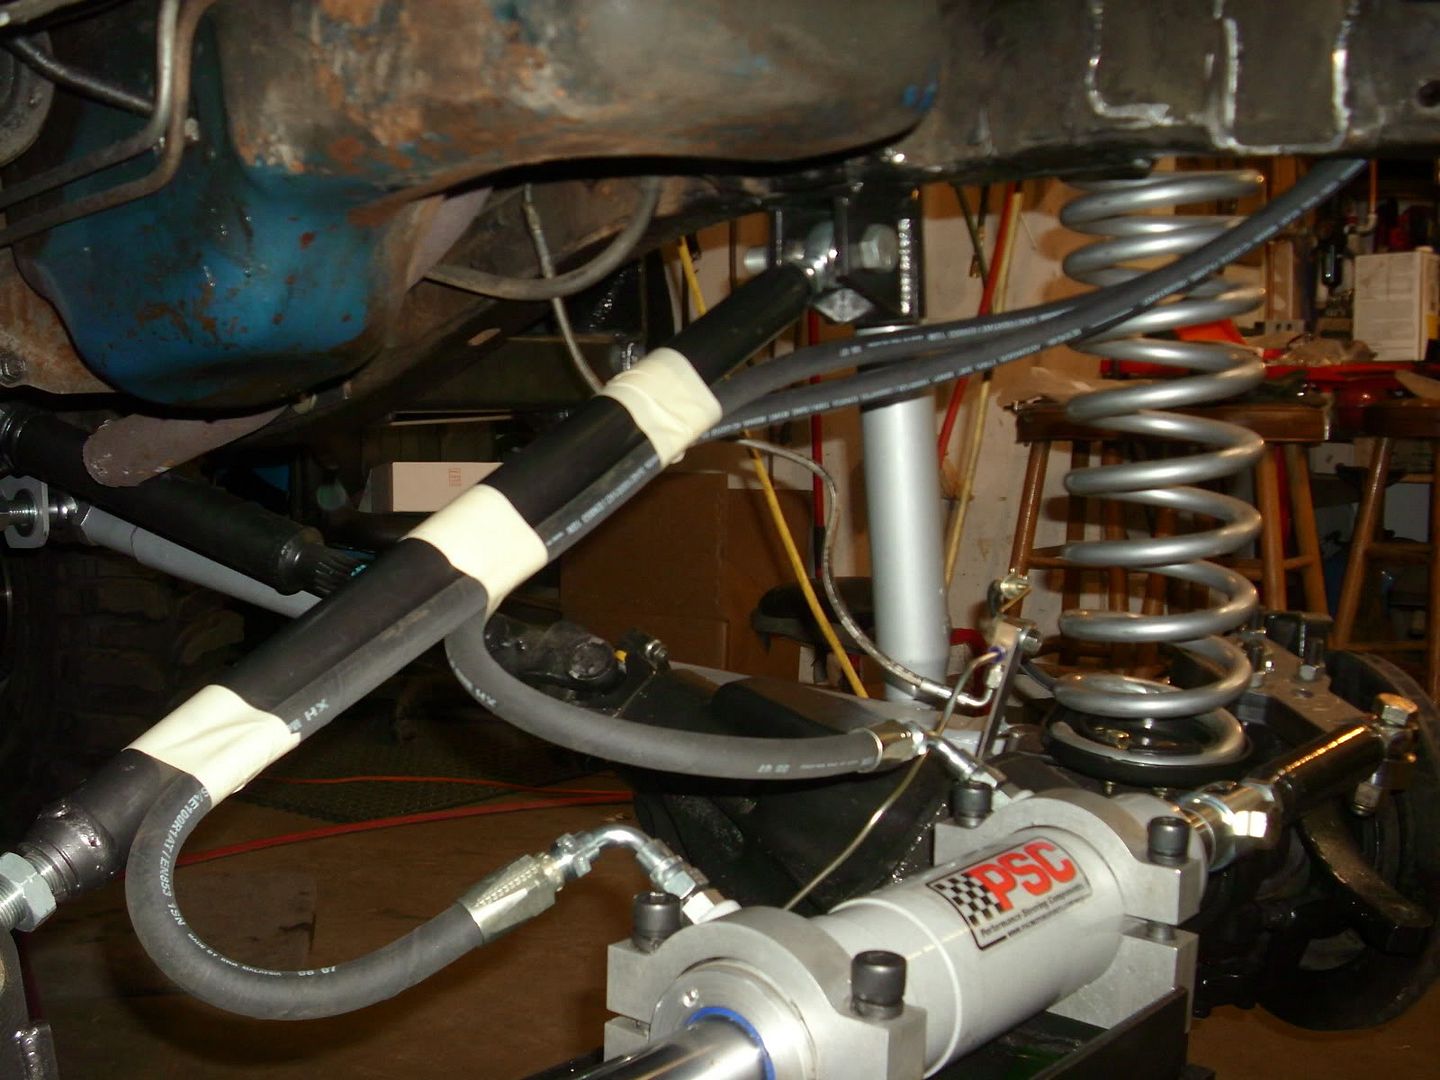
While that was going on I was making the last low pressure hoses and did the laborious task of tightening down all of the fittings making sure they stayed pointed in the correct direction. The fuel filter was installed while I was driving home as well - so I installed the battery, changed the oil, filled the system with fluid, pulled the coil wire and manually cycled the ram a few times by moving the tires to try and get as much air out as I could. I hopped into the truck (holy crap this thing got big!) and turned over the motor and cycled the steering left and right to try and get more fluid into the pump without spinning it fast and to try and work out any air before starting.

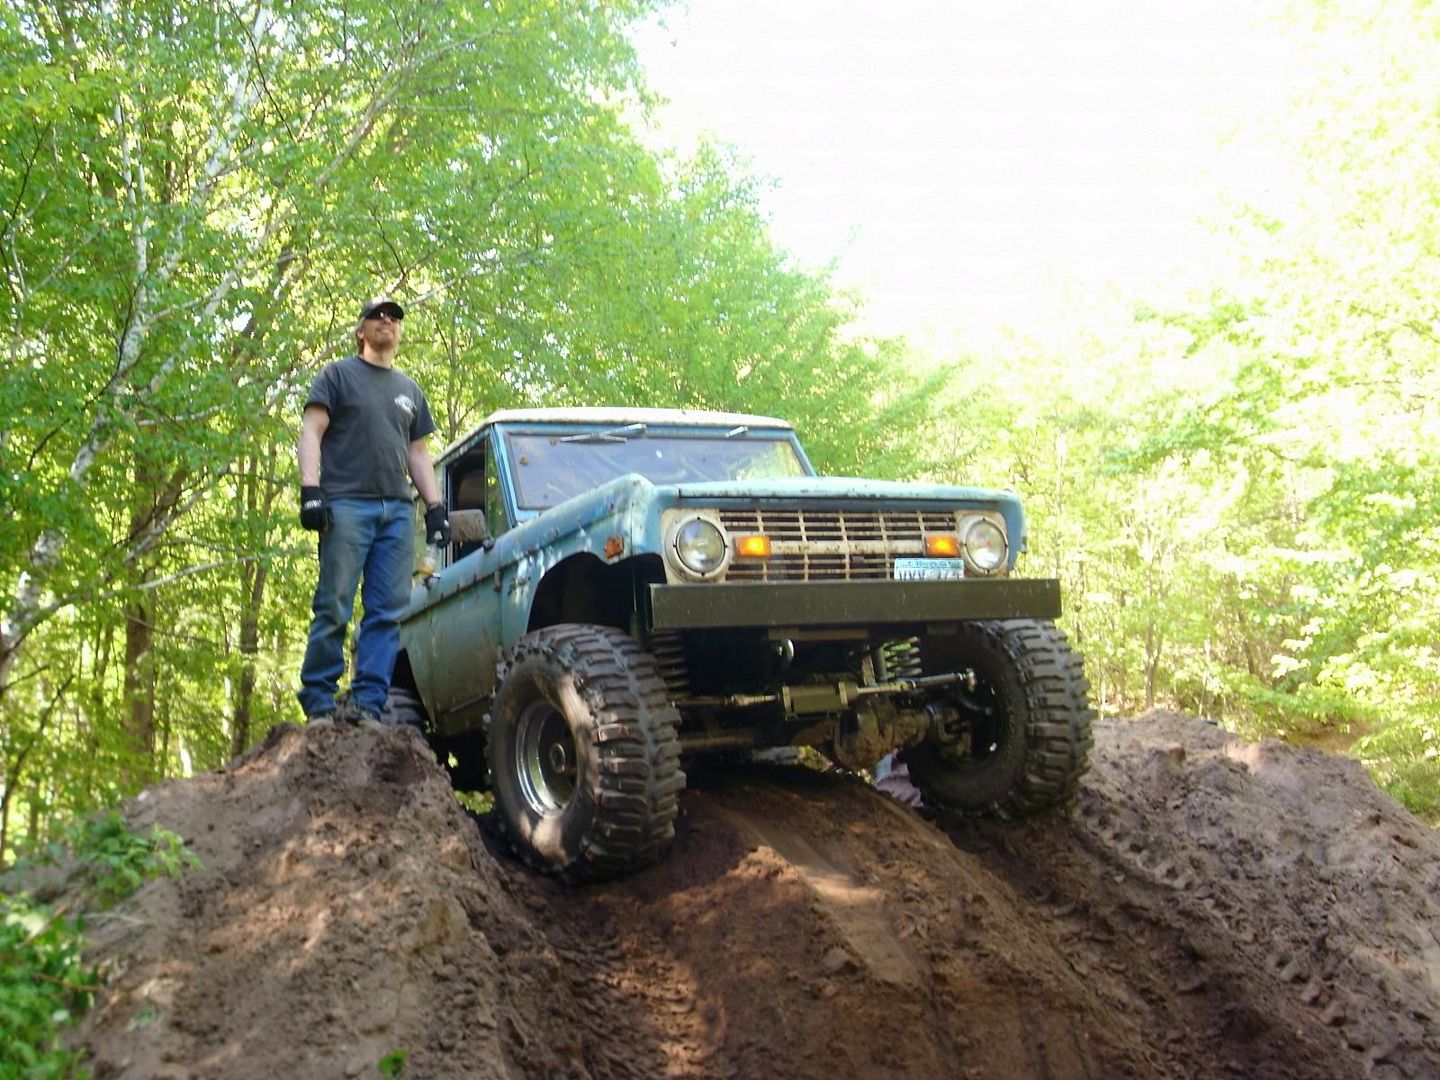
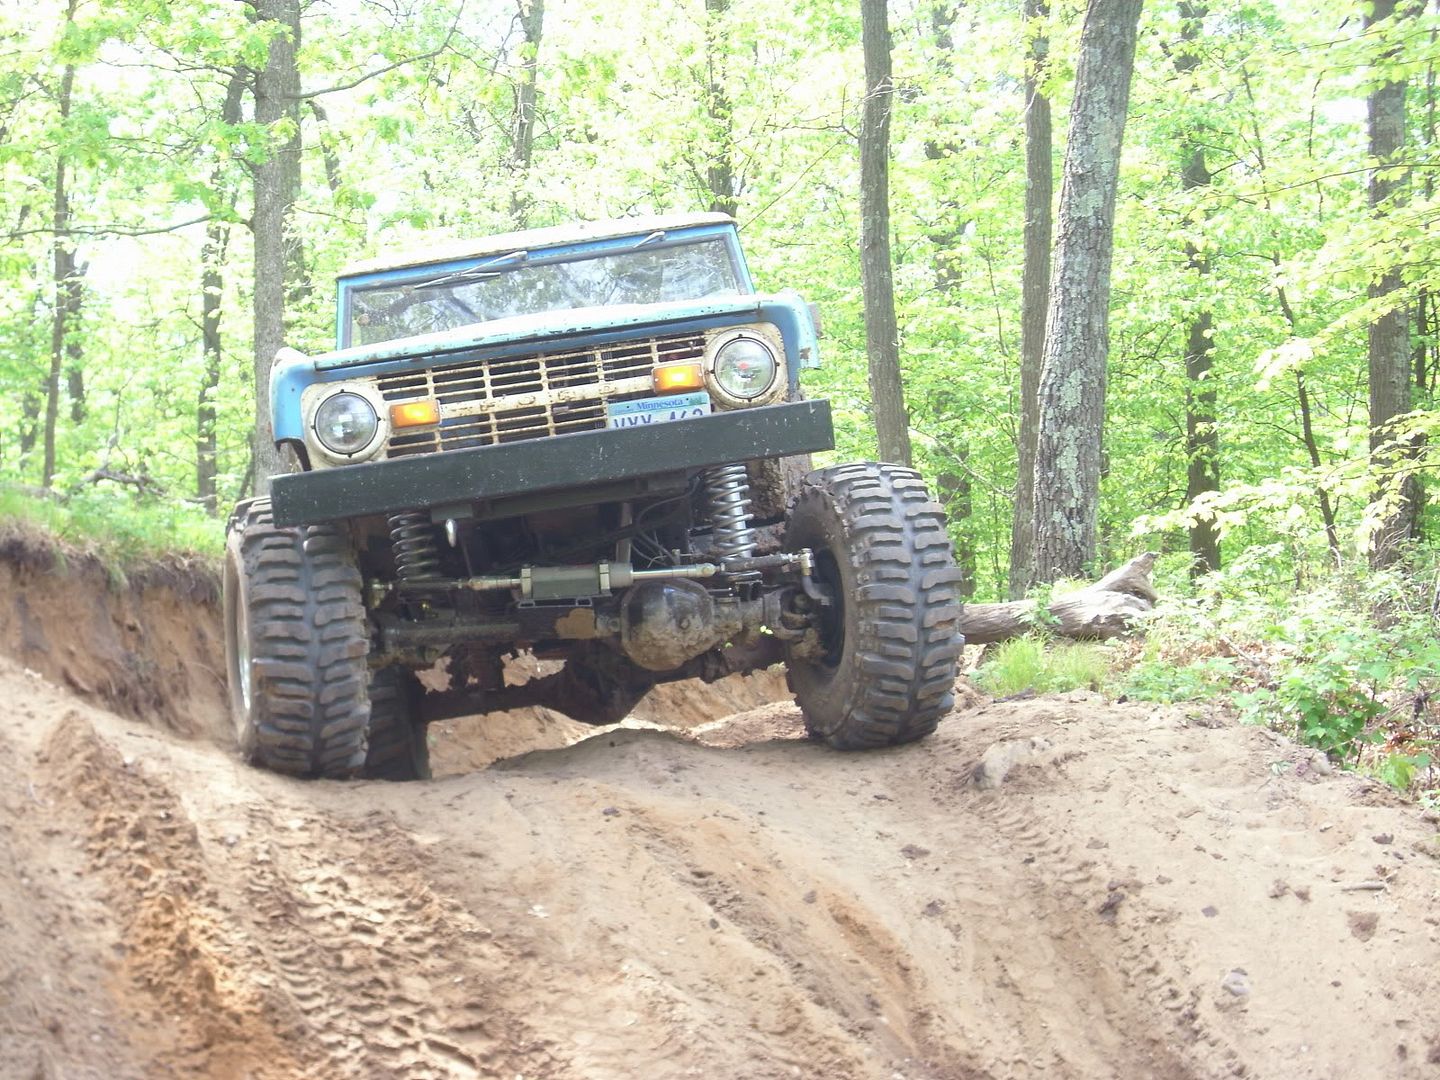
Here came the moment that has been building for quite some time - Dad popped the coil wire back on the distributer and looked around for things that would either get sucked into the fan or blown away and I got the all clear. Pumped the throttle twice and turned the key and the engine roared to life! Holy crap, that's right - almost forgot I had to cut all of the exhaust off :eek:

Well the new fuel pump sure did make the engine run better, maybe the carb won't need rebuilding (what am I kidding, no time - lol) and I tapped the throttle to get it down to low idle and I let it sit while Dad observed the fluid level in the reservoir. Things were looking good, almost ran out of fluid so I shut the motor down - added more fluid and started it back up. Started moving the steering wheel to work the air out and once in awhile I would get this grinding sound and it would feel like the wheel was slipping. It wasn't bad, only did it in one spot so I thought it was just air in the system. Kept working the steering and it got worse, eventually I got no input from the steering wheel at all :confused:

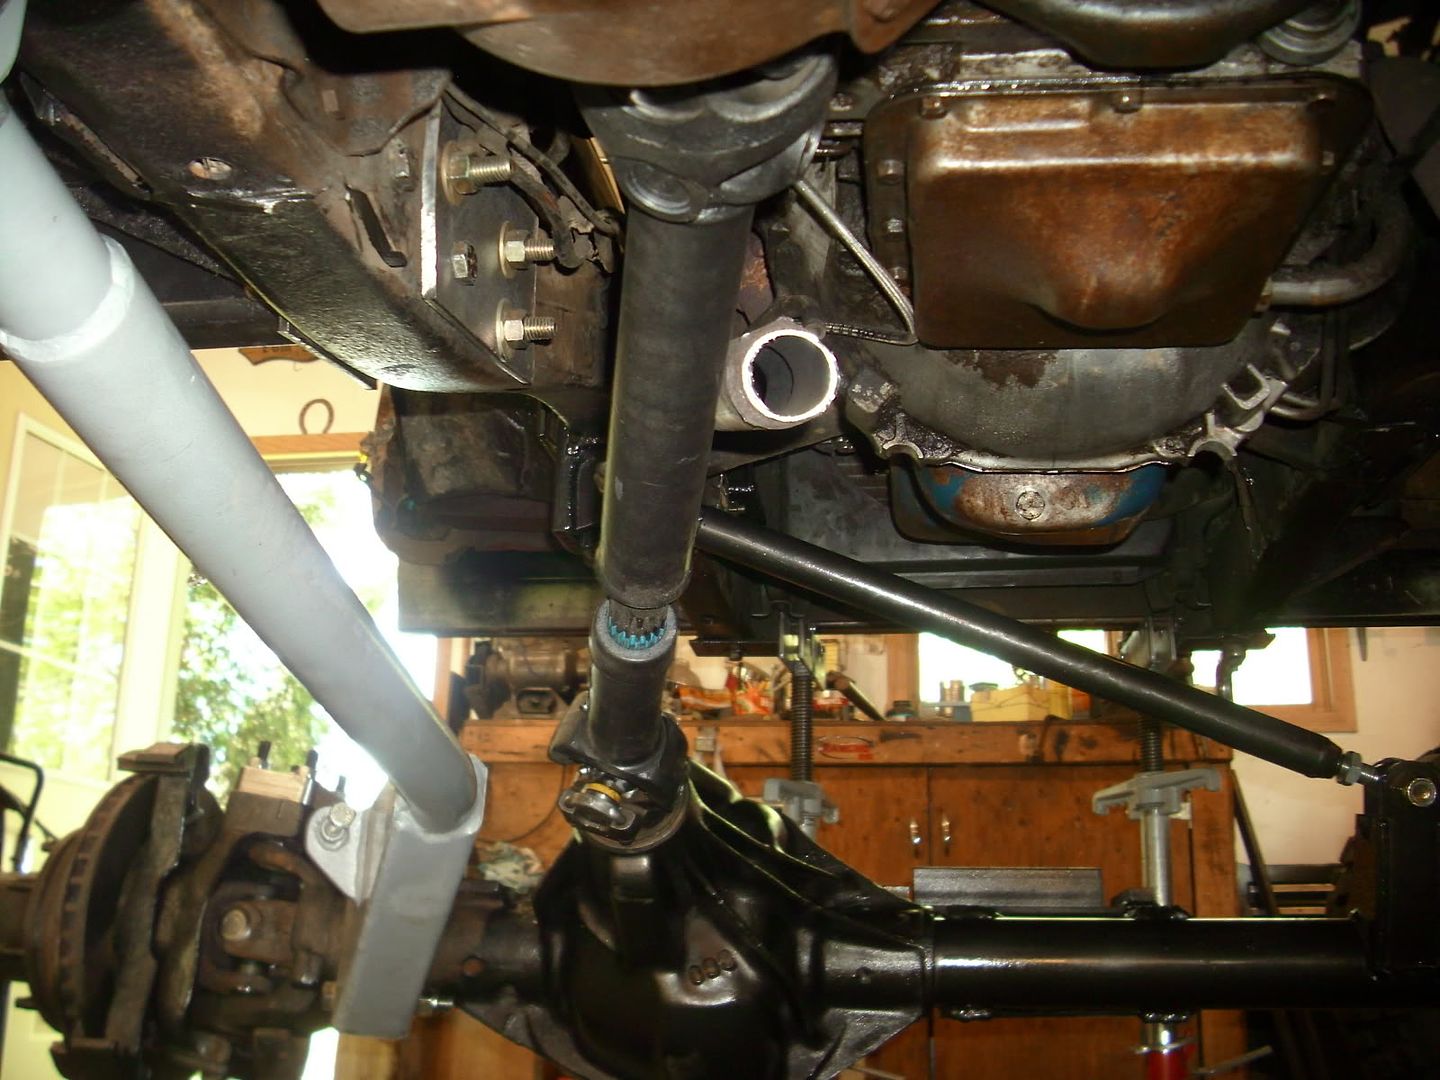
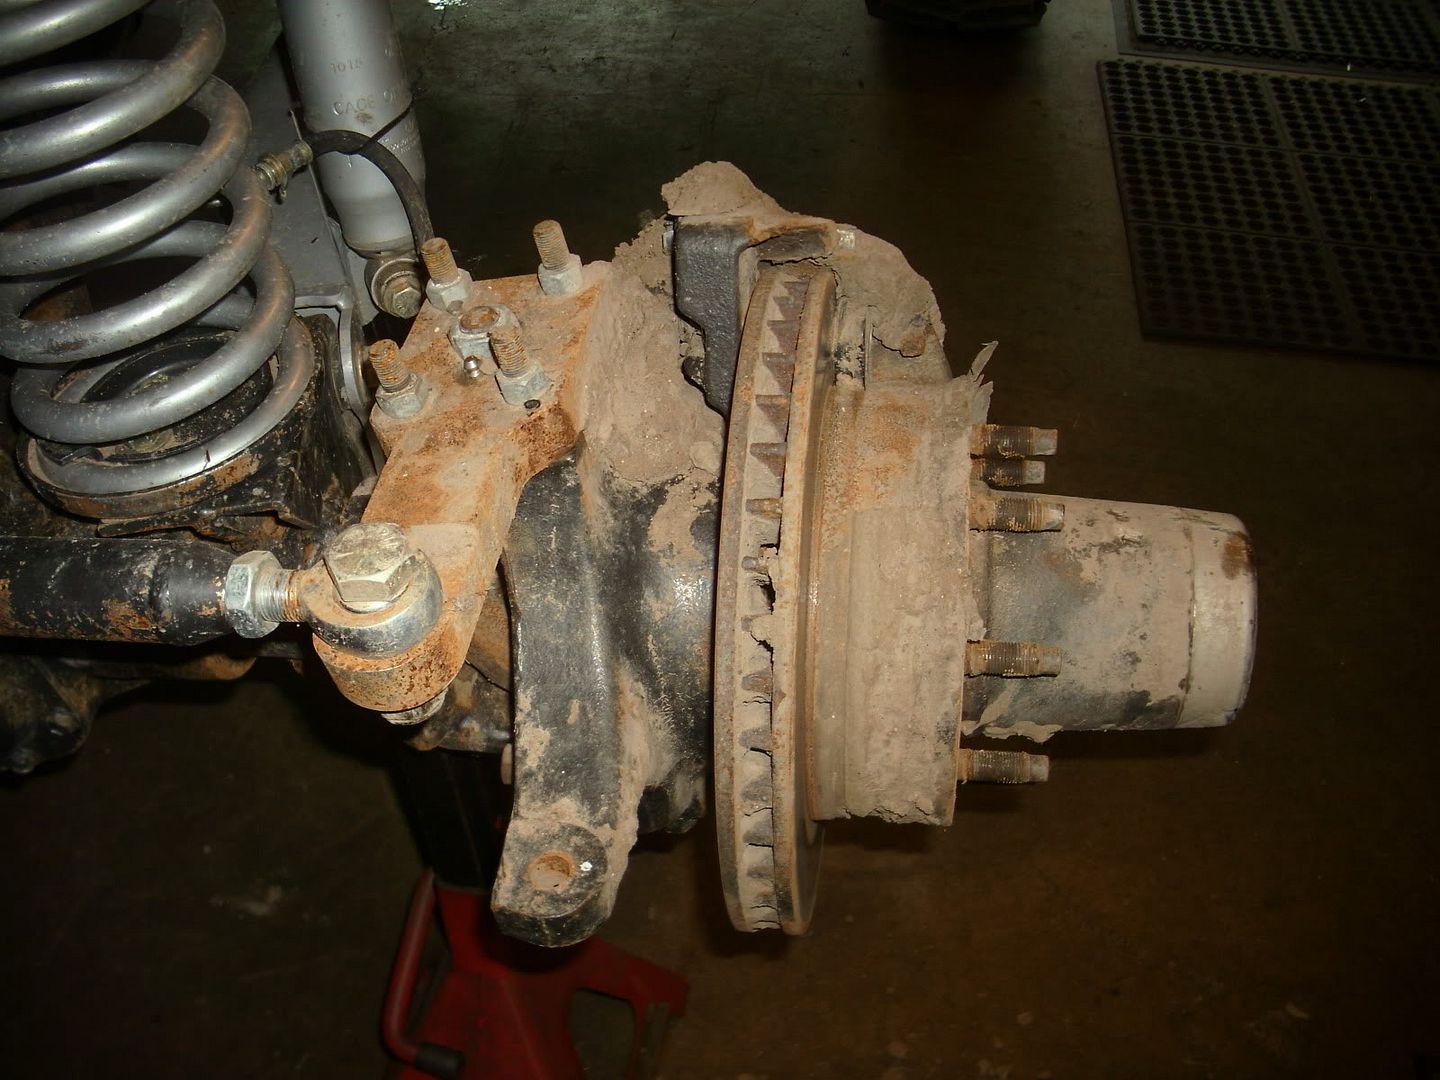
Turns out the column adapter is too small for the end of my steering shaft. With the digital dial caliper I got .750 on the steering (I told them I needed 3/4 36 Spline Ford) and the column adapter measures .720. We started scrambling around thinking of ways to make it work, even went out to his 78' to see what we could steal and nothing was going to work without some cutting and welding, not something I want to do on my steering.

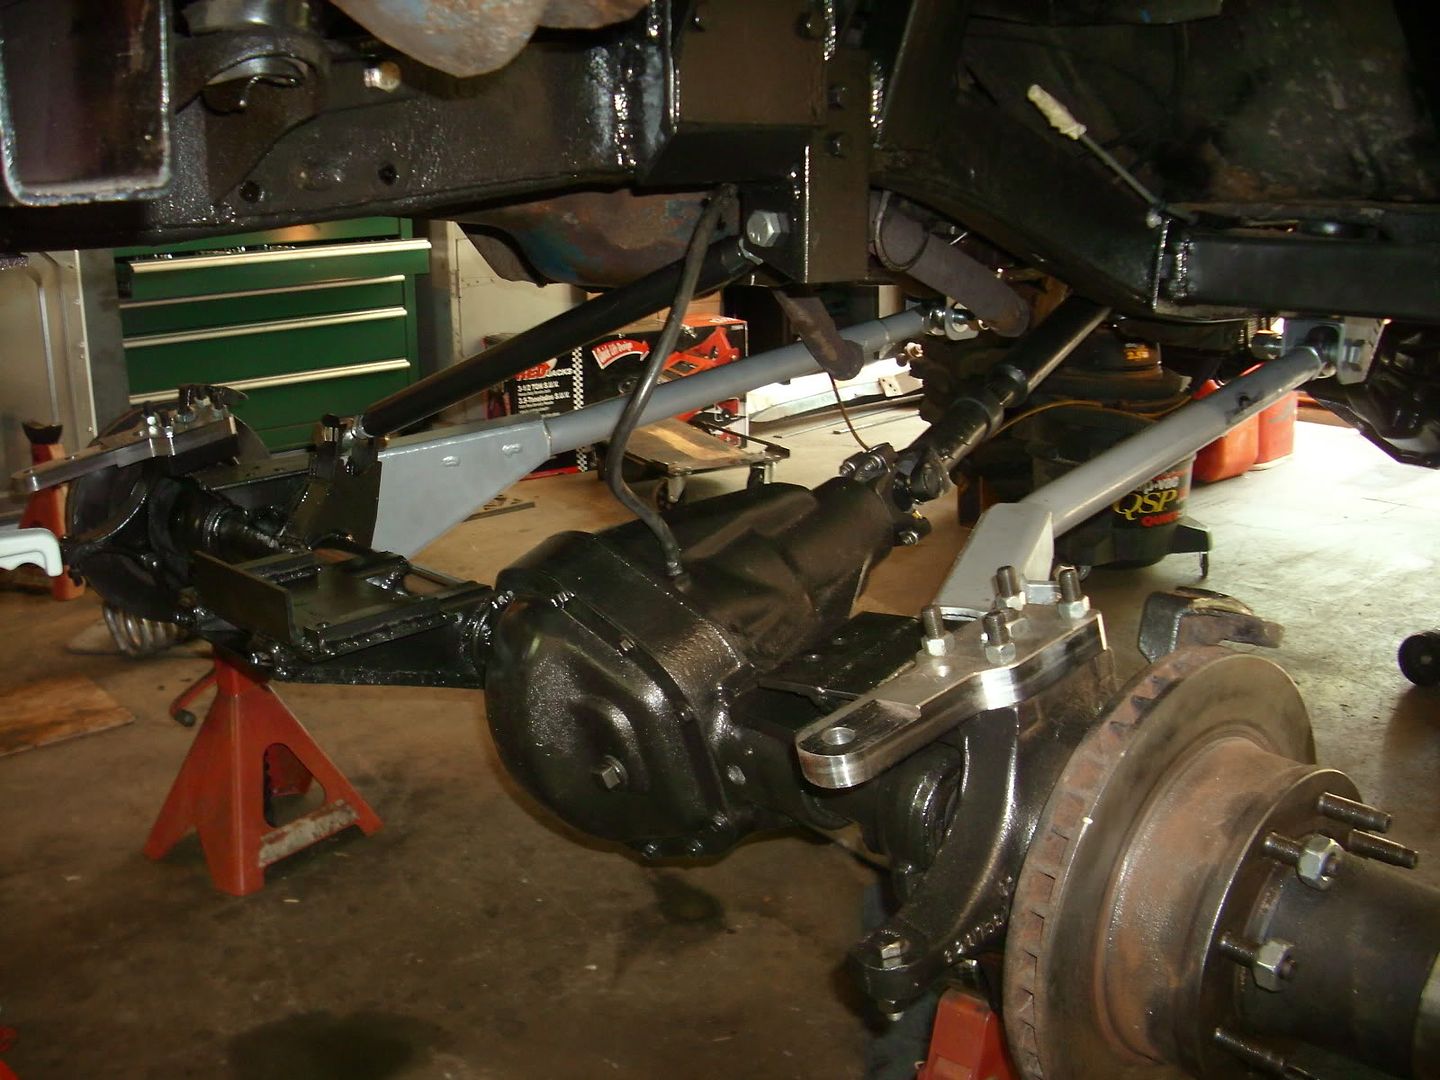
I am working with Kelvin @ PSC to get a replacement, after we ran into that problem we continued on and ground the calipers and I made and installed the rear drive shaft. Very few things left to do now...

Here is the deal with the column - shaft measures .75 - column is .72. No amount of toque through a bolt or a vice will close the gap (I've tried)


Just got off the phone - I'll have it in my hands tomorrow.... PSC has THE best customer support I've ever dealt with.
IMG00005-20090520-0907.jpg IMG00007-20090520-0908.jpg IMG00012-20090520-0910.jpg
 
OP
OP
KyleQ

KyleQ

Bronco Guru
Joined
Apr 24, 2008
Messages
5,480
Well PSC pulled through and I already got the box and it fits PERFECT. I called Wed morning and I got it 15 min ago.... WOW. This is THE BEST customer service I've ever had - I can't say enough about Kelvin and the rest of the PSC crew. :D
 
OP
OP
KyleQ

KyleQ

Bronco Guru
Joined
Apr 24, 2008
Messages
5,480
Well - got it all put together and wheeled it all weekend. Most things worked great, very happy with how the front end performs - steers easily and flexes like mad.

Not everything was perfect though - the rear shocks need high mounts, I had like 4" of up travel before the shocks became bump stops. I need to move the axle over a bit with the trackbar, coil is rubbing on the bucket and making all sorts of noise.

I got a little throttle happy and sheared the output shaft off the transfer case - so I'm on the lookout for a spare output - didn't let no rear drive end my day though. I just locked in the front and beat the living piss outa it getting through the hills and bypasses - that was fun too. Thank god for a D60 up front, those boggers were chucking fist sized rocks like a hailstorm! I also killed a starter from packing mud into it climbing some nasty hills and had all sorts of fun wrenching on my other rig I took to Dresser.

Hrm....
Before (2/1/09)


After (5/24/09)


Some subtle changes in those two pictures :D
 

Dr. Bronc

Full Member
Joined
Jun 17, 2007
Messages
186
Just read through the entire buildup. Amazing!
Those boggers look :cool: !
It is really inspirational to get started on my own junk.

Got a few questions:

- Maybe I %) missed this, but did you fabricate your own driveshafts?

-Will you eventually run flares?

-Is this still street legal?
 
OP
OP
KyleQ

KyleQ

Bronco Guru
Joined
Apr 24, 2008
Messages
5,480
Just read through the entire buildup. Amazing!
Those boggers look :cool: !
It is really inspirational to get started on my own junk.

Got a few questions:

- Maybe I %) missed this, but did you fabricate your own driveshafts?

-Will you eventually run flares?

-Is this still street legal?

I'm glad you like it - I think it is pretty cool ;D

I had Tom Woods make my front drive shaft due to the offset angle you get when you swap in a D60. I cut and welded my rear - running a 1310 to 1350 conversion joint to mate up the stock drive shaft to the D70.

Flares - if I can find a good deal on em I'll run em, but for the mean time I won't be actively looking to buy a set. The clearance between the body and the wheels sure comes in handy through some very tight trails.

Street legal - it isn't legal for a few reasons. I'd say the main reason is the full hydro steering, even though it is better then the stock setup and I can still easily steer with the engine off, it just isn't legal. Another obviosly illegal deal is the tire width without fenders covering them, not to mention the bumper height is probably a bit high as well.

Mentioning all of that it drives smoother them my Contour SVT and attracts even more attention. I'm very happy with the end result with just a few things to fix.

Figure I should post some pictures from last weekend - here are a few.

 
OP
OP
KyleQ

KyleQ

Bronco Guru
Joined
Apr 24, 2008
Messages
5,480
Well today I took the broken output shaft out and threw in the stock replacement I got - too awhile, but I got it to go. Did some tree climbing without the rear shocks and I've got a lot of trimming to do on the rear.

I'll post pictures of the output shaft later - pretty cool look'n break.
 
OP
OP
KyleQ

KyleQ

Bronco Guru
Joined
Apr 24, 2008
Messages
5,480


The truck now fits into the garage without touching at all - not bad for a 5.5" lift and 37's.
 
Last edited:

muskrat

Bronco Guru
Joined
Aug 21, 2008
Messages
1,503
Congrats. I got my first one (76) last summer and just picked up a sweeetttt 74 on Monday. I've been working on my '76. My advice. If it is safe and reliable to drive, drive it for a year or so until you figure out what you want to do with it. Then, to avoid frustration, don't look at it as a large job, but a series of smaller jobs!! Have fun, and get that roof off for the summer!!!
 
OP
OP
KyleQ

KyleQ

Bronco Guru
Joined
Apr 24, 2008
Messages
5,480
Congrats. I got my first one (76) last summer and just picked up a sweeetttt 74 on Monday. I've been working on my '76. My advice. If it is safe and reliable to drive, drive it for a year or so until you figure out what you want to do with it. Then, to avoid frustration, don't look at it as a large job, but a series of smaller jobs!! Have fun, and get that roof off for the summer!!!

Thanks - I am very much looking forward to removing the top, never had a vehicle with that feature before. Good luck on your projects - this wasn't the first 4x4 I've built and won't be the last, this one was just done right the first time.
 

Devin

Bronco Kineticist
Joined
Apr 29, 2004
Messages
3,956
Glad that output shaft worked out for you. You had briefly mentioned getting the upgraded output shaft. Here is a pic to inspire you.....
 

Attachments

  • IMG_0264.JPG
    IMG_0264.JPG
    205.5 KB · Views: 179
OP
OP
KyleQ

KyleQ

Bronco Guru
Joined
Apr 24, 2008
Messages
5,480
Glad that output shaft worked out for you. You had briefly mentioned getting the upgraded output shaft. Here is a pic to inspire you.....

:eek: :eek: :eek: :eek: :eek:
I feel better knowing the very output shaft sitting next to the upgraded one made it into my Bronco. I'm sure the stocker sitting so close to the awesomeness of the upgraded shaft made it stronger :D

I'll purchase the upgraded shaft in the future - I'm on the lookout for another output so I can have it cryo treated and use it as a trail spare.

Thanks again man -
 
OP
OP
KyleQ

KyleQ

Bronco Guru
Joined
Apr 24, 2008
Messages
5,480
Well I power washed the Bronco after I got it home from the last event, power washed it again before I replaced the output shaft and last night I repacked the drivers side wheel bearings... The truck is fairly clean, I've got 3+ hrs into power washing, but I wasn't prepared to find this much mud stuck in the brakes...


Some water got in, but the grease was still there and the bearings are fine - so I just repacked them and put the truck back together. Here are some pictures of what my brakes look like for those who are interested in running 15's on a D60.

Here is the wheel - wonder how long they will last before they start leaking air %)


This is how the underside of the Bronco ended up - my jam nuts on the track bar got loose and pushed the axle way off course, so after I adjusted it back, added copious amounts of locktite and torqued it down I took some pictures of the business side of the truck.


Here is how my exhaust ended up getting run - very quiet idle, but sounds mean and throaty when you get on it.
 
Top