


Community
Message Forum
Photo Gallery
Event Calendar
Book Reviews
Bronco Wallpaper
Bronco FAQ
Link Back to CB!
Photo Gallery
Event Calendar
Book Reviews
Bronco Wallpaper
Bronco FAQ
Link Back to CB!
Buy / Sell


Bronco Tech
3 Arm Wiper Setup
Fix Motor Mount
Roll Cage Braces
Throttle Body 65mm
Wheel Alignment
Heat Riser Replacement
Vent Window Repair
Center Console Mount
Straighten Bumper
Ford 6R80 6 spd
More Tech...
Fix Motor Mount
Roll Cage Braces
Throttle Body 65mm
Wheel Alignment
Heat Riser Replacement
Vent Window Repair
Center Console Mount
Straighten Bumper
Ford 6R80 6 spd
More Tech...

Install the app
-
Welcome to ClassicBroncos! - You are currently viewing the forums as a GUEST. To take advantage of all the site features, please take a moment to register. It's fast, simple and absolutely free. So please join our community today!If you have problems registering or can't log into your account, please contact Admin.
You are using an out of date browser. It may not display this or other websites correctly.
You should upgrade or use an alternative browser.
You should upgrade or use an alternative browser.
68 half cab retro build
- Thread starter ratbilt
- Start date
OP
OP
- Joined
- Dec 29, 2019
- Messages
- 140
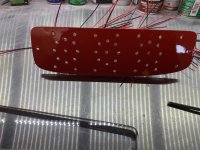
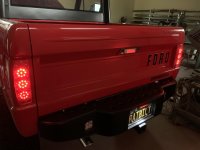
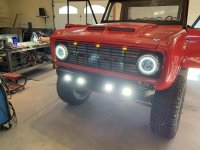
Painted 1 wheel 4 to go, got the tail lights done, all the rubber installed, polished the paint, marked the emblems going to drill but not going to install (going to have a clear wrap installed on the fenders & doors - for rock chips). Rich
Attachments


OP
OP
- Joined
- Dec 29, 2019
- Messages
- 140
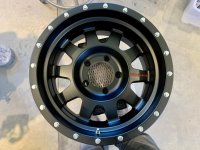
Took a couple weeks off - started wiring, installed the dash assy, velcroed the modules to the back side of the dash (made them removable for set up & service). Had the rims powder coated should be installing friday (painted them - didn't like it). I'll be wiring for at least 2 weeks. Rich
OP
OP
- Joined
- Dec 29, 2019
- Messages
- 140
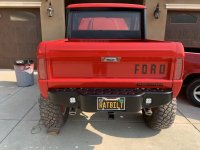
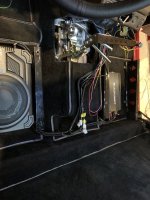
Rims are done (thinking of adding a 1/4" red pin stripe). I noticed installing the top, hood & tailgate the suspension started sagging, talked to John at acutune - filled out another sheet to figure spring rate, ordered a new set of springs (going 100 lbs more per corner - only 3,5" of shock shaft exposed want 5"). Bronco should sit 1.5" higher than the pics show. Been wiring up circuits. got some W/H door panels, modified the clip holes & cut out for door lock switches, dropped off at Jim's place to leather cover. 1 pic shows the wiring mess on the drivers floor. Let me know what you guys think. Going to sema next week. Rich
Attachments


- Joined
- Nov 3, 2003
- Messages
- 47,645
Lookin' pretty great from here!
I like the idea of the pinstripe on the wheels. Good color, but a little break in the form of a line would be just the ticket. Seems like the best spot would be the edge just inside the rim edge, but that's where they decided to put the valve stem. Might still be the spot though.
Paul
I like the idea of the pinstripe on the wheels. Good color, but a little break in the form of a line would be just the ticket. Seems like the best spot would be the edge just inside the rim edge, but that's where they decided to put the valve stem. Might still be the spot though.
Paul
Awesome looking build. Love the detail work and thought you put into this. Are you going with no side mirrors? I have never liked the location of Bronco mirrors due to the vent window and have thought about filling in the holes and going mirror less.
OP
OP
- Joined
- Dec 29, 2019
- Messages
- 140
Thanks Dirtdonk that was were I figured also I'll try it and see what it looks like.
I agree with you Jeff. I got 3 cameras (1 rear & 2 side cameras) think I'm going to mount them under the bronco emblem. Might run without mirrors.
Did have an idea for a mirror(was going to use a round stainless truckers mirror & make a billet mount- they come in 4.5.6" sizes) I've built some on utv's their are convex easy to see out. Rich
OP
OP
- Joined
- Dec 29, 2019
- Messages
- 140
Got the light switch wired in, tried to pin stripe the rims (I'll try that later - need to make a tool for that). Changed the springs & set the ride height (10" over stock - 2" body lift 35" tires I think the suspension lift comes in around 5-6" depending on tire height). Set the diffs side to side & front to back. Off to Sema Tuesday morning - back to bronco time next week. Rich
Attachments


OP
OP
- Joined
- Dec 29, 2019
- Messages
- 140
Finished the overhead wiring, the climate control, hooked up the interface from the pro injection to dash. working on the dash module, wired in a relay for dome lights. I did wire in 1 crank relay & and 1 run relay (figured the stock ign switch wouldn't handle all the extra loads). Rich
Attachments


Very Nice! ;D
jmhend
Bronco Guru
- Joined
- Dec 25, 2007
- Messages
- 2,736
Painted 1 wheel 4 to go, got the tail lights done, all the rubber installed, polished the paint, marked the emblems going to drill but not going to install (going to have a clear wrap installed on the fenders & doors - for rock chips). Rich
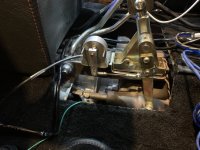
Wait a minute, how did I miss the little detail with the e-brake? Looks nice and tight.
OP
OP
- Joined
- Dec 29, 2019
- Messages
- 140
Thanks guys, yea jmhend I did a lot 1 off stuff - working on a component locater sheet that is going into a 5" binder I started on this build (all parts/ directions/ pics). Hey Randy I'm building mine like a range rover.
Installed the door panel (have to mill the billet handle guard to fit the arm rest). Was thinking about the dome light circuit (if I turn on the dome lights- my steps are going to deploy) Figured just need to install a diode- ordered (should work). Still wiring about 70% done, prechecked some components found a connector for the stereo missing also sourced an adapter for the cameras (ordered) (working on the trans module, next the injection module, then install the column. Hope to start it soon then accessory (steps/ cameras/stereo/ more lights). Rich
0
Attachments

OP
OP
- Joined
- Dec 29, 2019
- Messages
- 140
Steering column is in, brakes bled, ride height set, all fluids in. started engine. set timing (runs good)
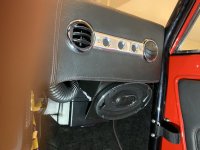
Mounted shift indicator (displays on speedo cluster). Mounted a sub woofer, ran all the wires to dash, wired steps. Rich
Mounted shift indicator (displays on speedo cluster). Mounted a sub woofer, ran all the wires to dash, wired steps. Rich
Attachments

Nice! About ready to get this thing out and enjoy your hard work.
OP
OP
- Joined
- Dec 29, 2019
- Messages
- 140
Hi Jeff I think I'm about a month away from driving, had a shit load of problems started with the fuse panel 1 terminal was wired in reverse from the factory , wipers were goofy (I wired wrong - now works good) programmed the trans module (found I didn't add the speed sensor in- now everything shows ok) can't test yet, brakes don't stop (booster not working) shipping off to company to check, checked the fuel gauge (found the tank sender grounded) need to pull tank, the stereo was shutting down (found the wires from amp to sub woofer bad) replaced sounds good now, alternator stopped charging (ordered new regulator). The pro injection won't idle below 1000 rpm & temp is fluctuating from 190 - 230 need to pin the the sensor 1st before calling edelbrock.
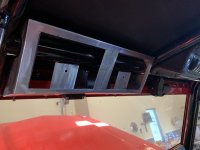
still need to make wiper cover, mount cameras, mount speakers, remake center console. Rich
still need to make wiper cover, mount cameras, mount speakers, remake center console. Rich
Still looks great Rich, and there are always bugs to sort with any build. Doug.
OP
OP
- Joined
- Dec 29, 2019
- Messages
- 140
Thanks Doug, Found the problem with the alternator is the ground (I powder coated the brackets - lost ground from the block}
made the speaker mounts (boy trying to fit 2 lbs of shit into a 1 lb container} I have 6x9s (they sound real good with the sub)
Made the side camera screen mount & installed. Need to mount 3 cameras next. I'm going to cover the pass speaker, Rich
made the speaker mounts (boy trying to fit 2 lbs of shit into a 1 lb container} I have 6x9s (they sound real good with the sub)
Made the side camera screen mount & installed. Need to mount 3 cameras next. I'm going to cover the pass speaker, Rich
Attachments


OP
OP
- Joined
- Dec 29, 2019
- Messages
- 140
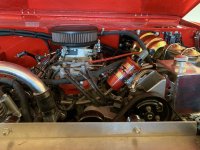
Added a 4th camera to the front, finished the center console- at the upholstery shop. Had to call Edelbrock , found you can't share the throttle sensor with trans module, also had to replace the coil and make a new bracket. The injection works good now (I will fine tune later). Making a new throttle sensor bracket for the trans (almost done) ordered an older gm sensor (need it to swing clockwise). Adjusted all the cameras, going to re-spring this will be the 3rd time (still to soft). Still a problem with the fuel gauge (I'll figure that out later). Need to install the train horn and rock lights. Hope to bring it to wild horses in April. Rich
Attachments


Similar threads
- Locked
City: Hacienda Heights
Price: $750
- Replies
- 0
- Views
- 129
City: Shenandoah
Price: $600
- Replies
- 2
- Views
- 347
- Locked
City: Saint David, AZ
Price: $25900
- Replies
- 0
- Views
- 514