• Welcome to ClassicBroncos! - You are currently viewing the forums as a GUEST. To take advantage of all the site features, please take a moment to register. It's fast, simple and absolutely free. So please join our community today!
    If you have problems registering or can't log into your account, please contact Admin.

1969 4BD1T Diesel & NV4500 conversion on 33's

OP
OP
BradtheWelder

BradtheWelder

Full Member
Joined
Sep 3, 2013
Messages
290
Loc.
Moline IL
That's where your license plate would be on a stock Bronco, but you'll have to put it somewhere else now. :p What'd you do with the other tailgate? Great stuff by the way!!! :cool:

That other tailgate is completely roached from the previous owner because they fillled it up with expandable foam in the lower section of the tailgate. The outside skin was fine but not really done very good. %)
 
OP
OP
BradtheWelder

BradtheWelder

Full Member
Joined
Sep 3, 2013
Messages
290
Loc.
Moline IL
So I bought 2 new quarter panels and will be trying to make the larger rear openings with the style of the uncut quarter panels like this one pictured. Wish me luck because I've never attempted anything like this before.
 

Attachments

  • 58.jpg
    58.jpg
    71.2 KB · Views: 5
Last edited:
OP
OP
BradtheWelder

BradtheWelder

Full Member
Joined
Sep 3, 2013
Messages
290
Loc.
Moline IL
OP
OP
BradtheWelder

BradtheWelder

Full Member
Joined
Sep 3, 2013
Messages
290
Loc.
Moline IL
Got back on this project tonight. I feel like I bought a title, front fenders, grill, top, doors, some glass, axles and some miscellaneous parts. Everything else needs to be replaced. Getting pretty fed up with this crap.

The good news is I got a drivers side fender. The other is on backorder.
 

Attachments

  • 62.jpg
    62.jpg
    52.4 KB · Views: 7
  • 64.JPG
    64.JPG
    176.8 KB · Views: 7
  • 65.JPG
    65.JPG
    132.7 KB · Views: 7
  • 66.JPG
    66.JPG
    127 KB · Views: 8
  • 63.JPG
    63.JPG
    90.5 KB · Views: 9
Last edited:

treetopflyer

New Member
Joined
Sep 5, 2003
Messages
33
Loc.
Yuma
Brad, If you pull this resto off (and you have demonstrated that you definitely have the skills) you have earned the admiration of Bronco owners everywhere! Man, I feel your pain, every component you have removed has revealed a new adventure in fabrication and reconstruction. Keep up the good fight and remember the old adage "How do you eat an elephant? One bite at a time." Thanks for the effort...I'm following your work.
 
Last edited:

broncobsession

Bronco Guru
Joined
Aug 12, 2001
Messages
4,049
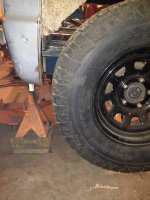
Ditto. Stick with it! Is that quarter pic on the front tire for mock up or are you gonna do something wild?
 
OP
OP
BradtheWelder

BradtheWelder

Full Member
Joined
Sep 3, 2013
Messages
290
Loc.
Moline IL
Brad, If you pull this resto off (and you have demonstrated that you definitely have the skills) you have earned the admiration of Bronco owners everywhere! Man, I feel your pain, every component you have removed has revealed a new adventure fabrication and reconstruction. Keep up the good fight and remember the old adage "How do you eat an elephant? One bite at a time." Thanks for the effort...I'm following your work.

Thanks glad to see some people are watching. I should be able to finish it but definitely taking more money and more time than I want it to.

Ditto. Stick with it! Is that quarter pic on the front tire for mock up or are you gonna do something wild?

No the front is just gonna be the stock front fenders. I just put that there for the pic.

you do go fast, looking good so far:cool:

Thanks.
 

thegreatjustino

Contributor
Red Head Grease Monkey
Joined
Jan 23, 2002
Messages
15,716
Loc.
Stockton, CA
I'm amazed by all the hidden rust. Nice to see you're pushing through instead of junking it and finding another. One more brought back from the brink.
 
OP
OP
BradtheWelder

BradtheWelder

Full Member
Joined
Sep 3, 2013
Messages
290
Loc.
Moline IL
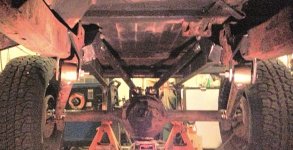
Got the other quarter panel rough cut so I can put the rear axle in postion for the rear 4 link. Building it with the axle at the approximate full compression of the suspension. It's only 2.5" away from the frame rails and 2" forward from the tail light housings which is giving me roughly a 100" wheelbase. Then started making some brackets for the link bars to bolt to. Using Johnny joints with 1.25" shank and 9/16" thru bolts. Trying to get the links located before Friday because I got Halloween stuff going on.
 

Attachments

  • 67.JPG
    67.JPG
    131.8 KB · Views: 8
  • 69.JPG
    69.JPG
    126 KB · Views: 8
  • 68.JPG
    68.JPG
    102.6 KB · Views: 9
Last edited:

bushman

Full Member
Joined
Jul 30, 2006
Messages
271
Loc.
Oregon City, OR
I save these build threads for inspiration. My second project is almost as bad as this, but every time I think of offloading it I see a thread like this and decide to do a little more works on it.
 
OP
OP
BradtheWelder

BradtheWelder

Full Member
Joined
Sep 3, 2013
Messages
290
Loc.
Moline IL
Got some of the 4 link done tonight. 6 out of 16 tabs are tacked on. 1/4" wall lowers and 1/8" wall upper DOM tubes. I'd say most the hard work is done. This is the last day I will be working on this until Sunday.
 

Attachments

  • 70.JPG
    70.JPG
    120.8 KB · Views: 9
  • 72.JPG
    72.JPG
    131.2 KB · Views: 8
  • 71.JPG
    71.JPG
    118.8 KB · Views: 8
Last edited:
OP
OP
BradtheWelder

BradtheWelder

Full Member
Joined
Sep 3, 2013
Messages
290
Loc.
Moline IL
Had a little time today after work to do 4 tabs. Hopefully Sunday I will finish the last 6 tabs.
 

Attachments

  • 73.JPG
    73.JPG
    179.6 KB · Views: 9
  • 74.JPG
    74.JPG
    79.3 KB · Views: 8
Last edited:
OP
OP
BradtheWelder

BradtheWelder

Full Member
Joined
Sep 3, 2013
Messages
290
Loc.
Moline IL
Been slacking lately. I did finish all the tabs tonight and ready for some coil spring mounts. I will probably be making just the lower mounts and make some temporary upper mounts until the drivetrain gets put in to make the truck sit how I want it to. My next piece if the puzzle will probably be putting the drivetrain in then start fixing the body up.

Here's the upper frame mounts. Kinda crazy and will be putting on a lot if gussets.
 

Attachments

  • 75.JPG
    75.JPG
    195.6 KB · Views: 10
  • 76.JPG
    76.JPG
    181.8 KB · Views: 10
  • 77.JPG
    77.JPG
    144.3 KB · Views: 9
Last edited:

bosshoff

Contributor
Sr. Member
Joined
Mar 30, 2004
Messages
713
I am of little faith. I would have parted it out. You have so much talent and time, and you seem to be trying to make silk purse out of a sow's ear. I wish you well, but I personally have made mistake of sinking time, money, effort, and did I say time into the wrong starting point/rig. Ask 72EB to confirm.
 
Top