


Community
Message Forum
Photo Gallery
Event Calendar
Book Reviews
Bronco Wallpaper
Bronco FAQ
Link Back to CB!
Photo Gallery
Event Calendar
Book Reviews
Bronco Wallpaper
Bronco FAQ
Link Back to CB!
Buy / Sell


Bronco Tech
3 Arm Wiper Setup
Fix Motor Mount
Roll Cage Braces
Throttle Body 65mm
Wheel Alignment
Heat Riser Replacement
Vent Window Repair
Center Console Mount
Straighten Bumper
Ford 6R80 6 spd
More Tech...
Fix Motor Mount
Roll Cage Braces
Throttle Body 65mm
Wheel Alignment
Heat Riser Replacement
Vent Window Repair
Center Console Mount
Straighten Bumper
Ford 6R80 6 spd
More Tech...

Install the app
-
Welcome to ClassicBroncos! - You are currently viewing the forums as a GUEST. To take advantage of all the site features, please take a moment to register. It's fast, simple and absolutely free. So please join our community today!If you have problems registering or can't log into your account, please contact Admin.
You are using an out of date browser. It may not display this or other websites correctly.
You should upgrade or use an alternative browser.
You should upgrade or use an alternative browser.
Landsharks 76er Refresh and Build
- Thread starter landshark99
- Start date
Sounds like what Ive got planned as well. What tires are you planning on? Duel tanks? Rebuilt motor?leaving it uncut.. lifting it 2.5 in suspension, 1 in body lift.. returning it to original color eventually.. leaving the interior the same, re-leafing the chrome highlights inside.. replacing all the bushings, bearings and sealing the underbody...
OP
OP
landshark99
Bronco Guru
- Joined
- Oct 13, 2011
- Messages
- 1,401
Seats dont look bad at all, do you know how long the PO had the covers on it before?
I didn't' ask but there is some wear on the back seat so I would guess he covered them in the 80's sometime.. the fronts had covers at one point but they were off when i picked it up. the drivers seat is the worse off some cracking, missing a bit of stitching... passenger side is cracking a bit but no tears or anything.. they have been used no doubt but iam going to drive the truck so it will be used even more
")
OP
OP
landshark99
Bronco Guru
- Joined
- Oct 13, 2011
- Messages
- 1,401
Sounds like what Ive got planned as well. What tires are you planning on? Duel tanks? Rebuilt motor?
Well I just put in my first order from toms to replace all the ujoints, rebuild the axles, driveshafts and replace all the bushings. Iam then sending the trans and TC out to get rebuilt by Viper™ and once i get the underside recoated and the drivetrain back together i will drop it back down and start on the engine and interior...
iam keeping the duel tanks (will drop, clean and repaint them) and right now my plans are to pull the engine, clean, replace and paint it.. then convert to a serpentine belt and put it back together... I need to do a compression test and see what i find once i pull it, but expect it to be good. The motor has less than 70,000 on it and seems to be strong so no reason not to run it for the for seeable future.
not sure on the tires.. or the wheels.. I haven't gotten that far yet and honestly I'm not too worried about it.. I will see where i stand once i get the drive train re-installed and the lift on.. I know I want whitewalls and maybe 31's.. but we will see. I already have a rock crawler on 37 MTR's and dont really need anther monster truck.. keeping this one as a DD... maybe even replace my car one day...
I expect allot of little things to pop up however I want to keep this thing on the road more than in my garage so the exterior paint and body work will probably be on hold until next year.. just depends on what i find once i get into it.
OP
OP
landshark99
Bronco Guru
- Joined
- Oct 13, 2011
- Messages
- 1,401
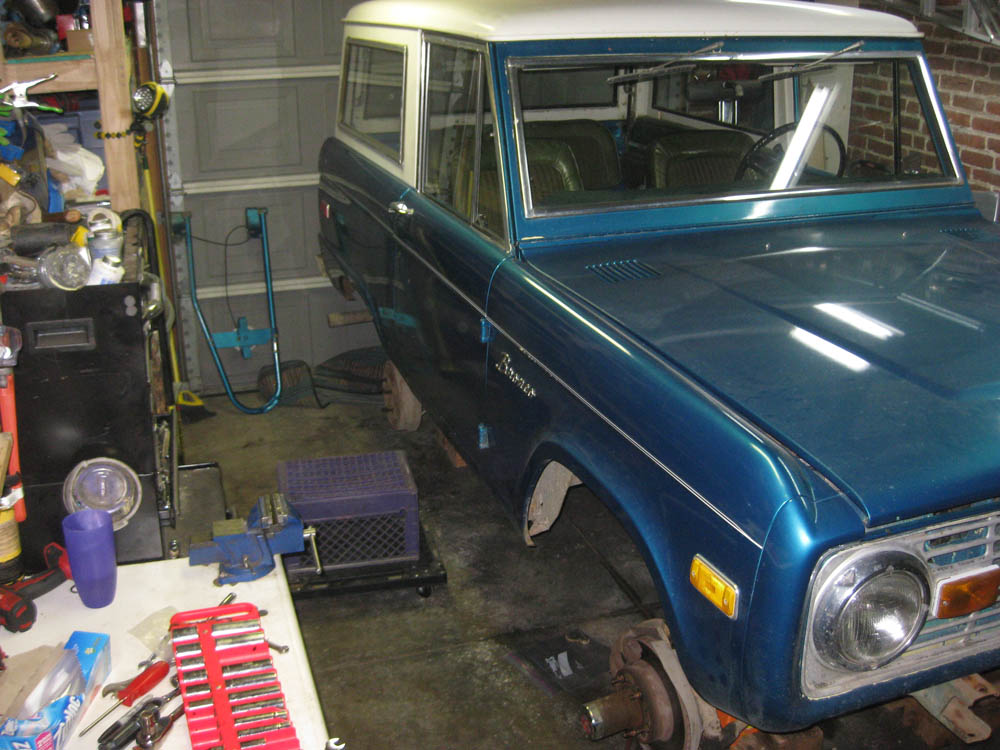
So this is going to be slow going, so again i will make one more excuse for the mundane photos.. I'm documenting everything as i go not only to know where things go when I put it back together but also to make sure I do it right
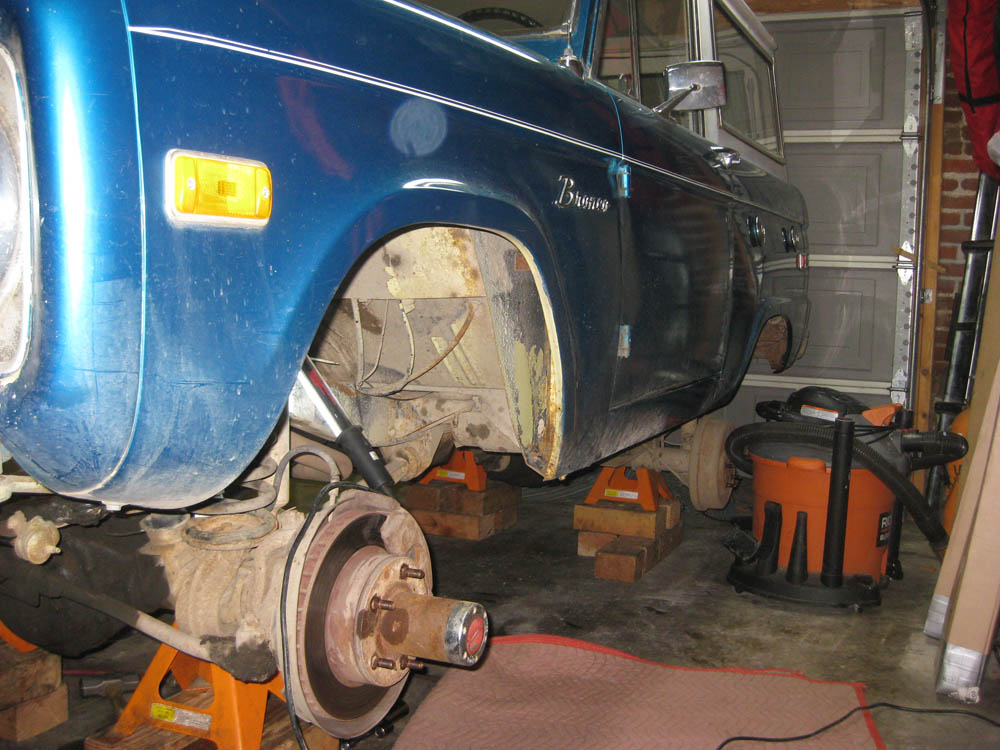
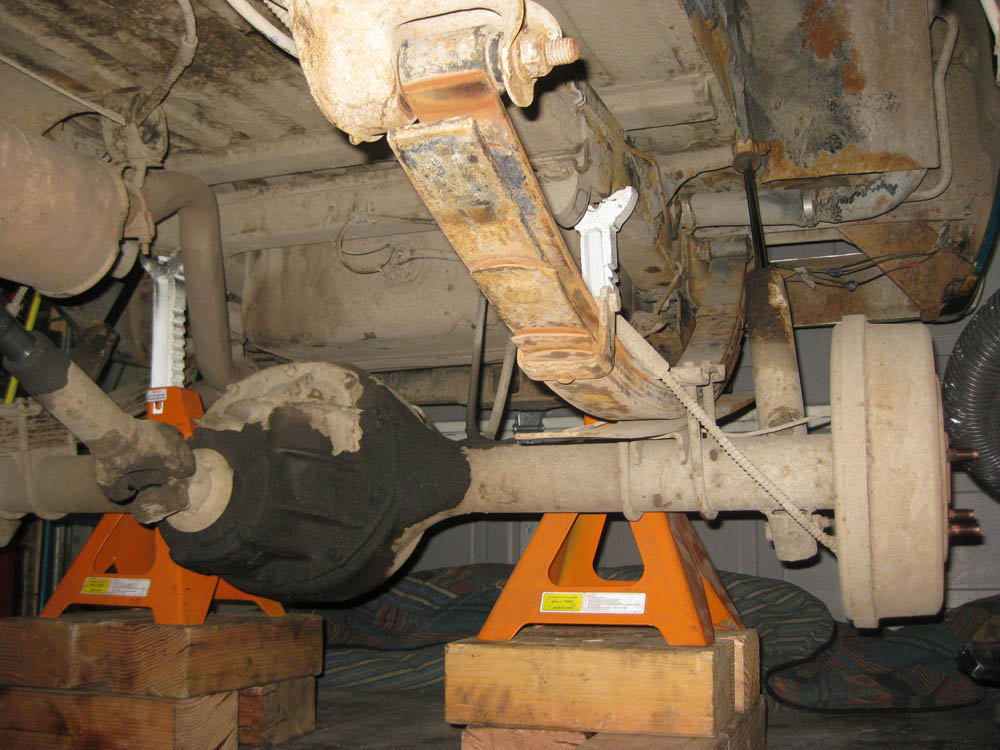
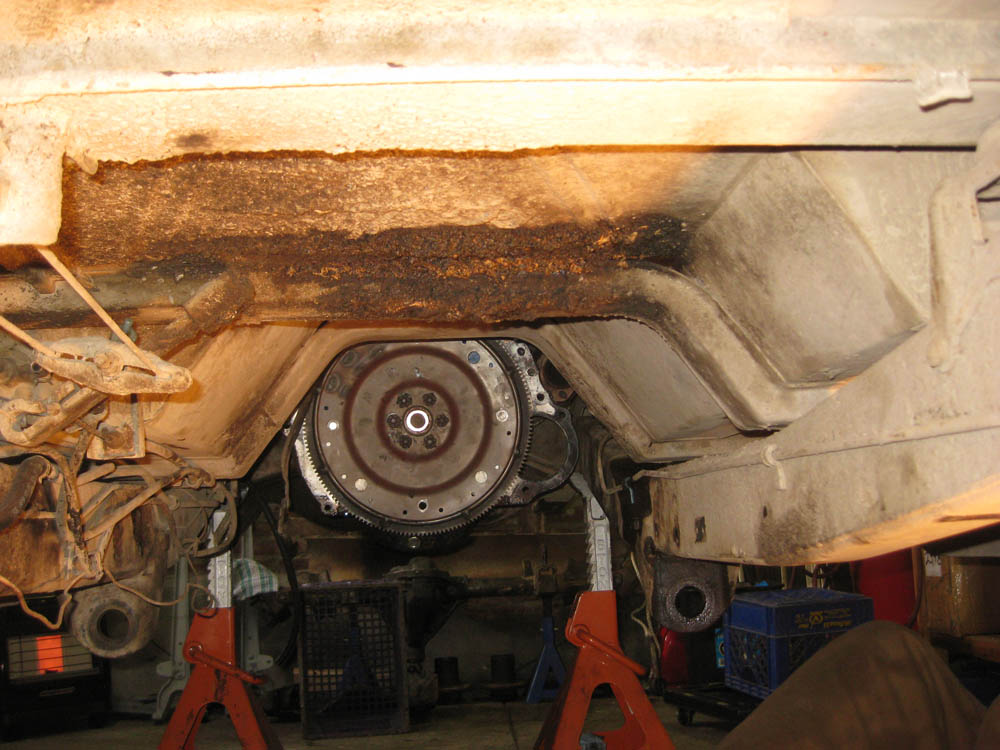
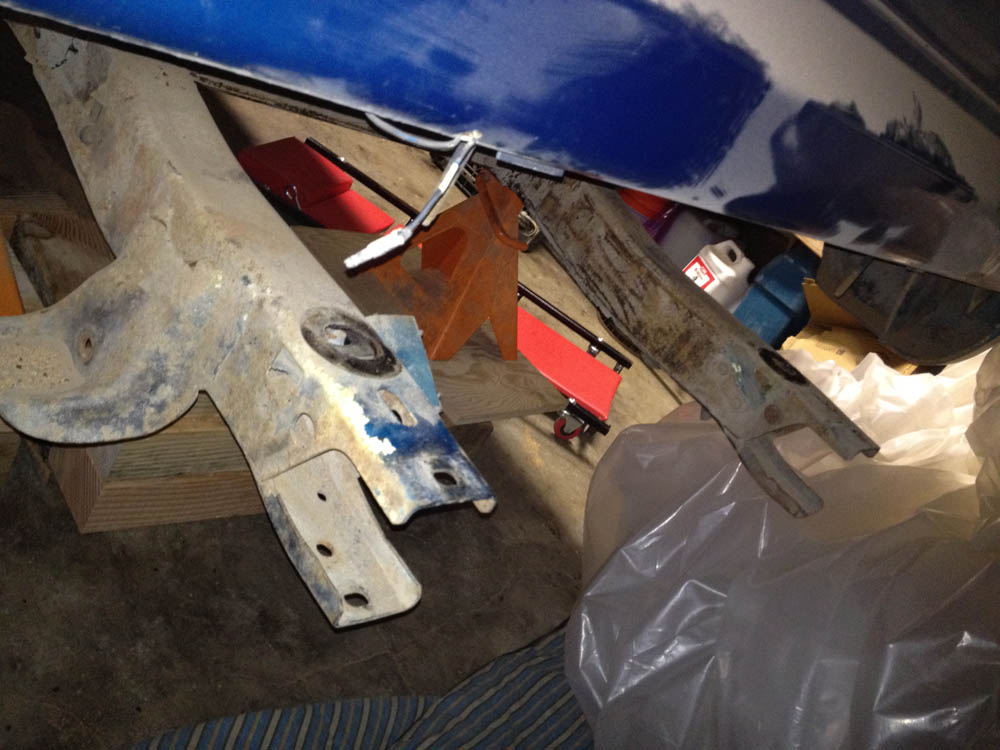
I got the bronco into the garage, took the tire carrier off, wheels and tires and started to pull the front end out of it...
tight fit but I think it will work out...
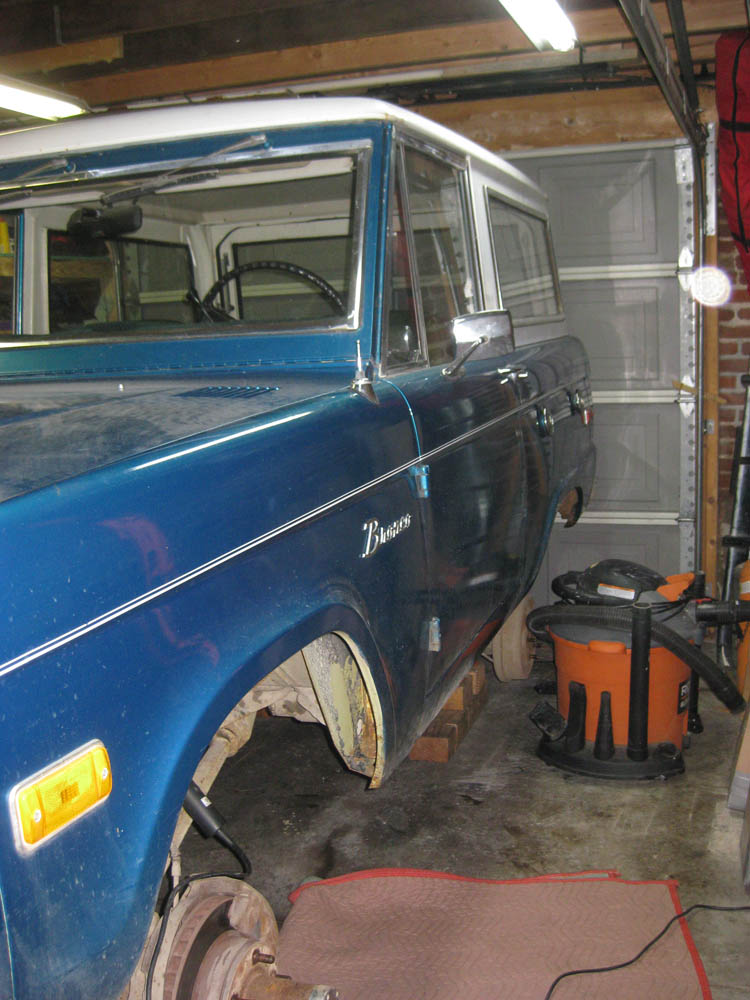
i think all the grease and gunk have saved the axles and frame

some people have paint.. I prefer gunk
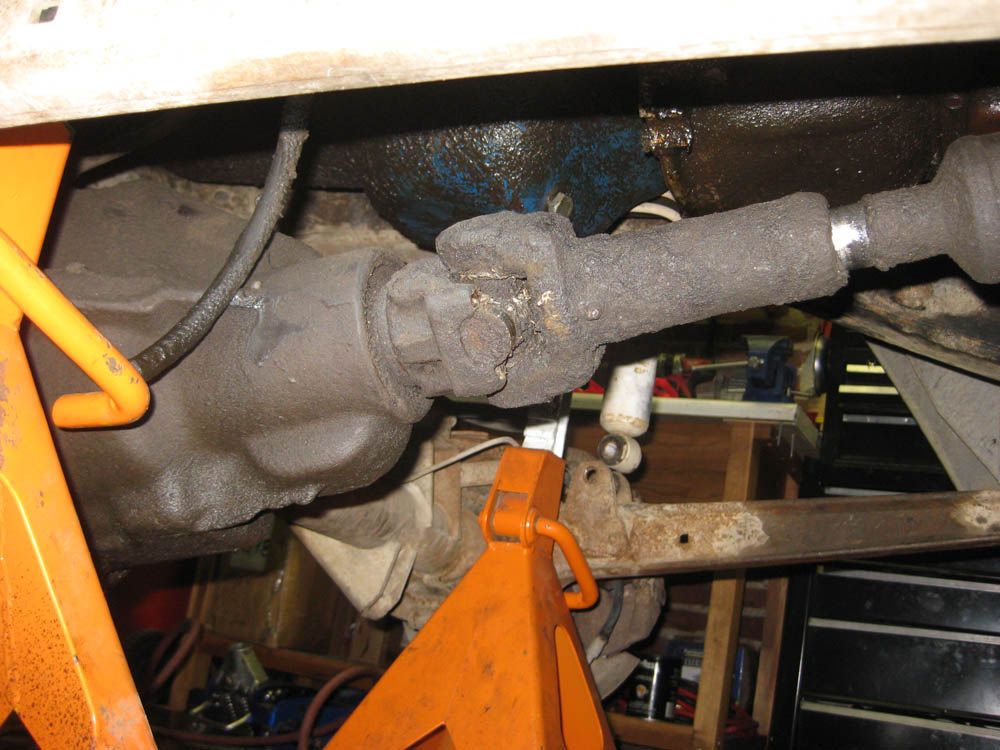
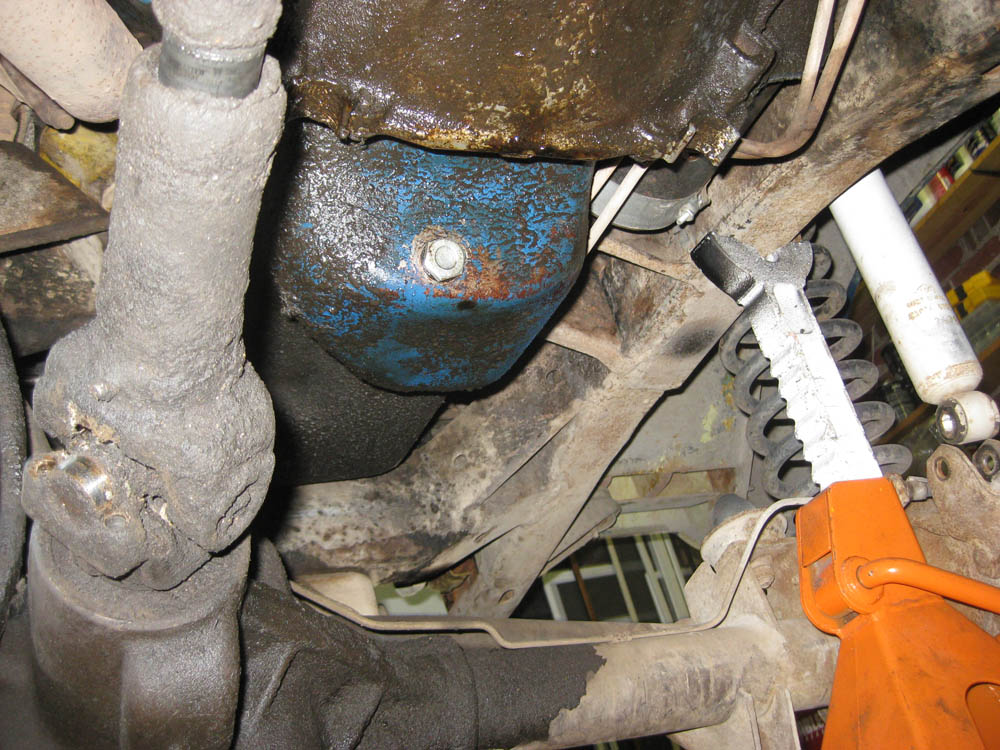
I think the bushings are a bit worn...

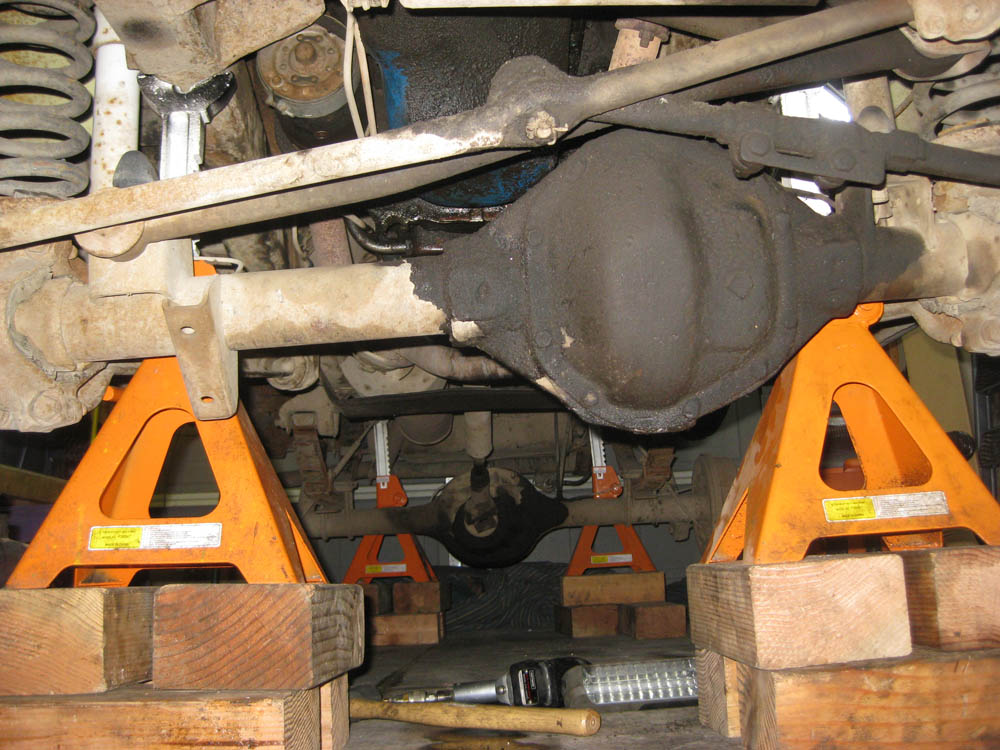
and the front axle is detached.. just need to remove the radius arms and pull the axle out.. then I will go through it and start to rebuild it, good news so far - no stubborn bolts or nuts... I'm still amazed that the truck is in as good condition as it is.
hope to have the axle done by the weekend and hopefully painted.. then move onto removing the transmission and transfer case and get those cleaned up and sent out to Viper...
I got the bronco into the garage, took the tire carrier off, wheels and tires and started to pull the front end out of it...
tight fit but I think it will work out...
i think all the grease and gunk have saved the axles and frame
some people have paint.. I prefer gunk
I think the bushings are a bit worn...
and the front axle is detached.. just need to remove the radius arms and pull the axle out.. then I will go through it and start to rebuild it, good news so far - no stubborn bolts or nuts... I'm still amazed that the truck is in as good condition as it is.
hope to have the axle done by the weekend and hopefully painted.. then move onto removing the transmission and transfer case and get those cleaned up and sent out to Viper...
OP
OP
landshark99
Bronco Guru
- Joined
- Oct 13, 2011
- Messages
- 1,401
axle is stripped down, everything came apart pretty well, now to start digging the crud off!
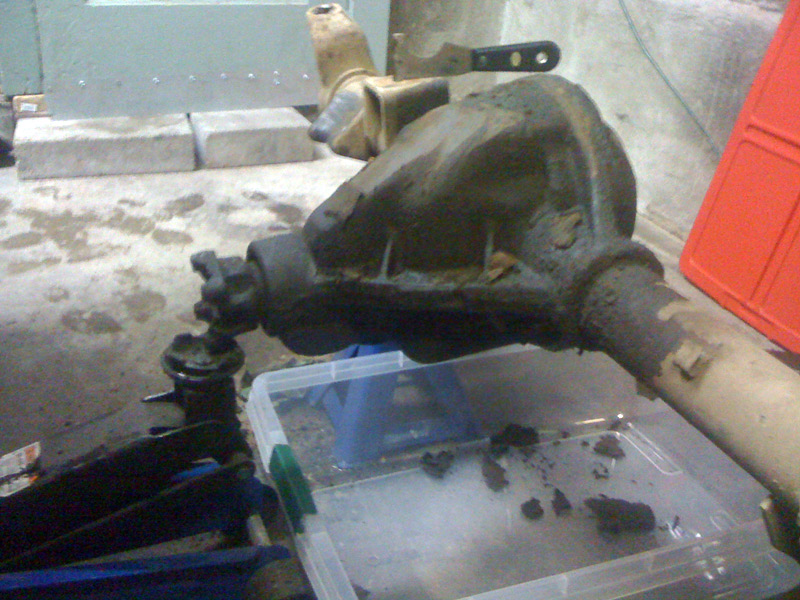
Picked up my POR-15 supplies and the rest of my axle parts today, so hoping to make some good progress this weekend if I can get the lights up and decorations on the tree
Picked up my POR-15 supplies and the rest of my axle parts today, so hoping to make some good progress this weekend if I can get the lights up and decorations on the tree
OP
OP
landshark99
Bronco Guru
- Joined
- Oct 13, 2011
- Messages
- 1,401
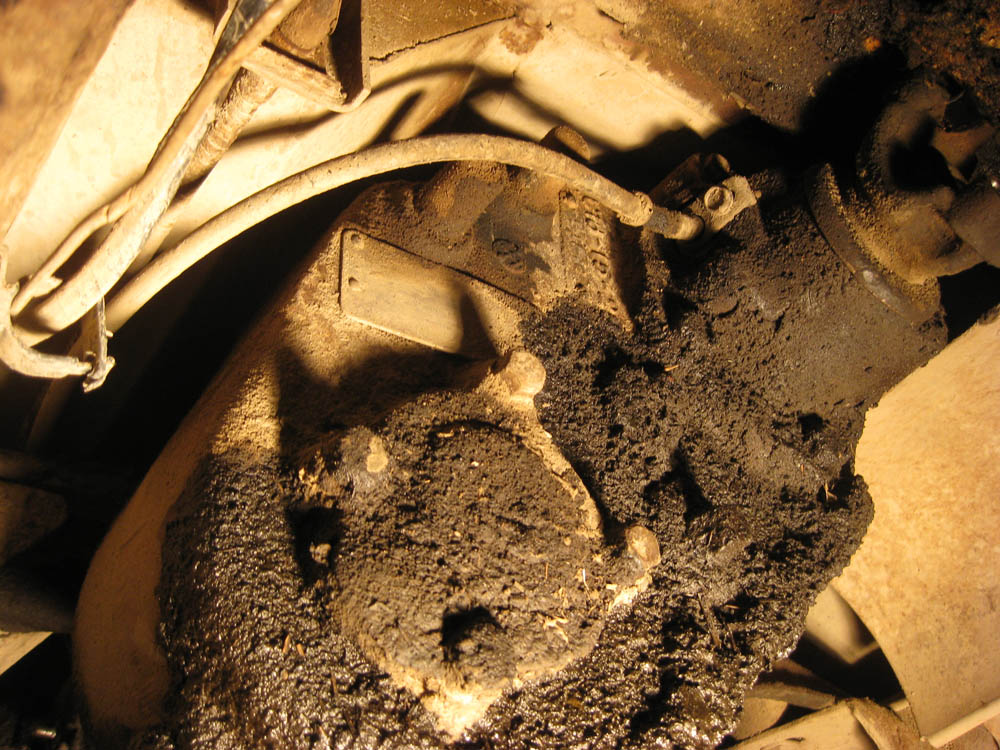
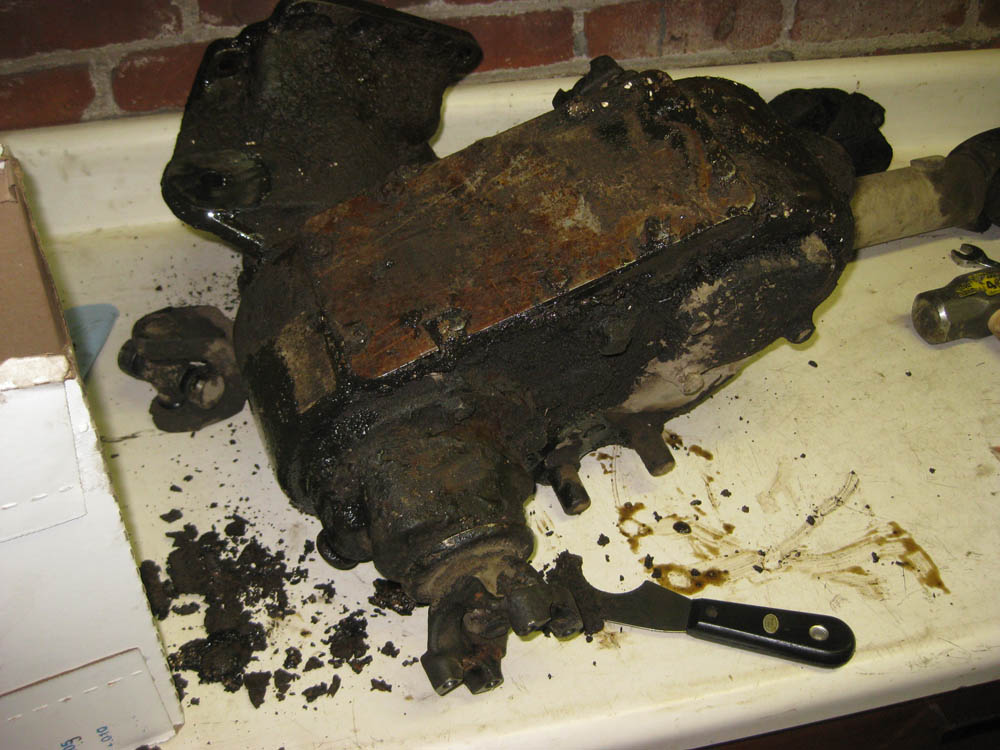
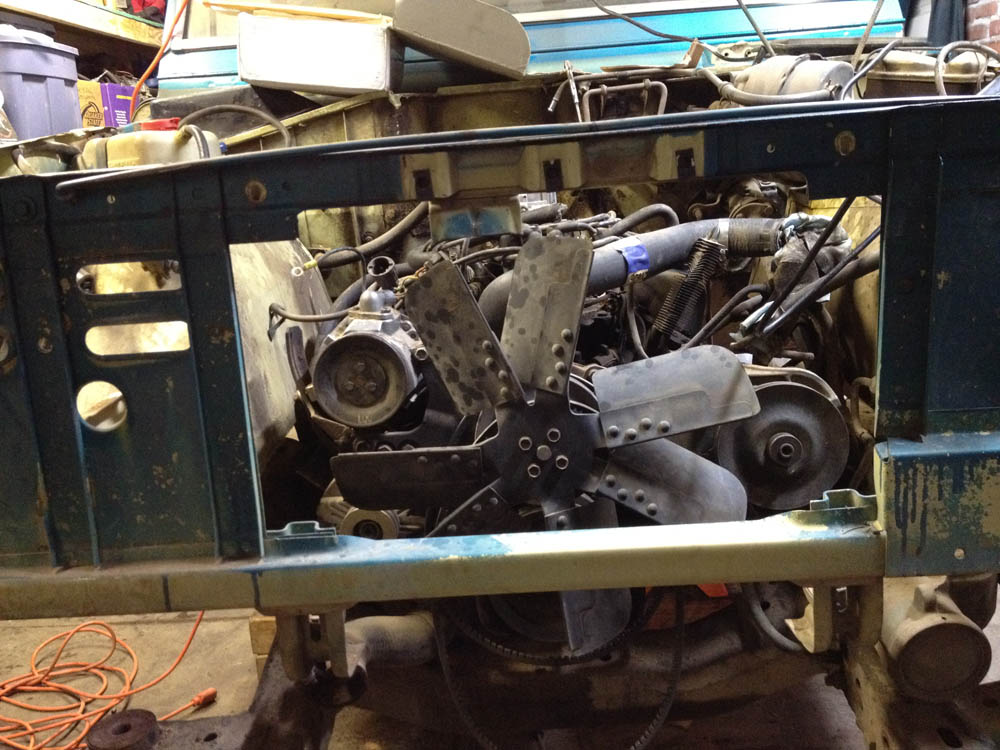
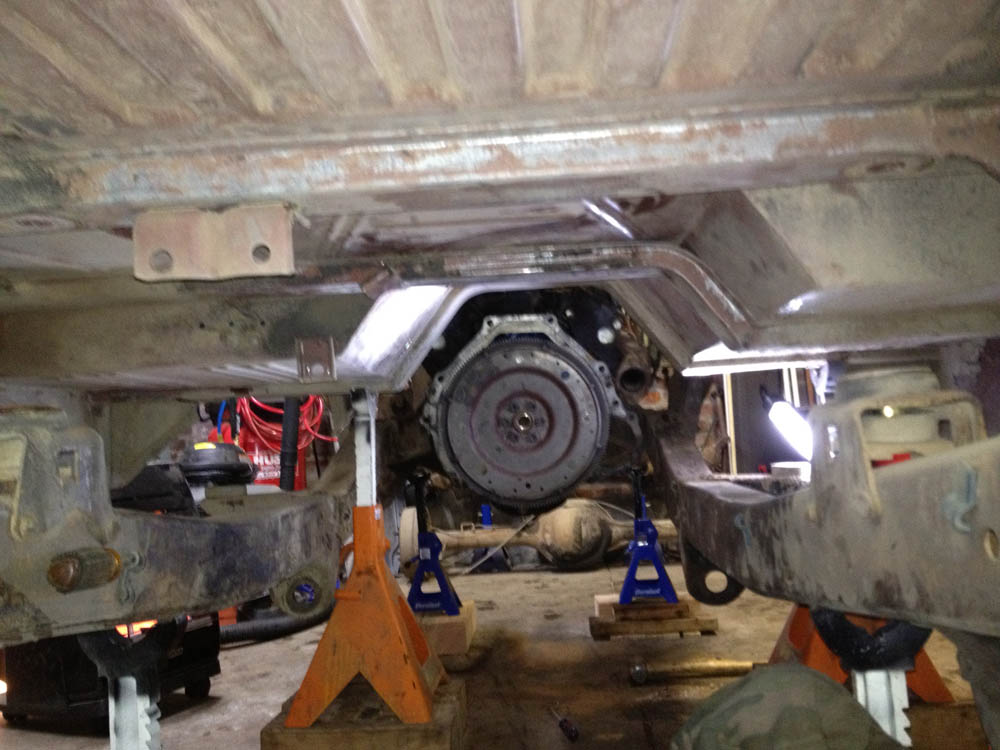
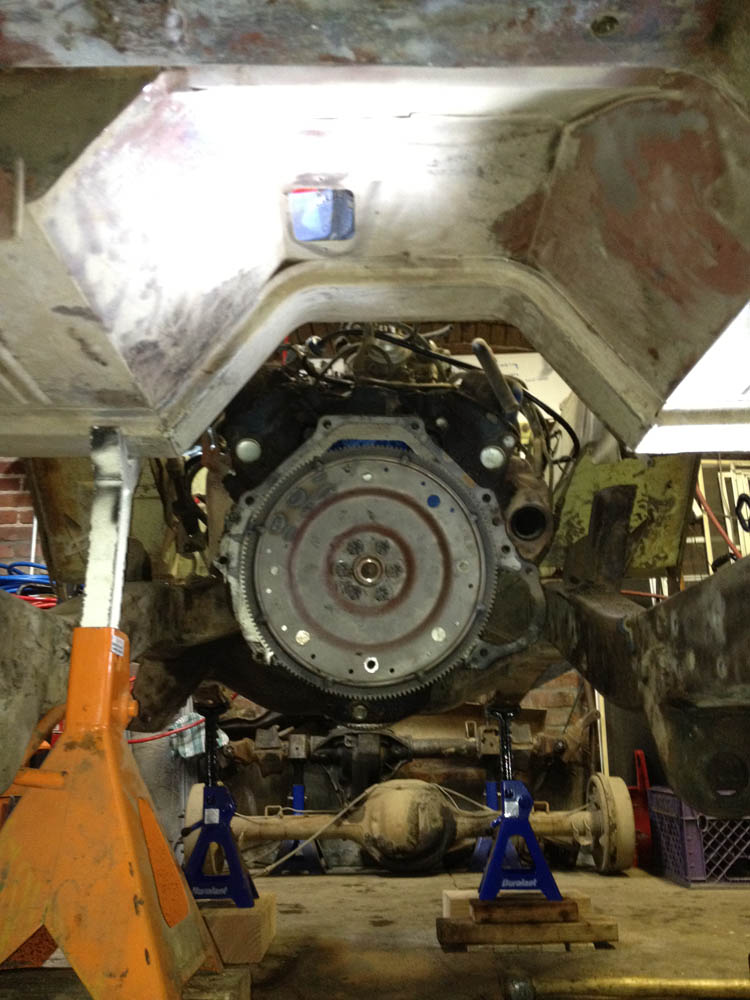
Got the exhaust, transmission/transfer case and a bunch of other stuff off the bronco... now i need to start cleaning them up to get them to Viper
I also have both drive shafts off.. they are dirty.. one more than the other.. and there is allot of caked on oil and dirt on one.. am i able to get these blasted or do they frown upon caked on oil dirt and mess?
Here are some progress pics...

so next up is more cleaning.. then removing the rear axle and springs, then drop the tanks.. and then.. more cleaning...
I also have both drive shafts off.. they are dirty.. one more than the other.. and there is allot of caked on oil and dirt on one.. am i able to get these blasted or do they frown upon caked on oil dirt and mess?
Here are some progress pics...
so next up is more cleaning.. then removing the rear axle and springs, then drop the tanks.. and then.. more cleaning...
- Joined
- Sep 7, 2006
- Messages
- 2,972
Heavy duty easy off oven cleaner and pressure washer, hooked to hot water if possible, works great for cleaning grease and grim. Spray it on, let it set for 5~10 mins and blast away.
You have a very good rig there body looks to be really solid. Good luck with the build.
You have a very good rig there body looks to be really solid. Good luck with the build.
OP
OP
landshark99
Bronco Guru
- Joined
- Oct 13, 2011
- Messages
- 1,401
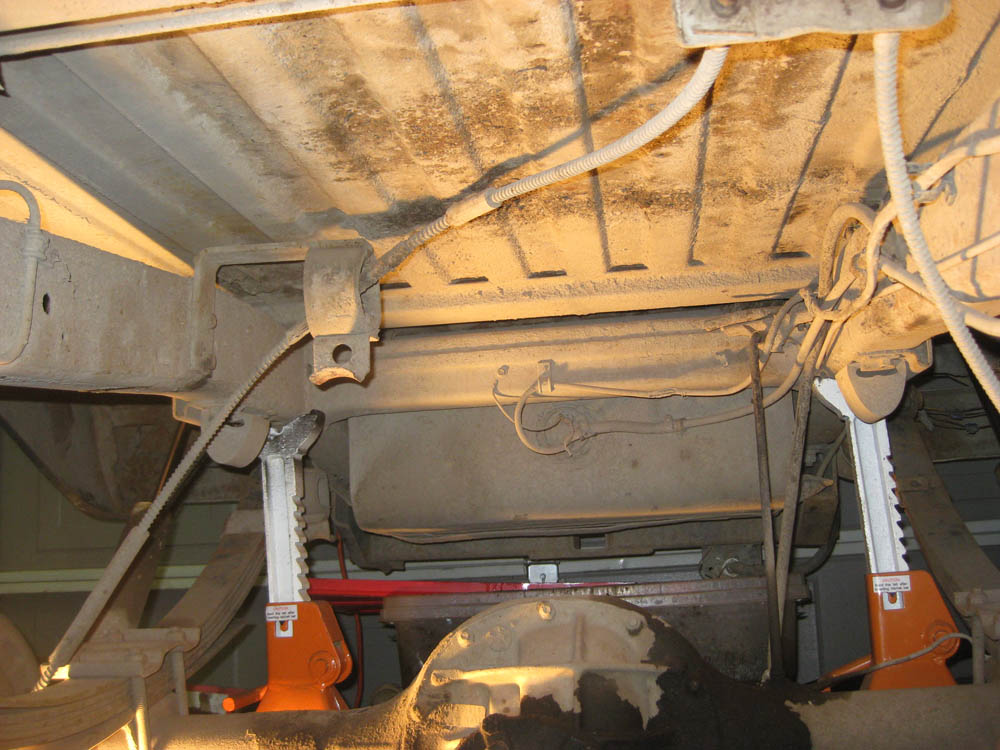
So seems like nothing has gotten done but been really busy cleaning cleaning and more cleaning.. small spaces require creative solutions when tearing apart a truck and have to keep things organized for the day i start to put everything back together..
anyway got everything stripped off the underbody and frame and started pulling the body mounts off.. so far so good. Tomorrow I'm hanging plastic around the bronco so I can sand blast the underbody and frame and get it all prepped for por15 and chassis saver.. Hope the compressor is up to the task, its going to be working double overtime!
Anyway most of these pics are boring.. but not much else to take pics of right now.. just a very dirty garage
OP
OP
landshark99
Bronco Guru
- Joined
- Oct 13, 2011
- Messages
- 1,401
You are doing a great job and we all like pictures, there are no boring bronco pictures!
Thanks, well i will keep snapping them as I go.. i'm trying to document as much as possible.. plus photos help when you are putting it back together
Hope to restore it completely back to the original glen green configuration.. i haven't seen any so it will set this rig apart.
OP
OP
landshark99
Bronco Guru
- Joined
- Oct 13, 2011
- Messages
- 1,401
well cleaning is coming along however the more I poked around the door pillars the worse they seem. So it would seem I will probably replacing both door pillars here shortly. I kept on poking in them and finding more and more rot. I think it would just save time and headaches to replace the whole thing. Oh well knew I would be finding some surprises!
I will post up some pics in the next few days..
I will post up some pics in the next few days..
76Bronco302
Full Member
Looks good. Amazed at your floors. Lucky. Keep up the good work.
OP
OP
landshark99
Bronco Guru
- Joined
- Oct 13, 2011
- Messages
- 1,401
Dropped the frame away from the body today thanks to Justin for the extra jackstands and the hand!
Went pretty smooth, went slow and made sure we didn't die.


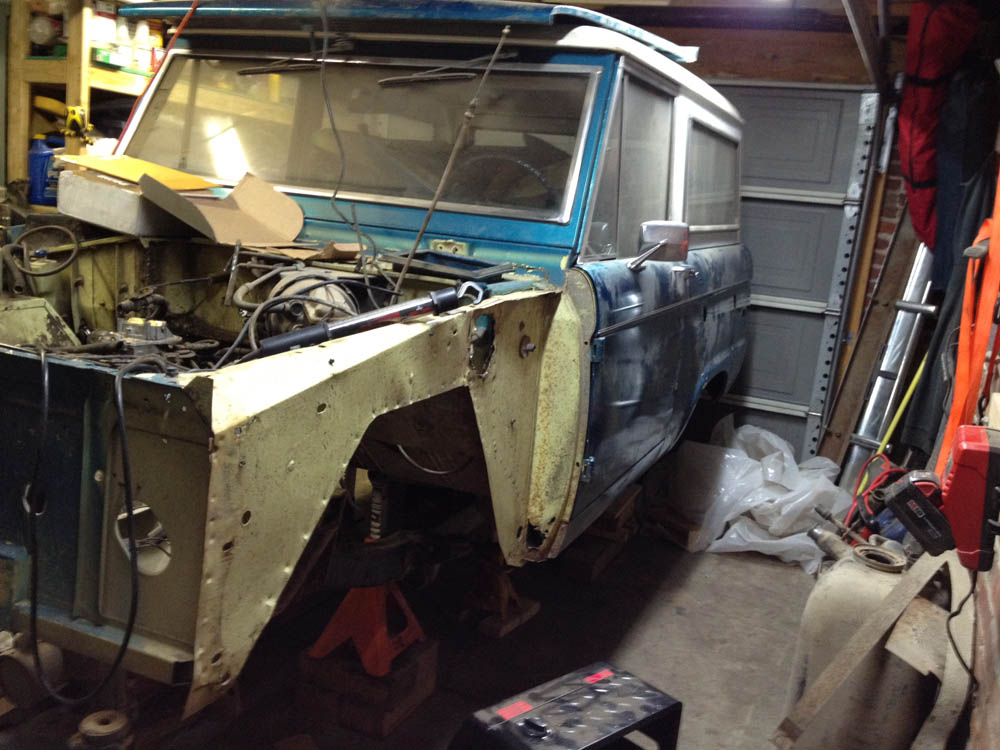
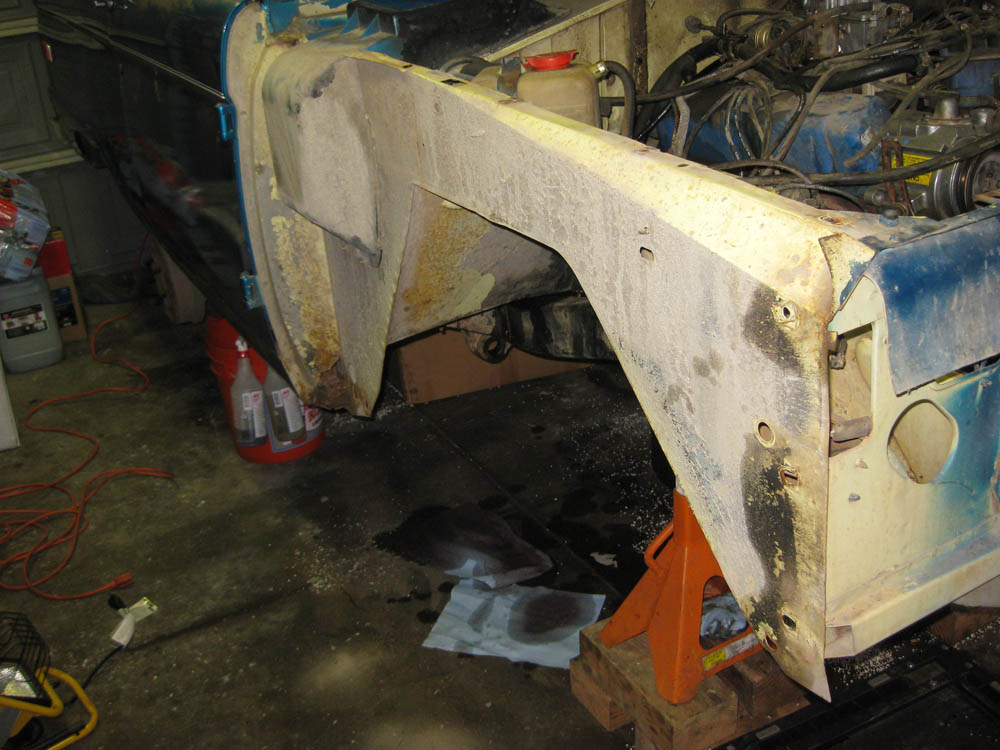
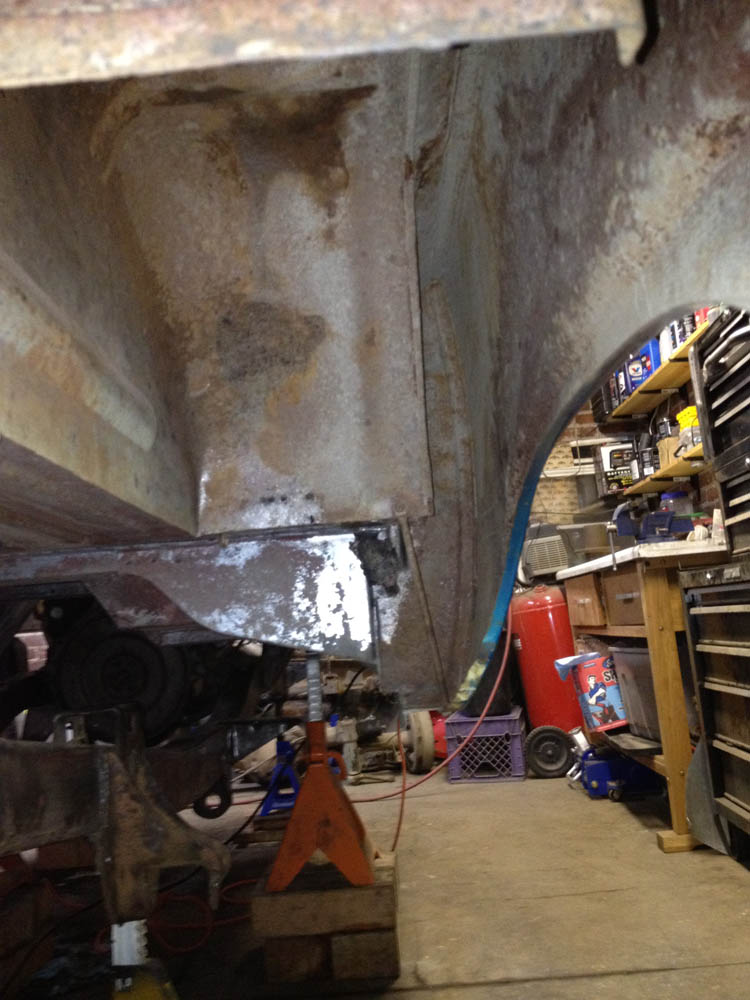
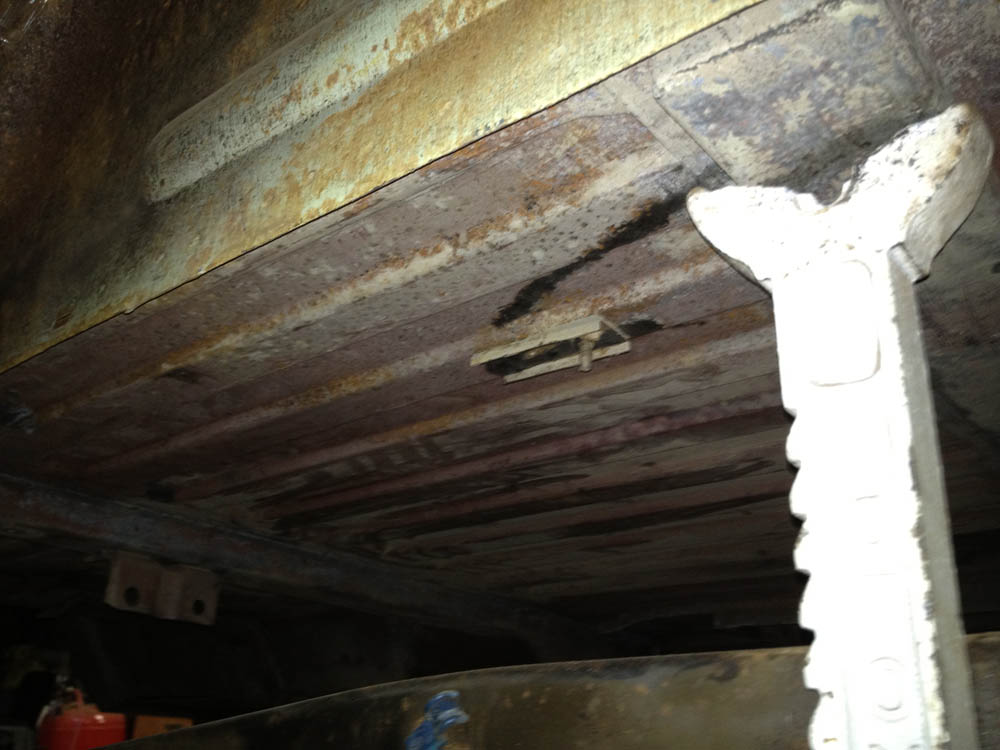
Started to really poke around the rust areas.. looks like a Door post replacement is in the future.. I will patch up the fender holes before I finish sealing the underbody...


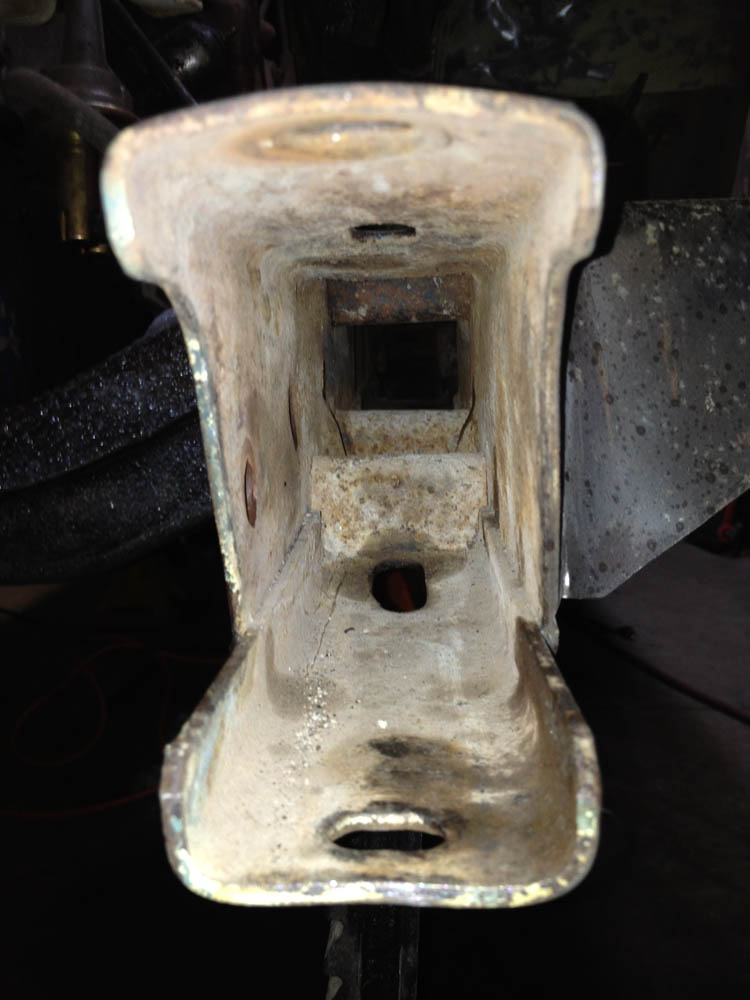
Making progress on the underbody after experimenting with various stripping techniques… best one I found for getting the undercoat off was a paint scraper.. hitting the hard to reach nooks and crannies with the blaster.

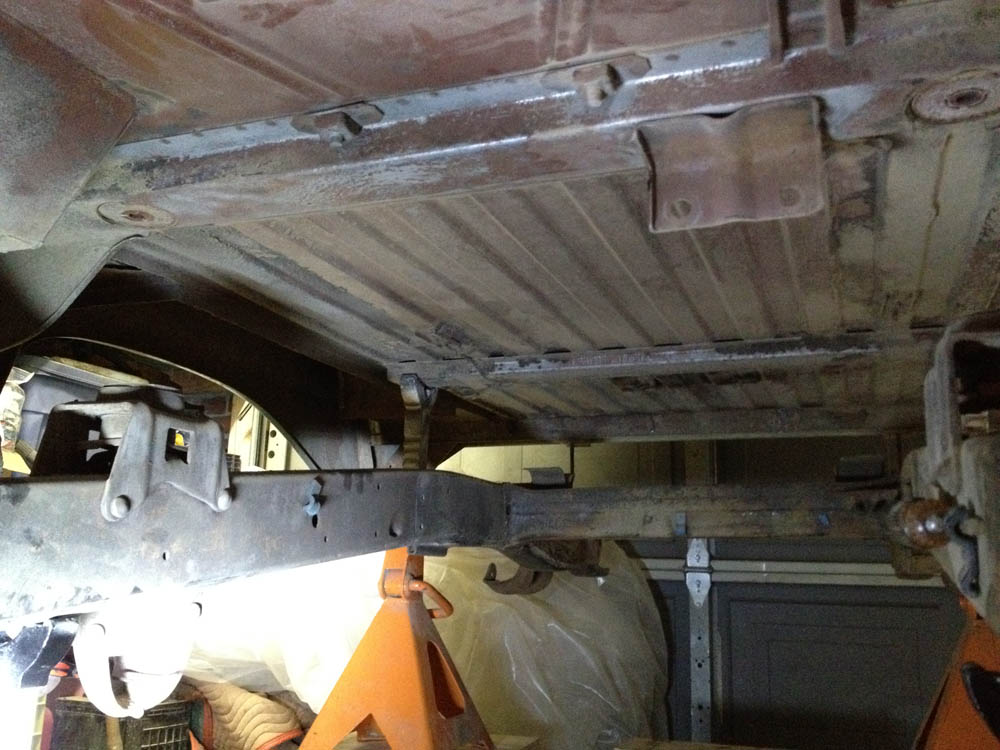


well now that i have access to the whole frame I will concentrate cleaning it up and then move back to the body sides and rear fenders.. then touchup, cleaning everything in the garage after my blasting sessions and then marine clean, metal prep and POR-15… still haven't decided what to coat the body with, leaning toward a spray on product.. something not goopy and can easily be blasted off...
Went pretty smooth, went slow and made sure we didn't die.
Started to really poke around the rust areas.. looks like a Door post replacement is in the future.. I will patch up the fender holes before I finish sealing the underbody...
Making progress on the underbody after experimenting with various stripping techniques… best one I found for getting the undercoat off was a paint scraper.. hitting the hard to reach nooks and crannies with the blaster.
well now that i have access to the whole frame I will concentrate cleaning it up and then move back to the body sides and rear fenders.. then touchup, cleaning everything in the garage after my blasting sessions and then marine clean, metal prep and POR-15… still haven't decided what to coat the body with, leaning toward a spray on product.. something not goopy and can easily be blasted off...
broncobsession
Bronco Guru
- Joined
- Aug 12, 2001
- Messages
- 4,049
I hate you ;D Really clean under there man.
OP
OP
landshark99
Bronco Guru
- Joined
- Oct 13, 2011
- Messages
- 1,401
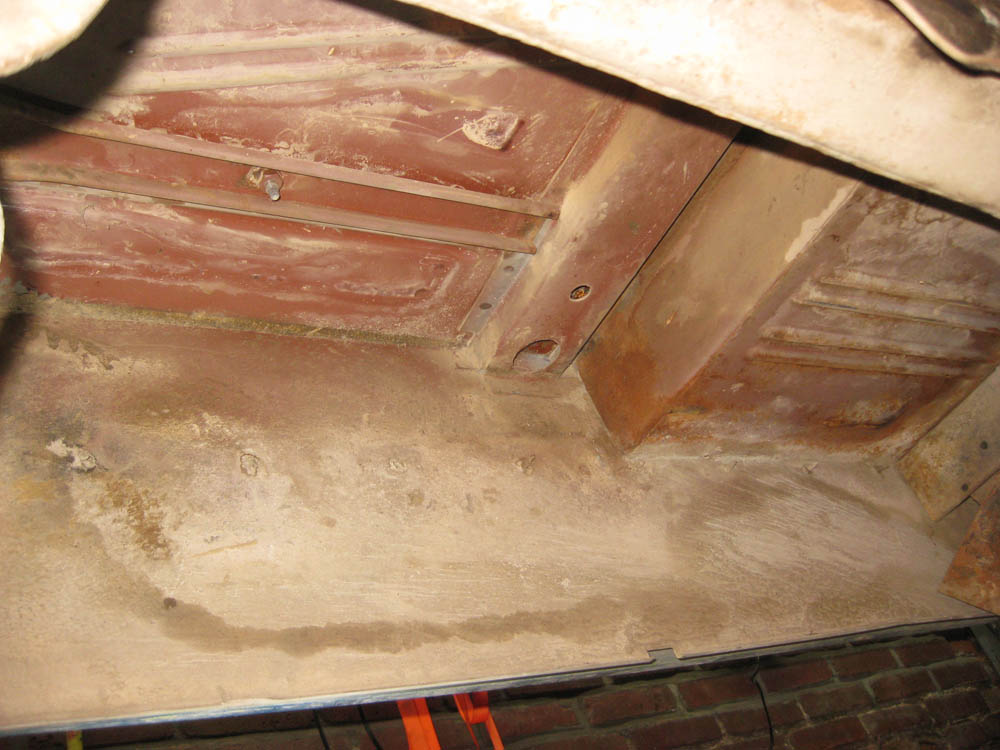
Almost ready to start sealing the frame and underbody, have a bit more clean up work todo... lesson learned.. next time iam taking the body and frame in to have done, its cool to get to know every crevice of the bronco but I could have used the time to concentrate on other bits that need to be done.. but oh well - onward and upward
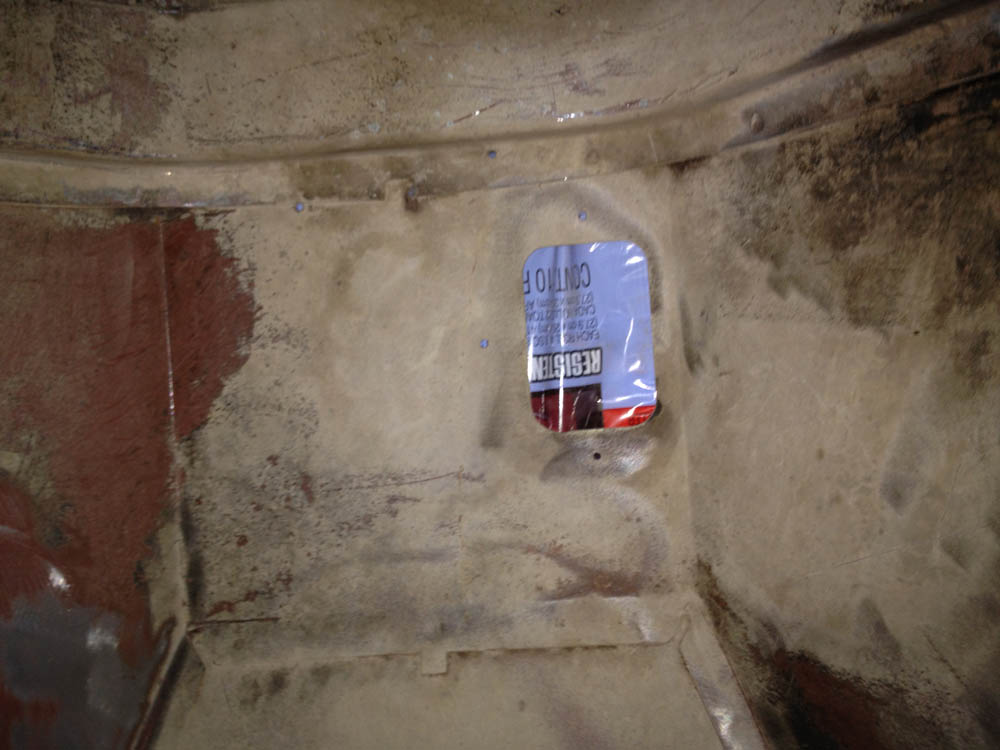
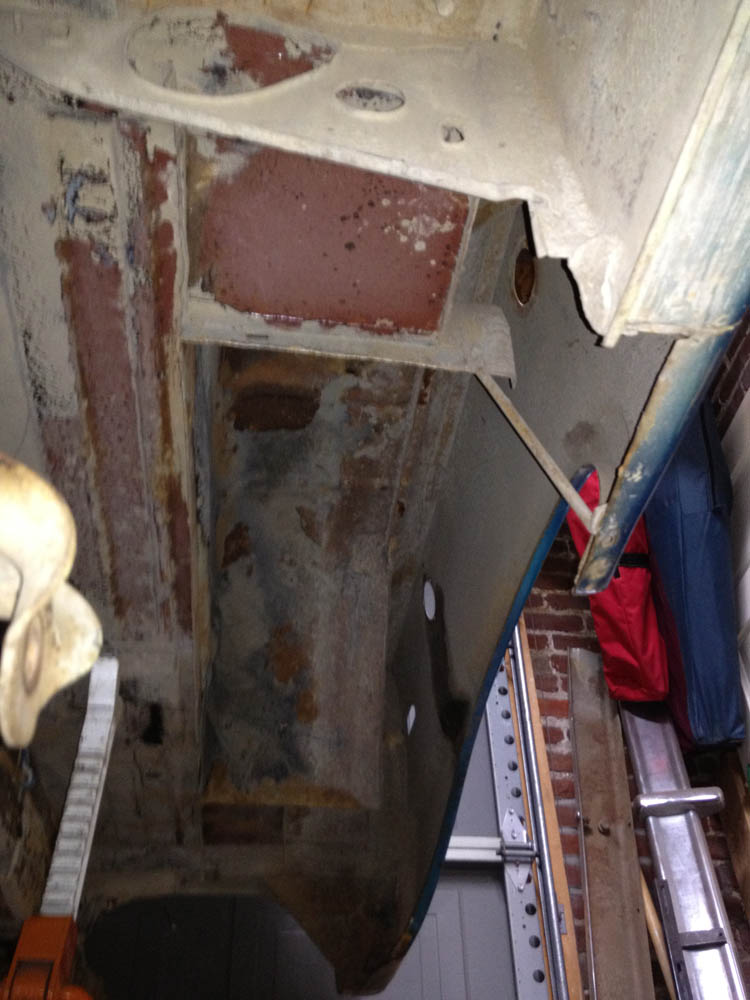
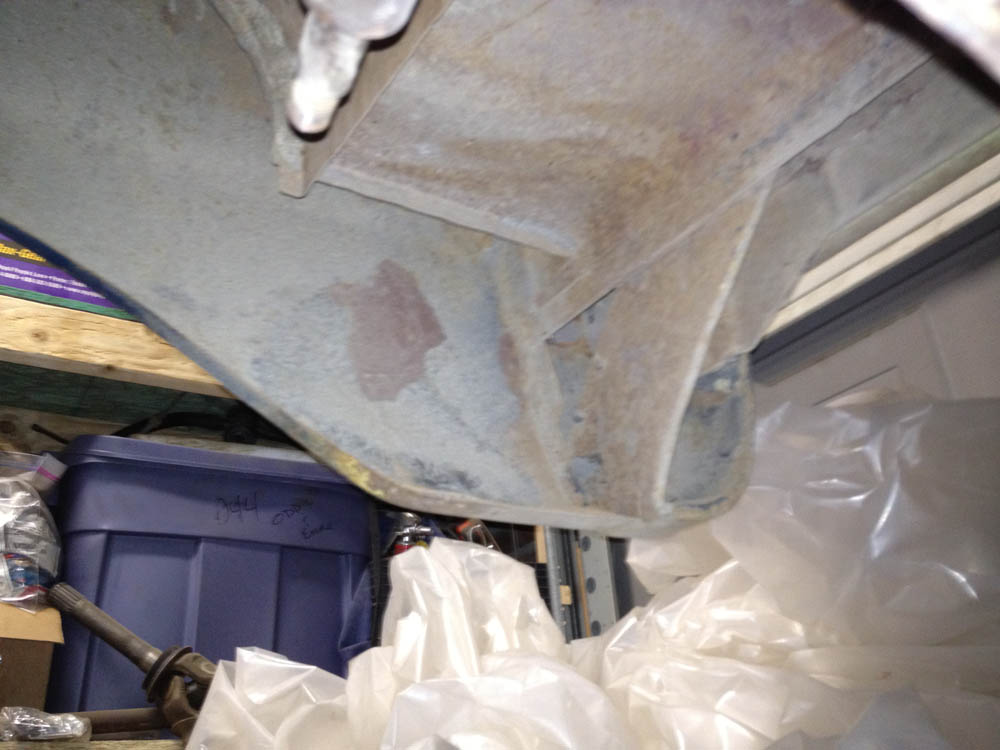
Anyway i have started thinking about the rust spots that need to be repaired and took a few photos of the problem areas. I have a good idea on what to do on most of the areas however a little advice is always welcome!
I'm fighting the urge to get the suspension together and then stripping down the tub and just get it blasted patched and then painted... but sadly its not in my budget right now... so reluctantly it can wait.
Anyway, here is a breakdown of what I have to patch, replace or ???
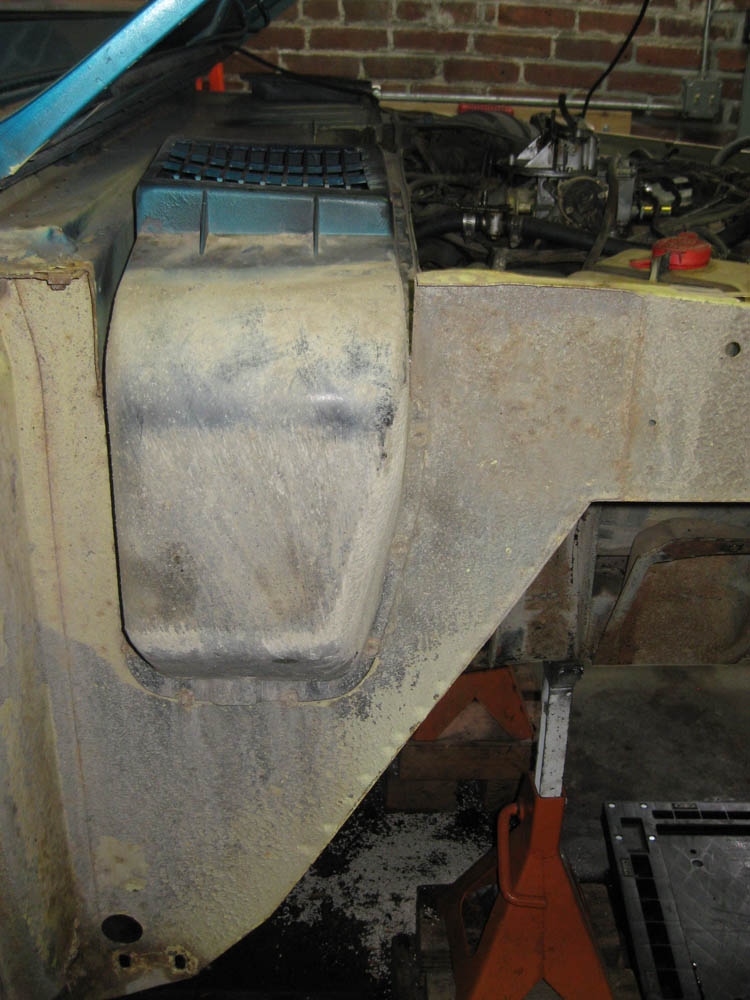
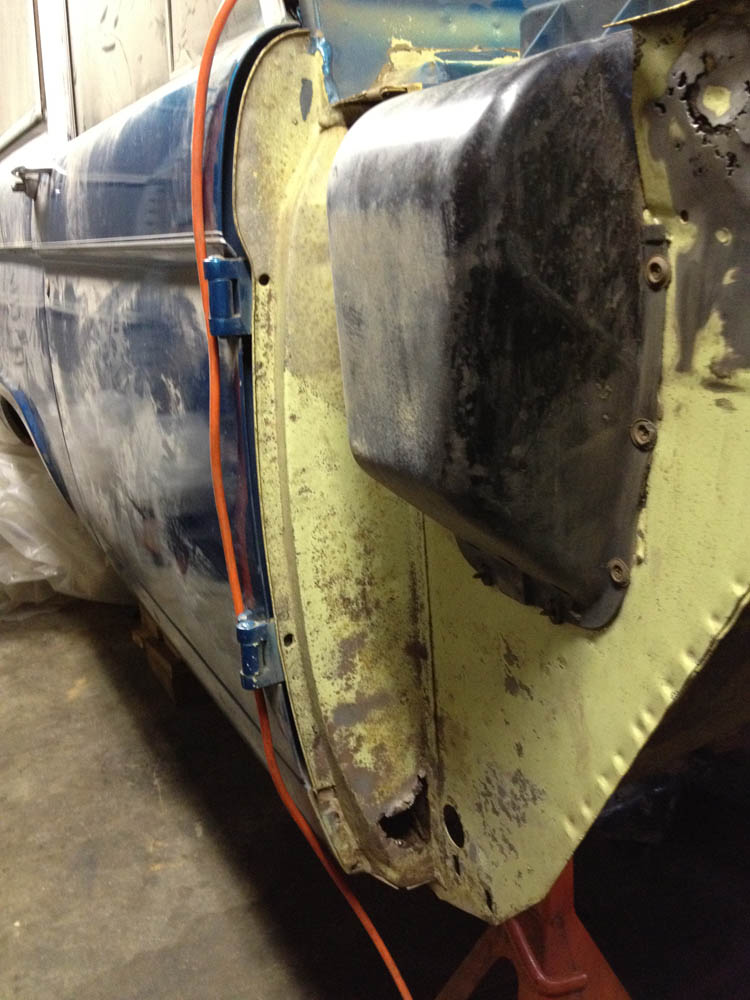
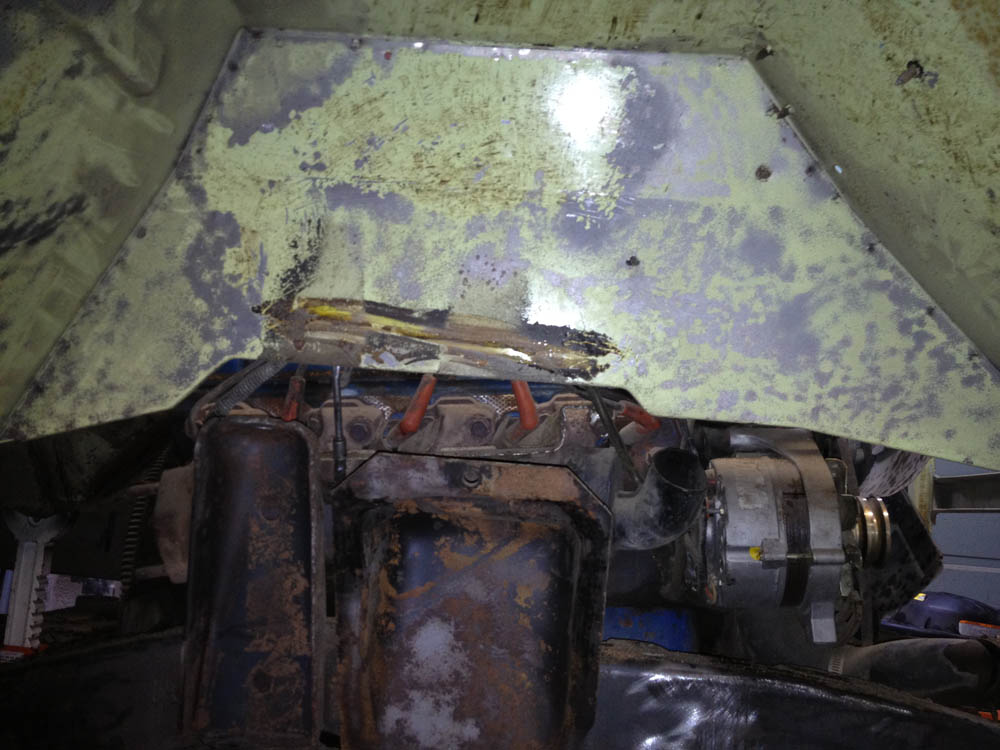
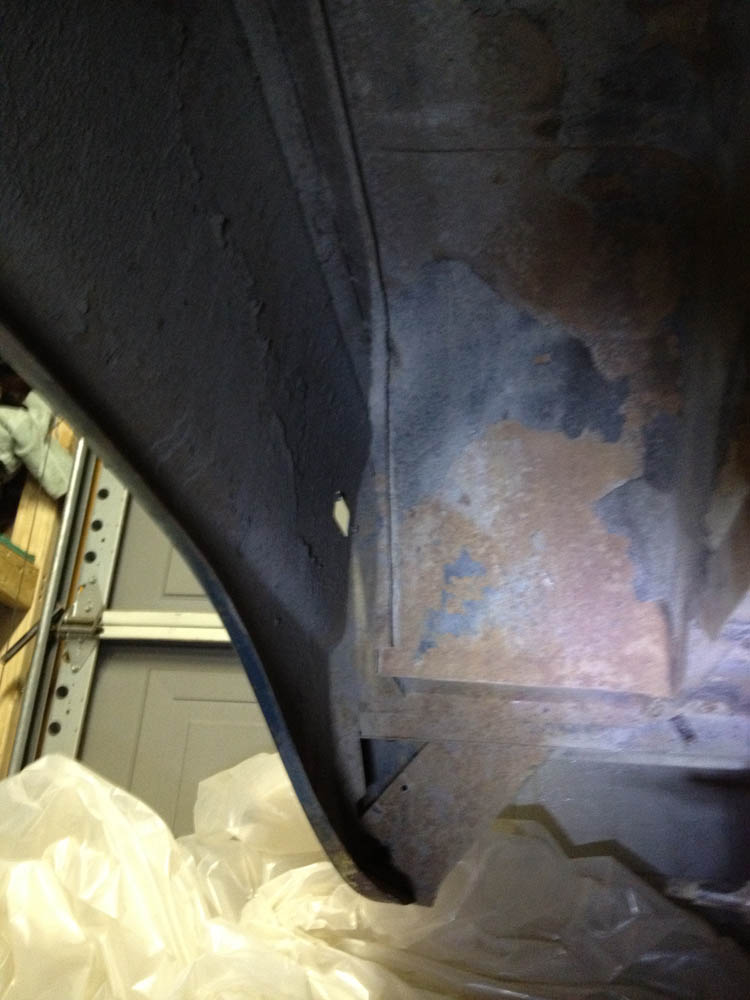
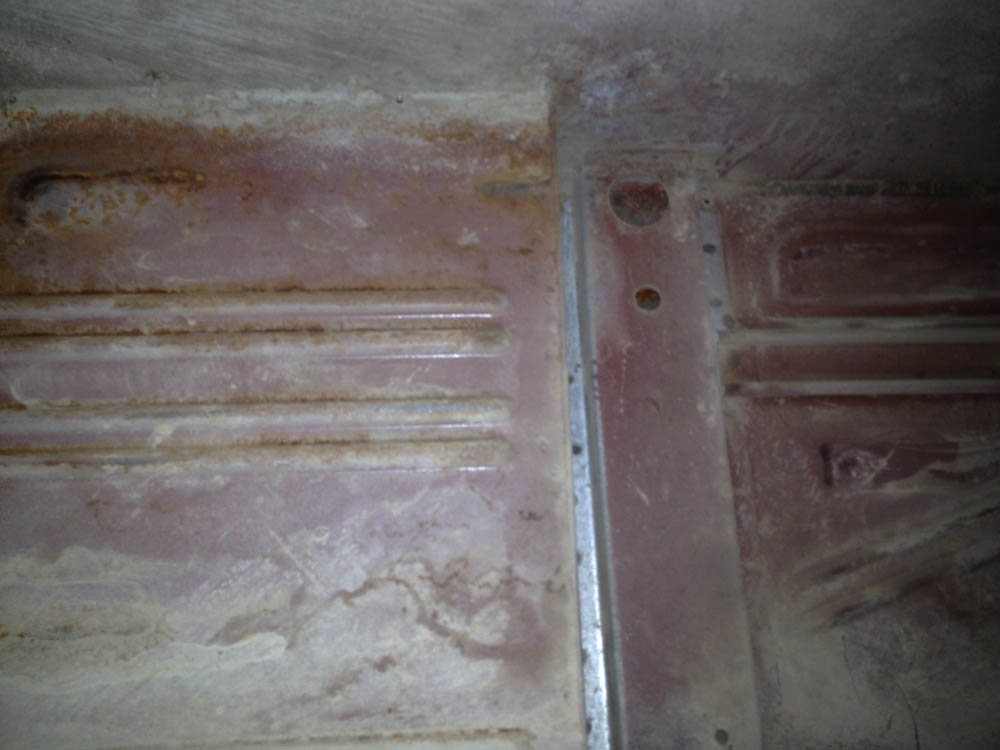
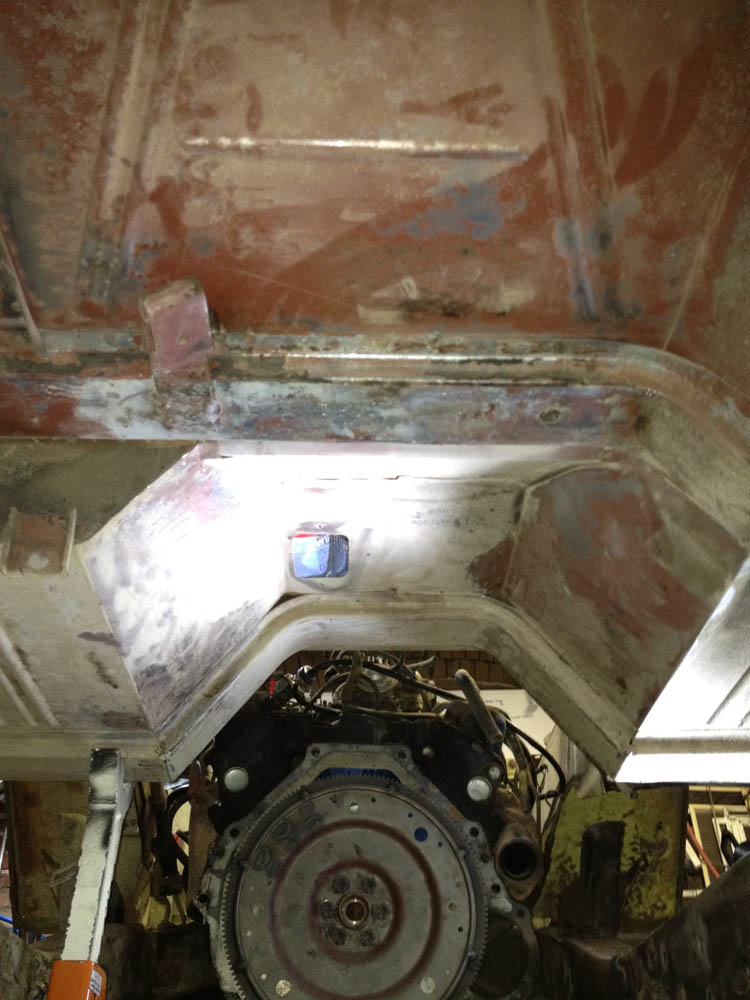
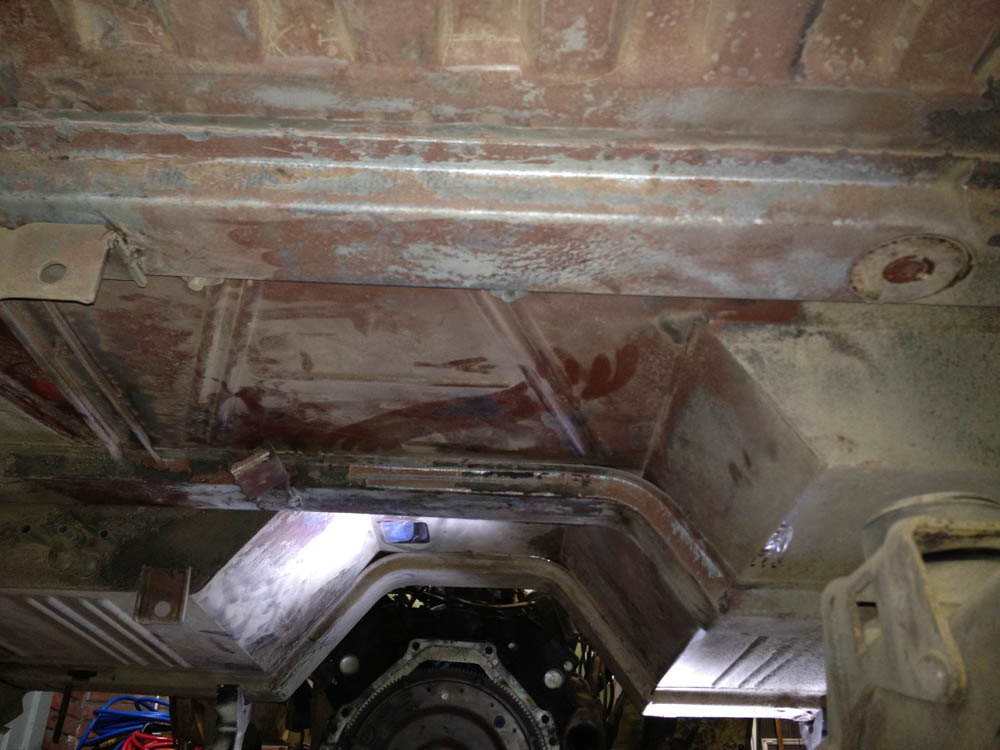
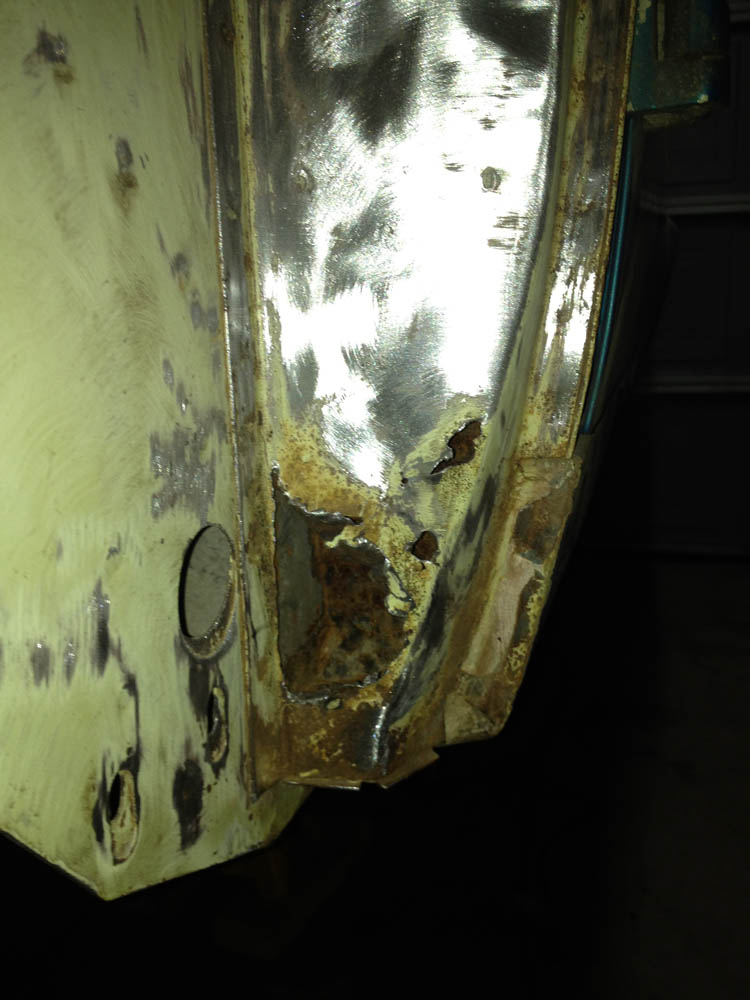
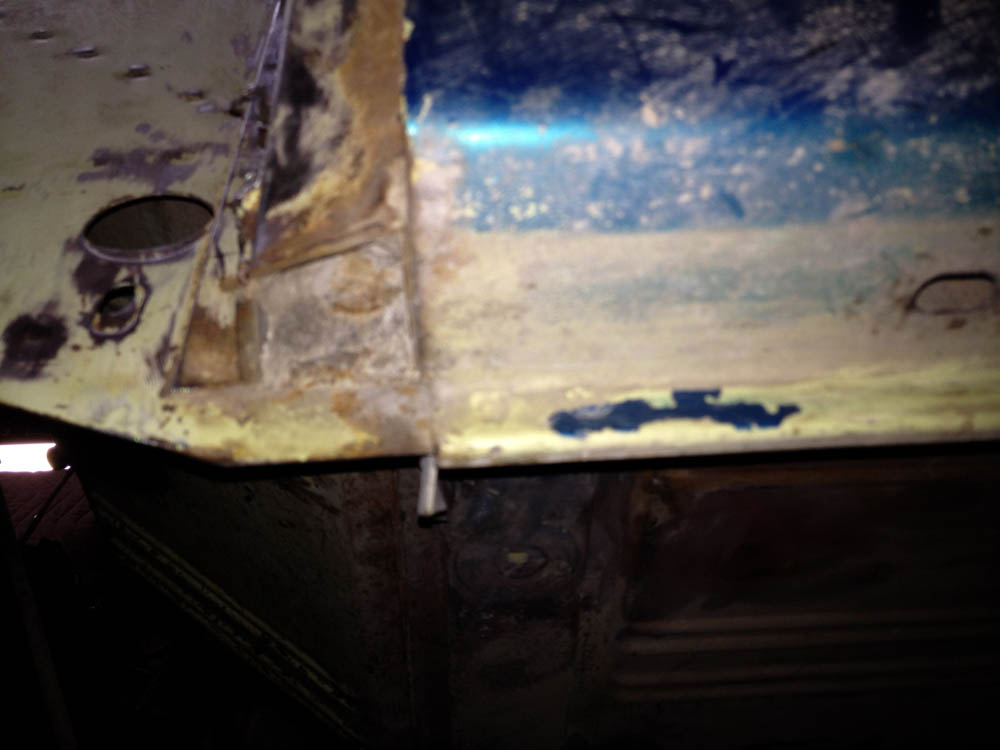
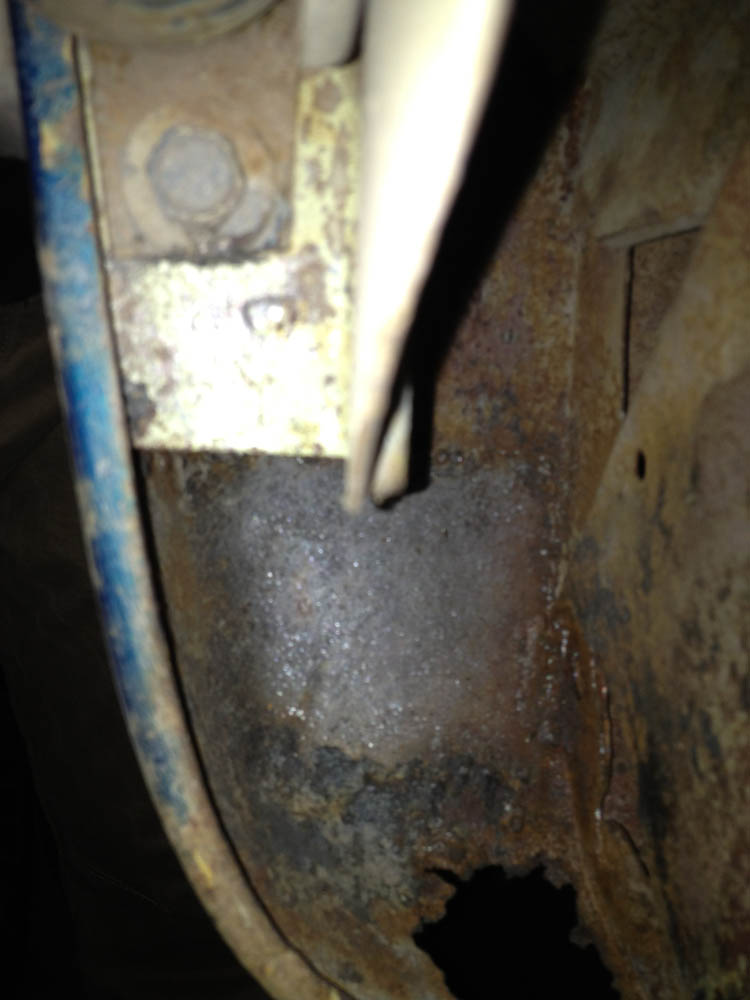
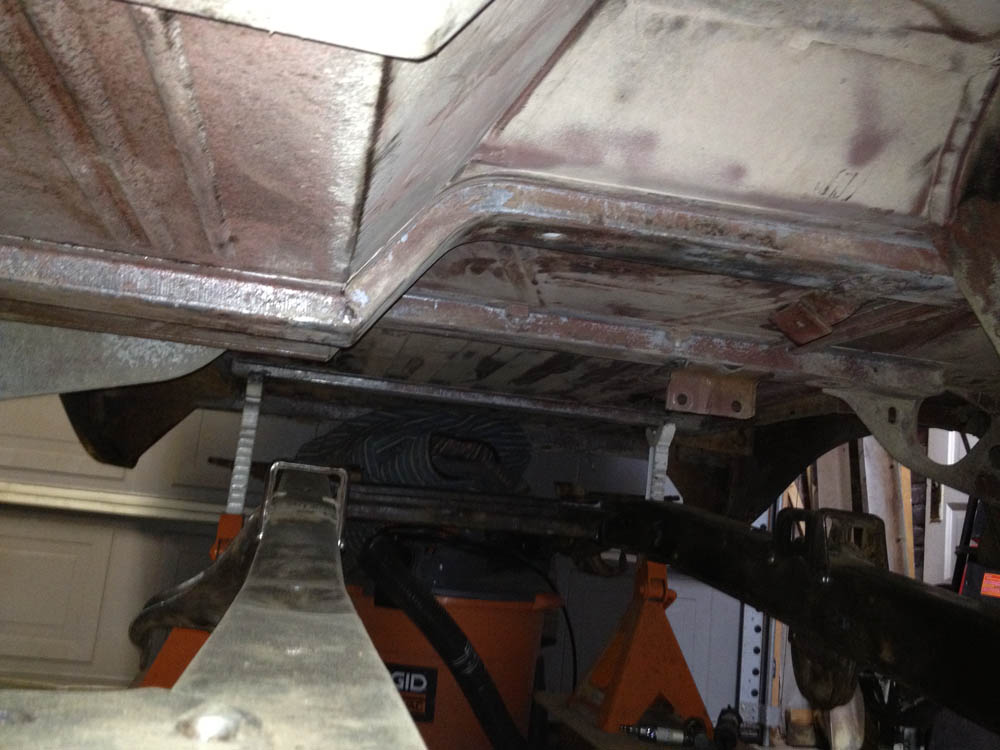
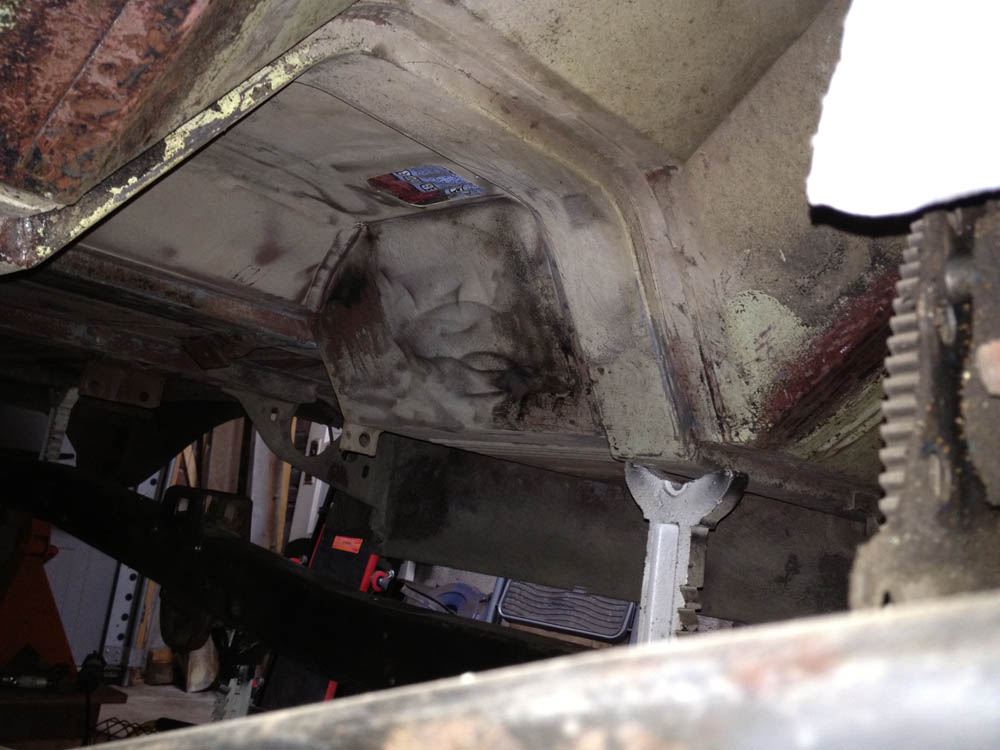
The front side walls of the engine bay are pretty obvious, patch them up (after i get the frame back on the body). Pretty straight forward.
Drivers Side

Passenger Side

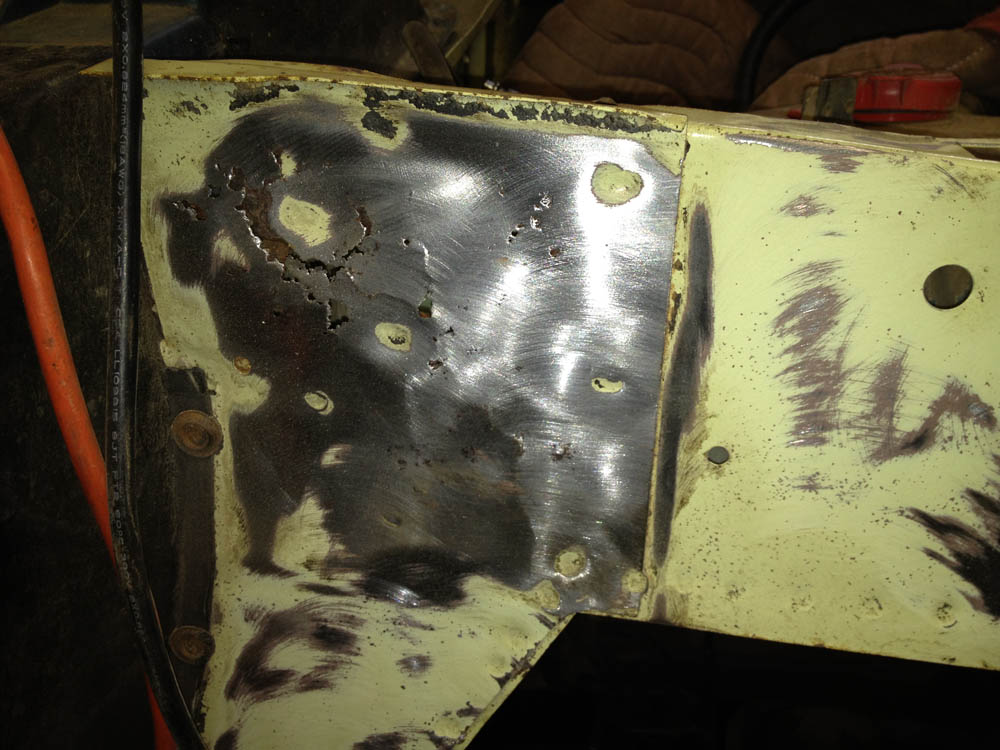
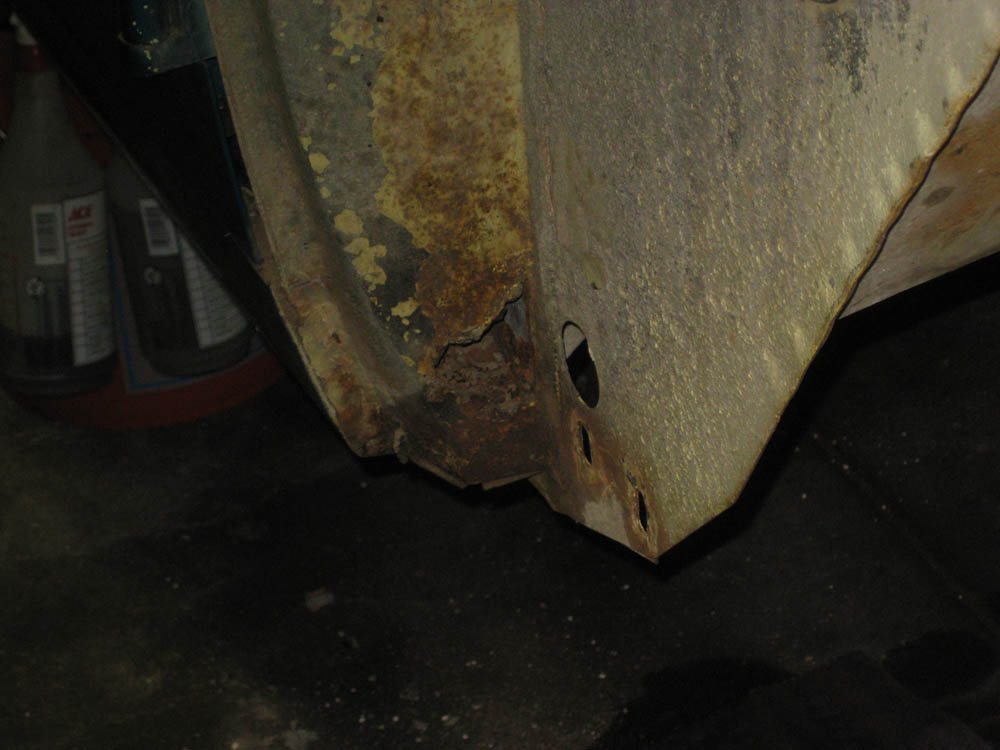
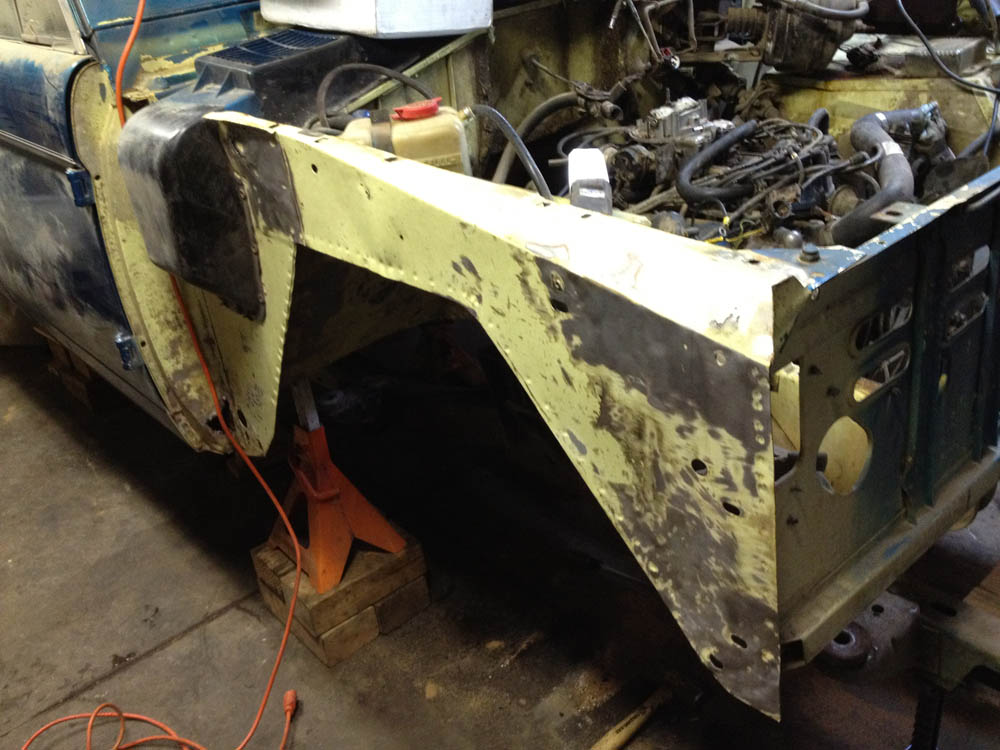
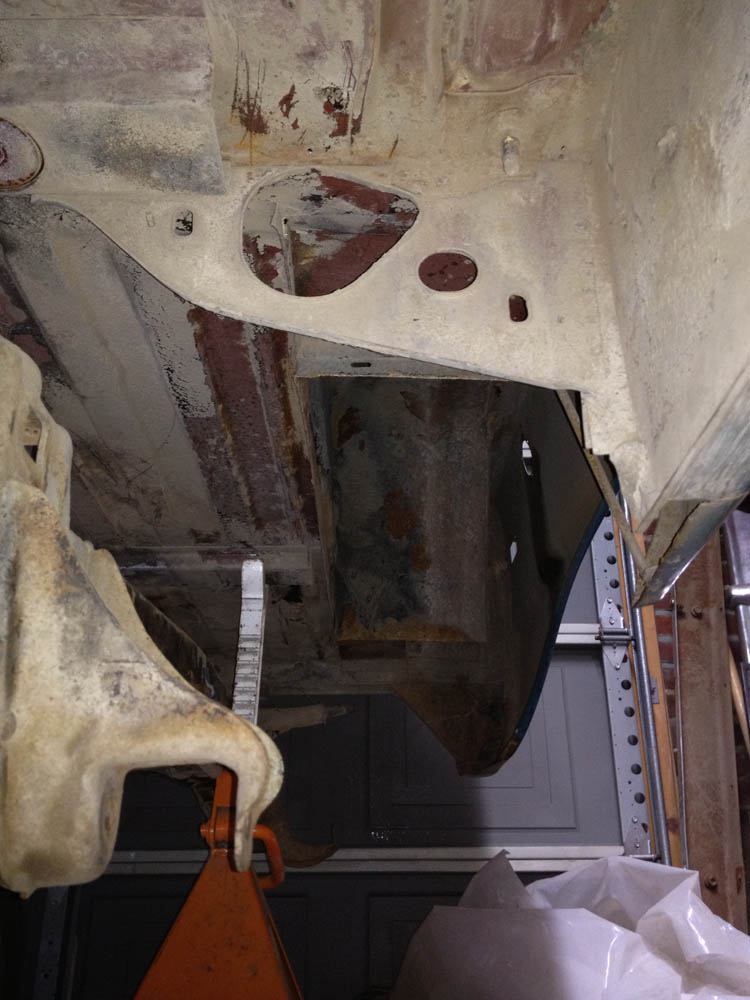
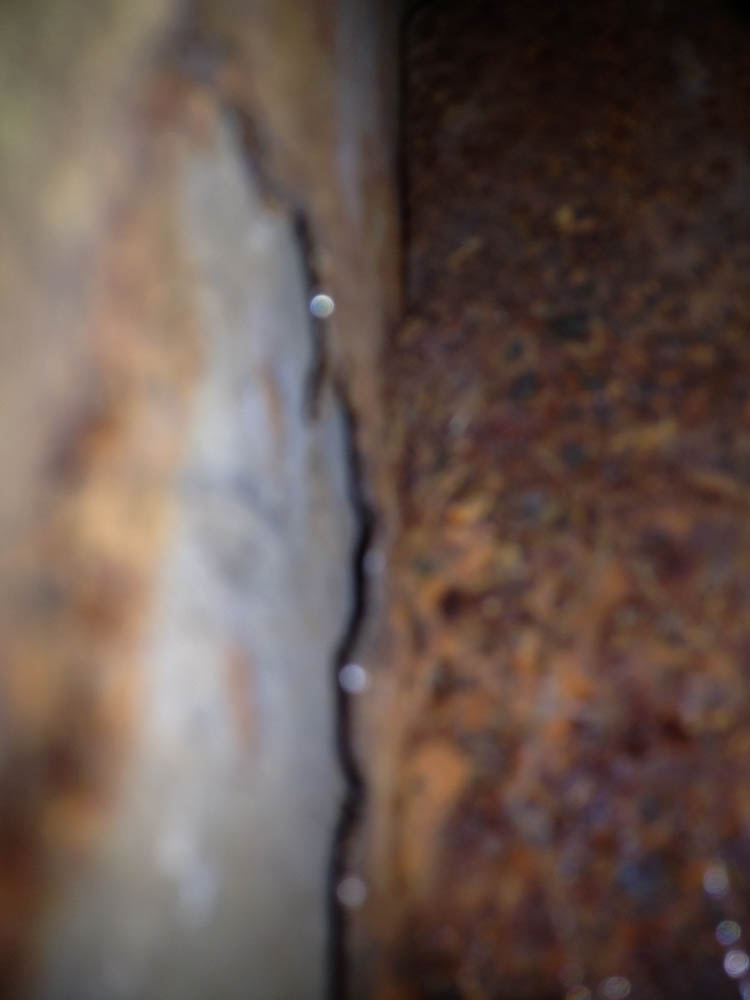
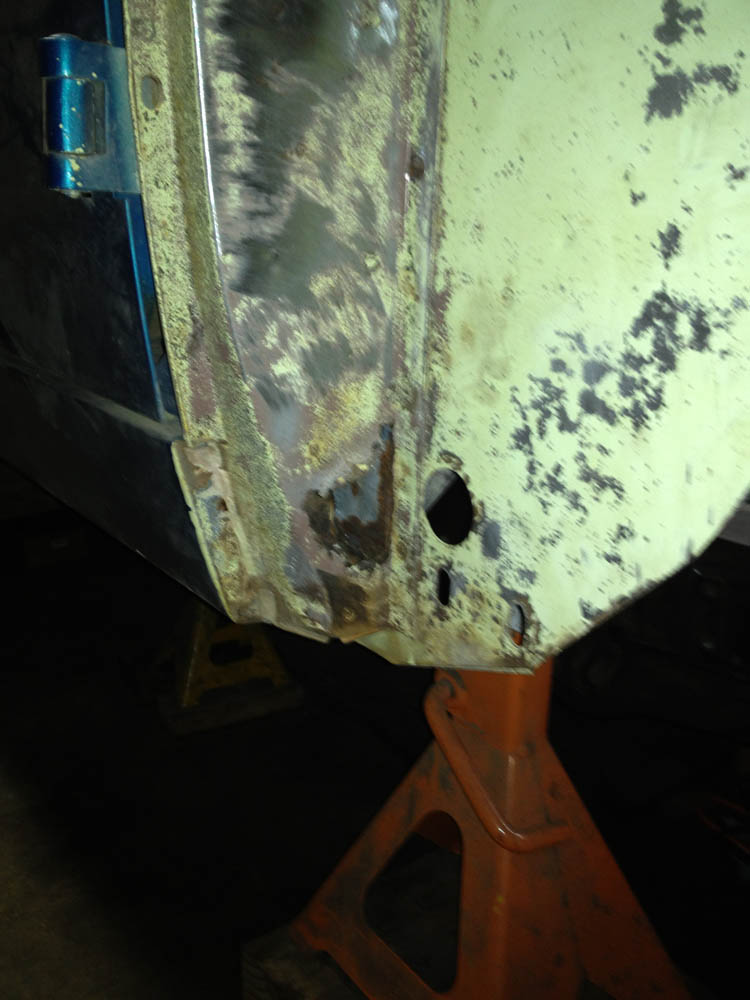
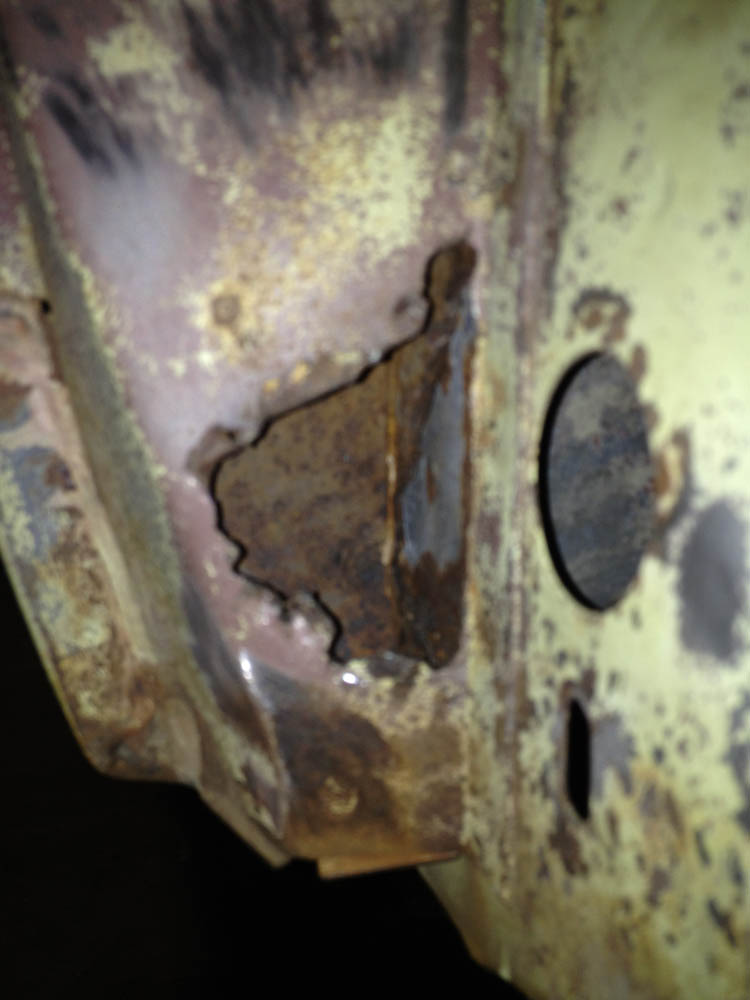
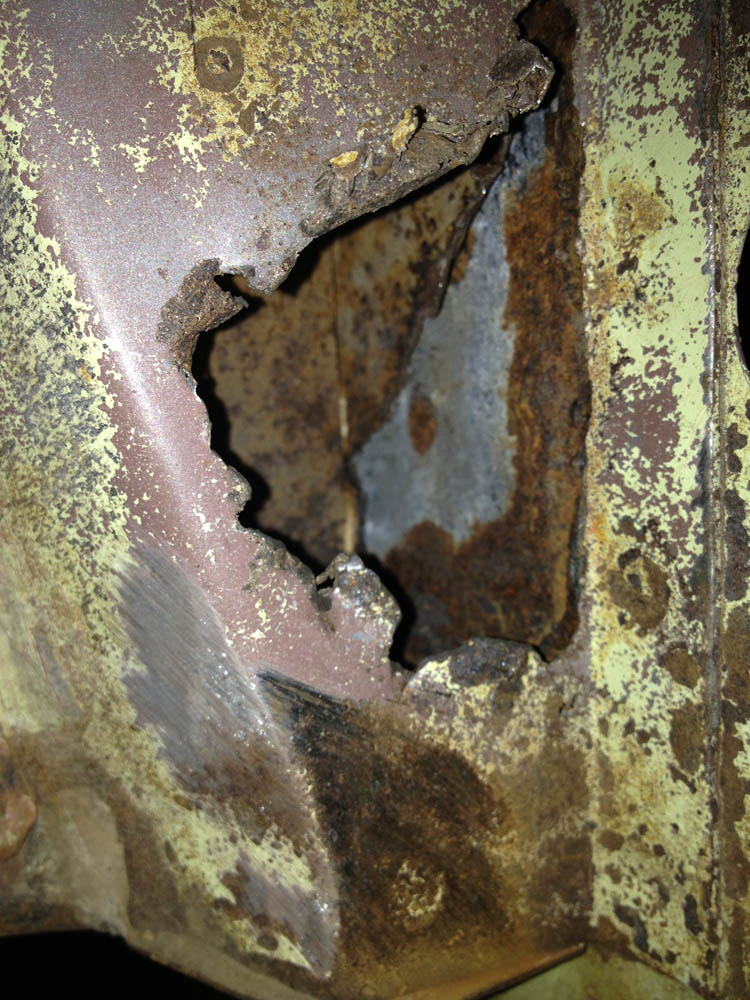
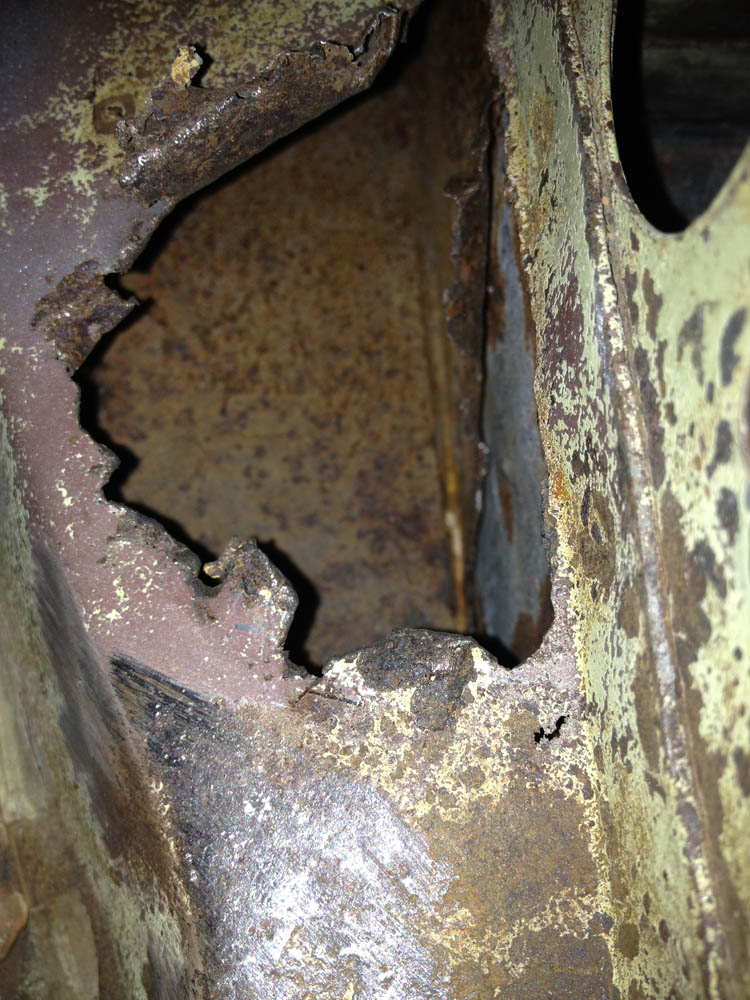
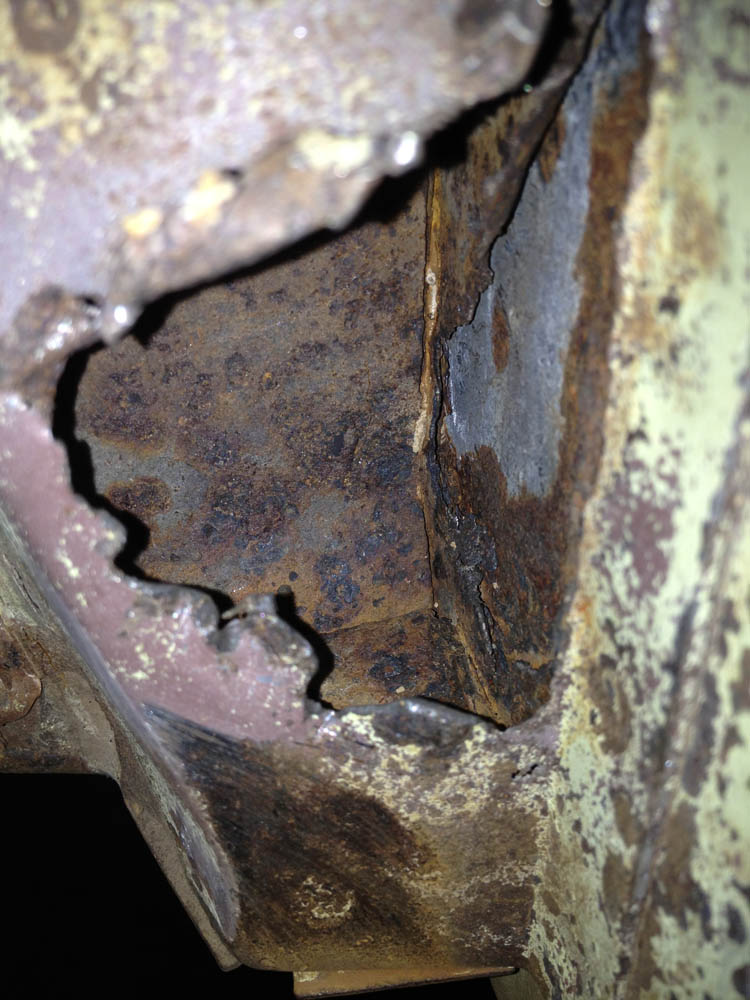
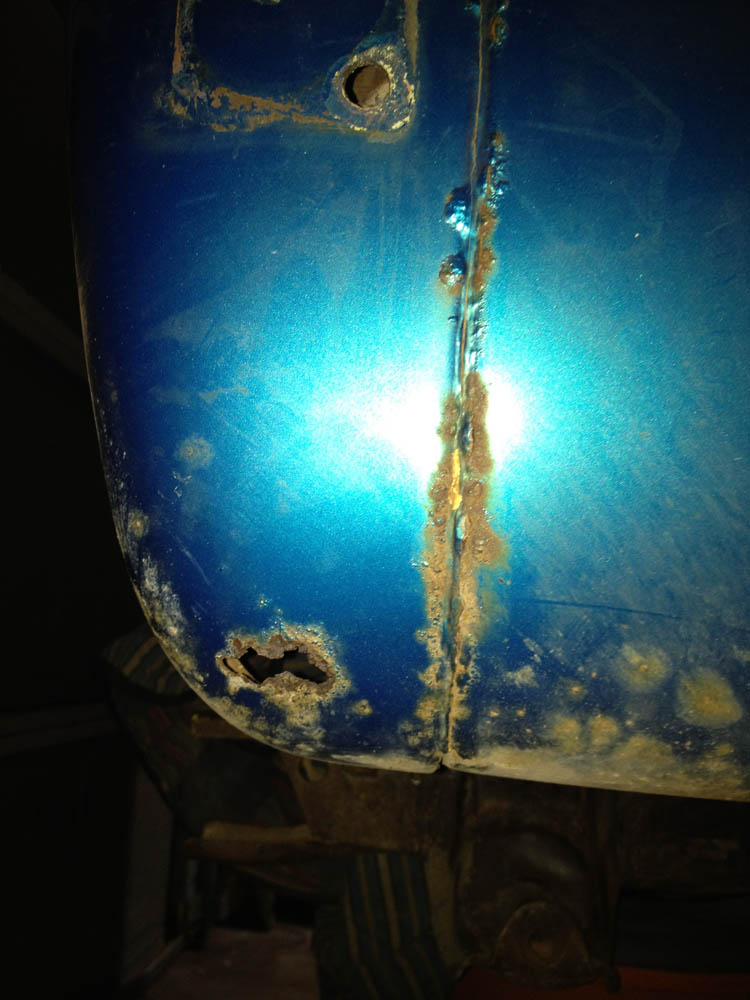
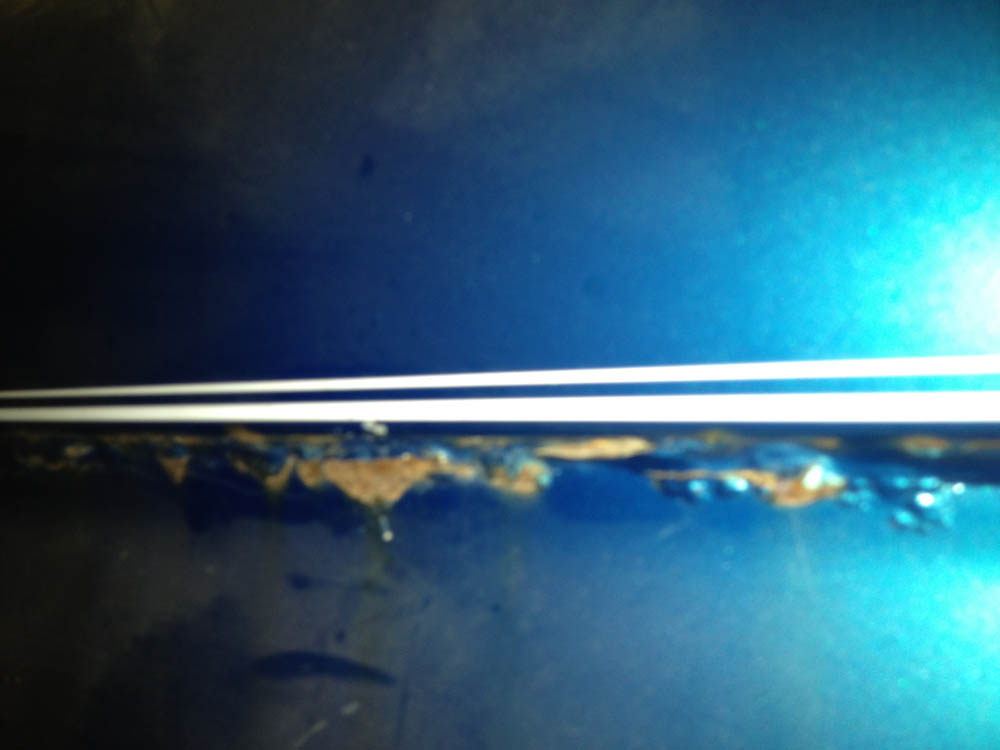
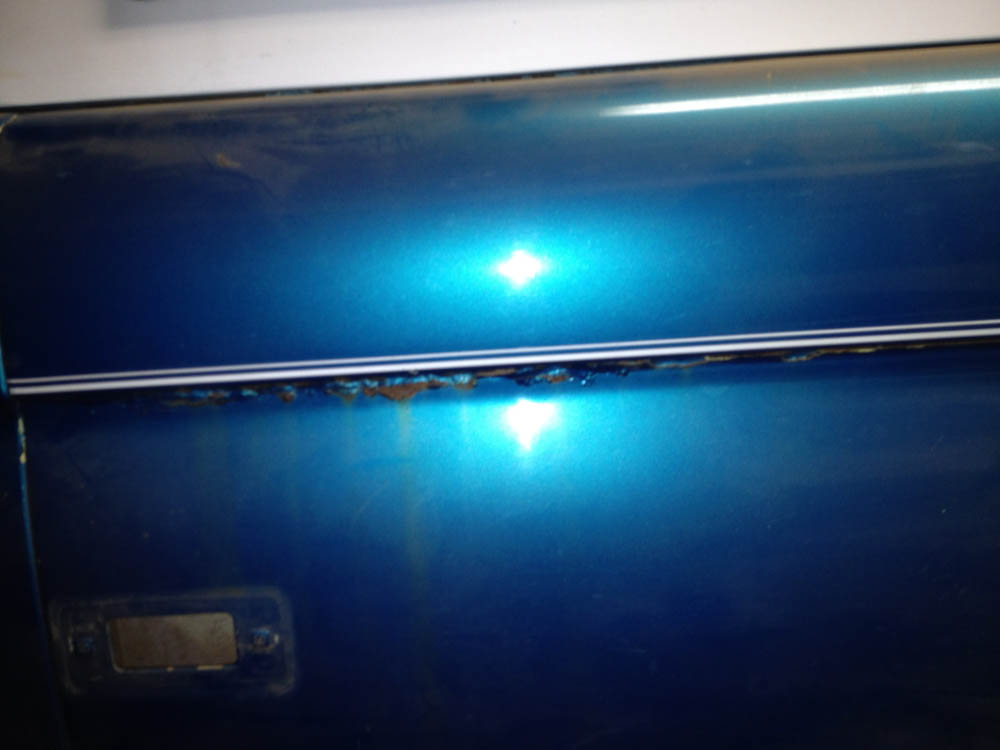
Next up is the front side front door pillar post on the drivers side. I was thinking the whole post would have to be replaced. But maybe i can patch it and make sure i seal the inside real good with a decent rust inhibitor? i tried to get some pics up inside.. the rot really doesn't go up too far and I couldn't find any underneath or on the hinge side of the post... what would you guys do?
Drivers side pillar.

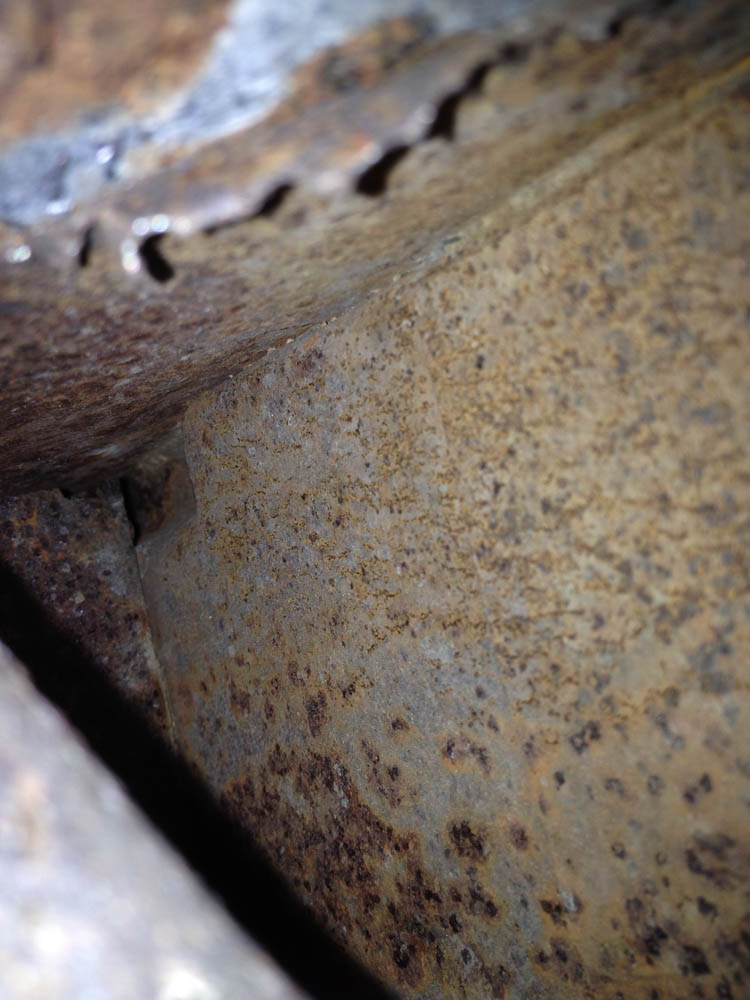
Passenger side door pillar...
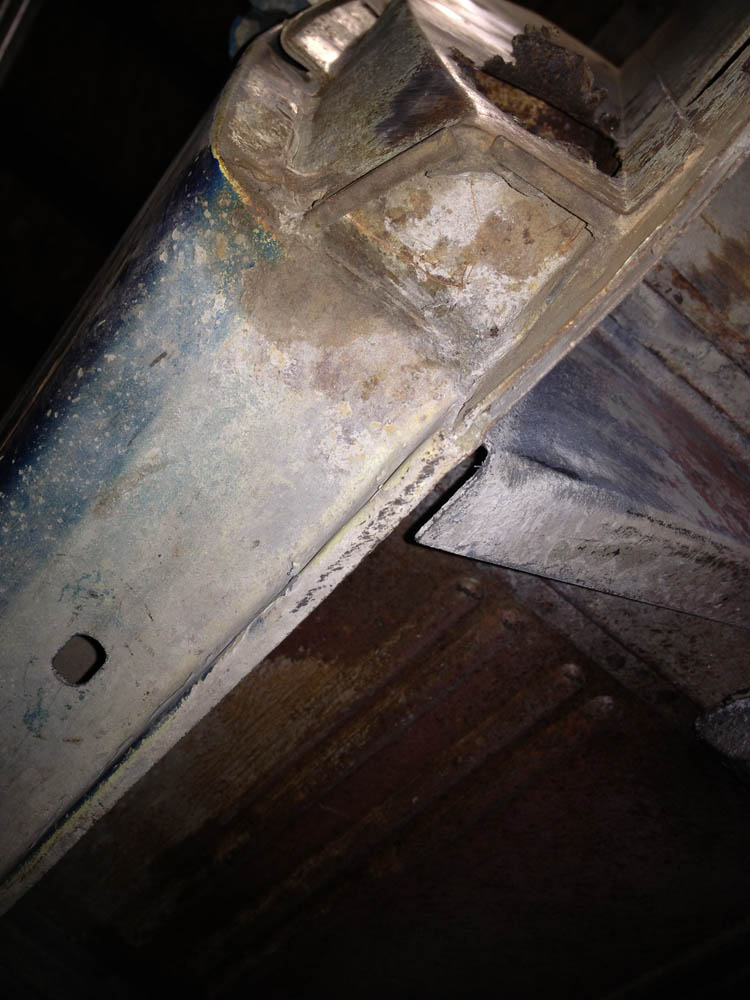
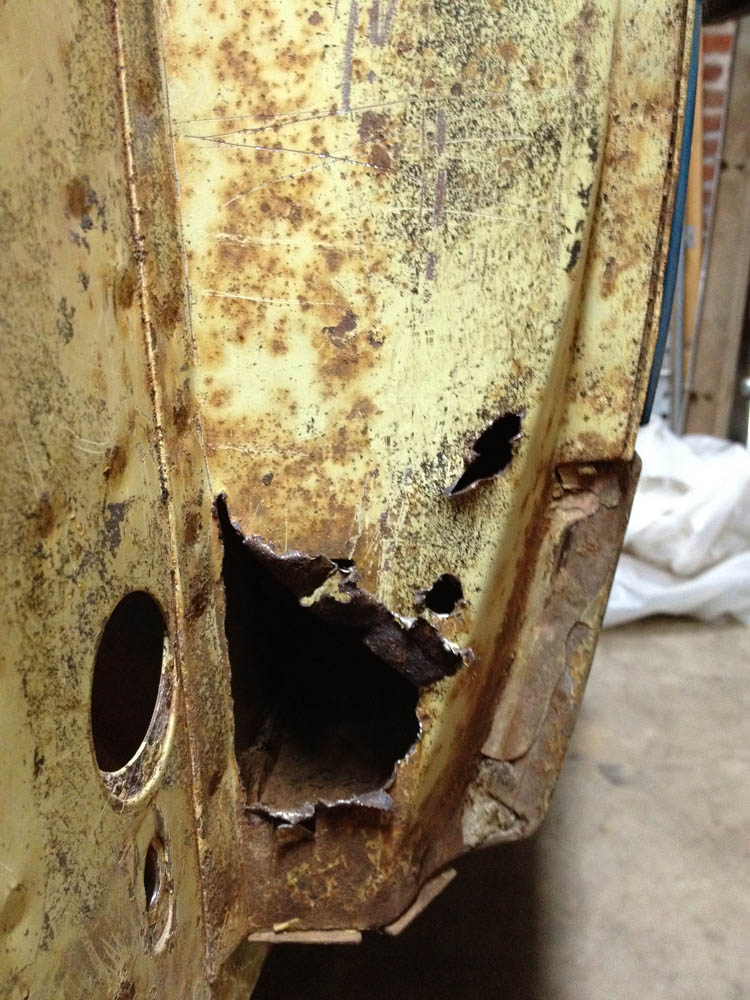
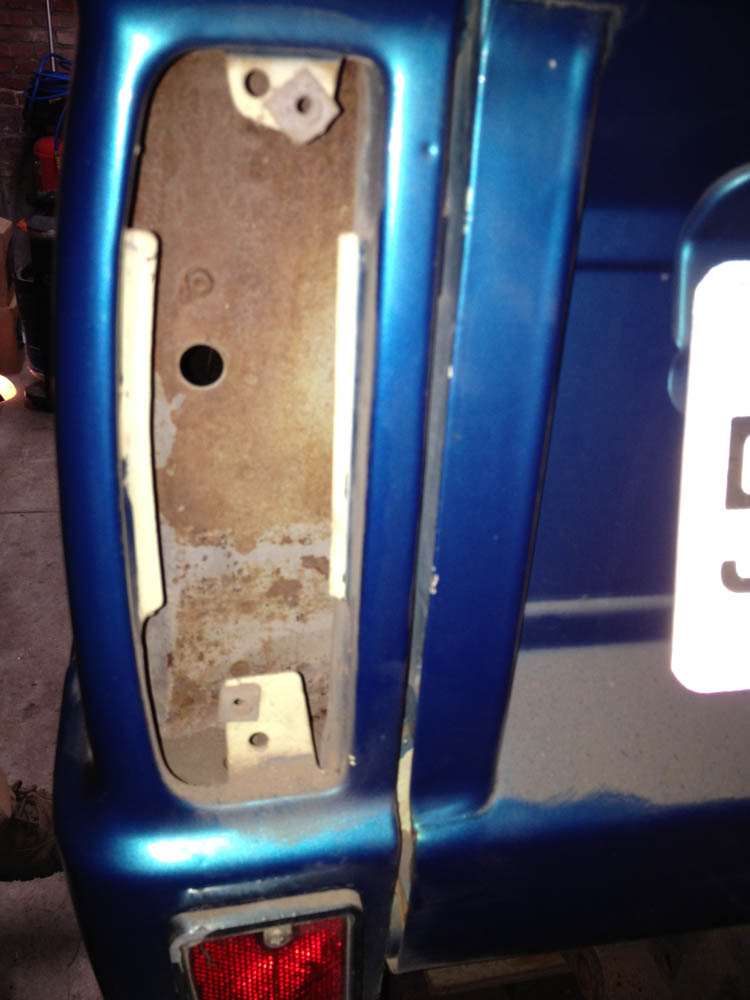
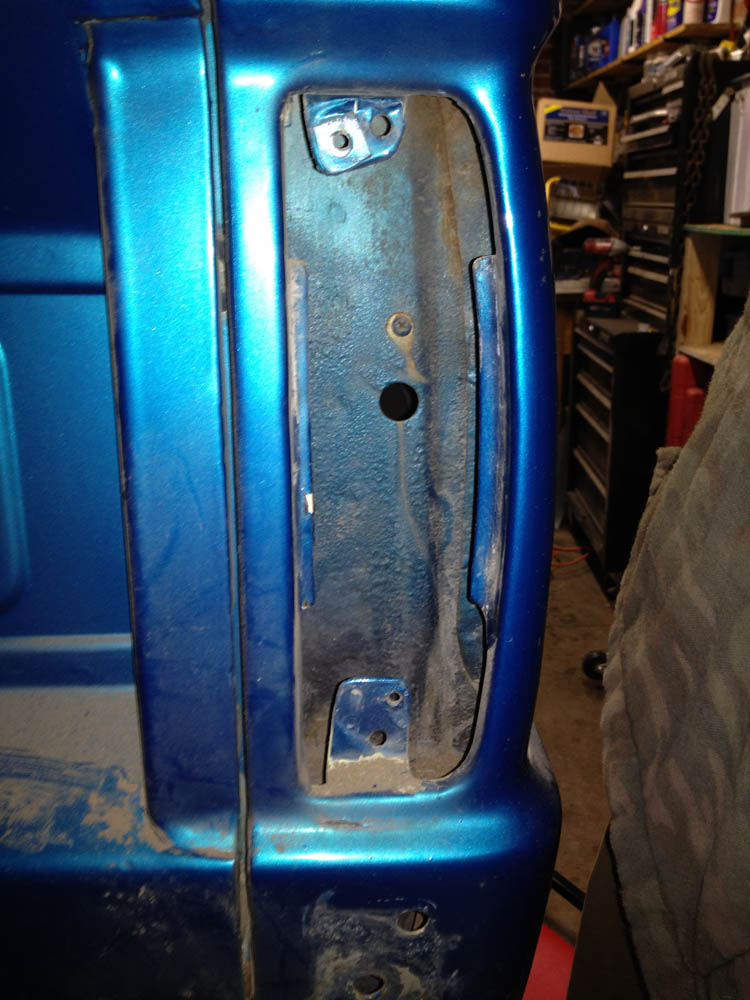
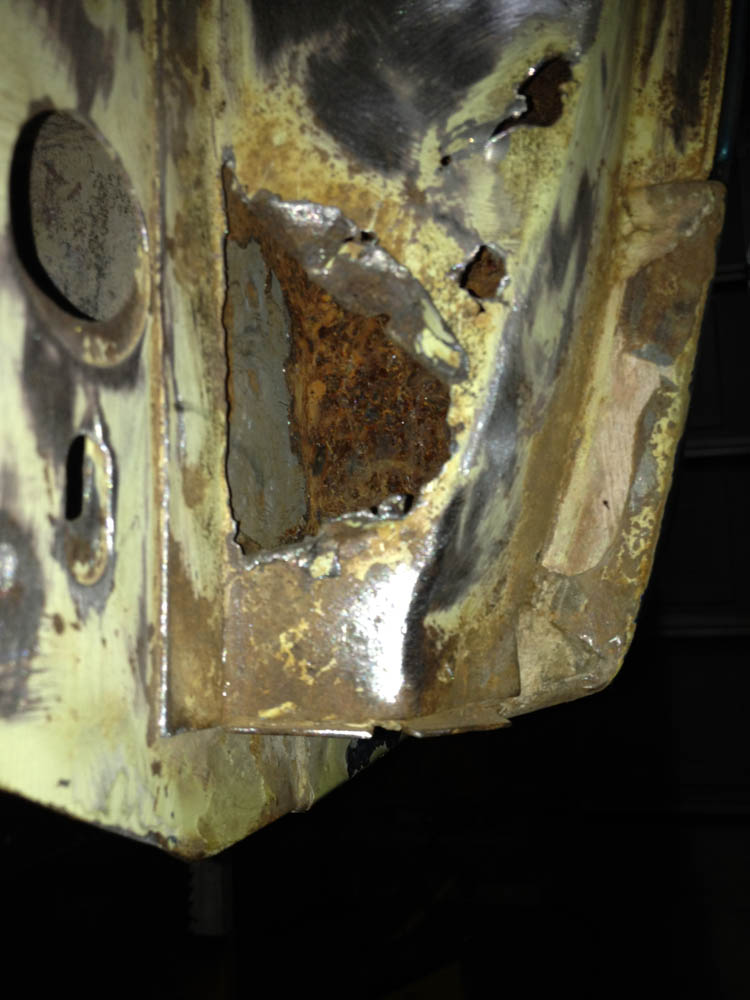
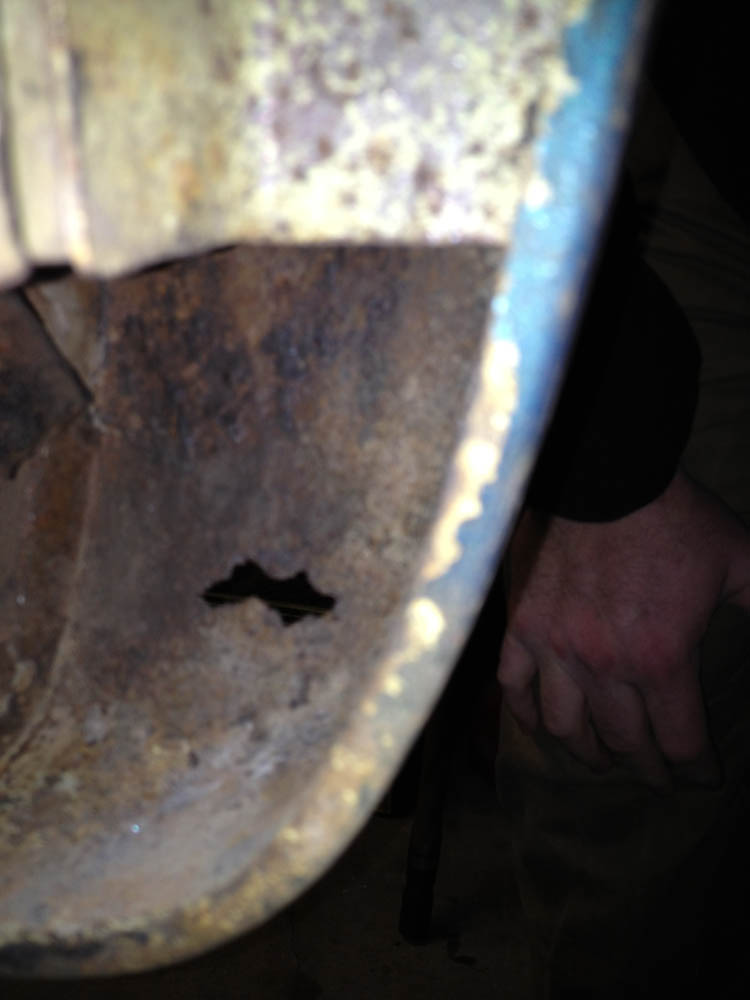
My next areas are the two rear lower corner panels, one had been patched or partially patched as it turns out.. a little bondo on the bottom of the tail light panel.. feel right out when i hit it with the needler.. anyway thinking i should just make up new sections for each side and bend them into shape.. however it might be better to just replace both ends? thoughts?
Drivers side
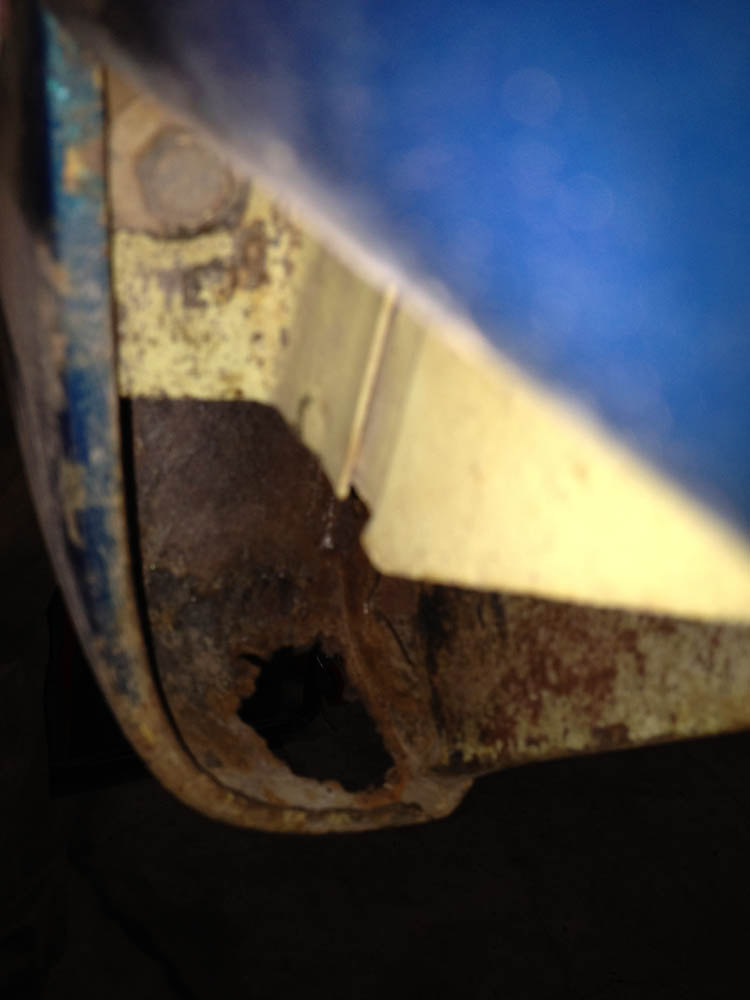

Passenger side
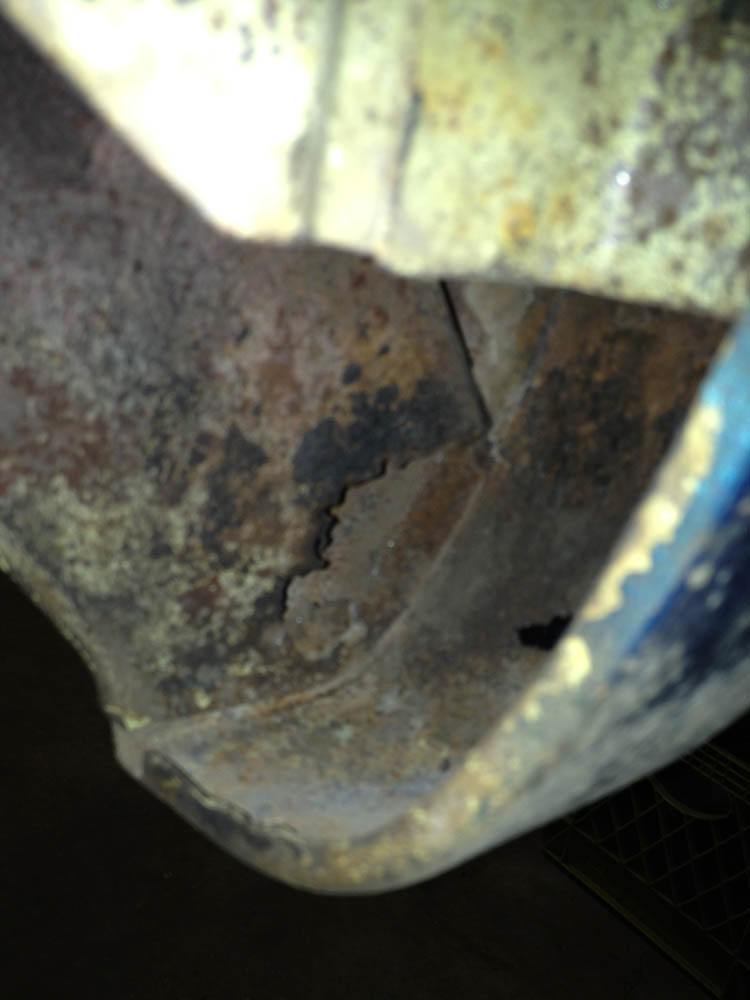
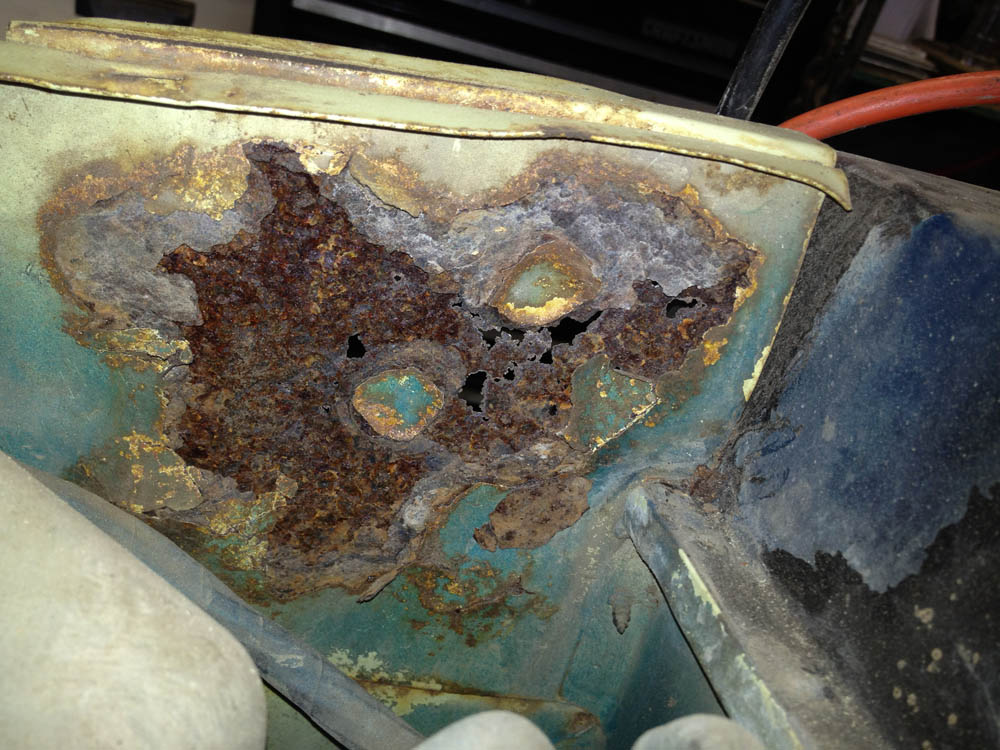
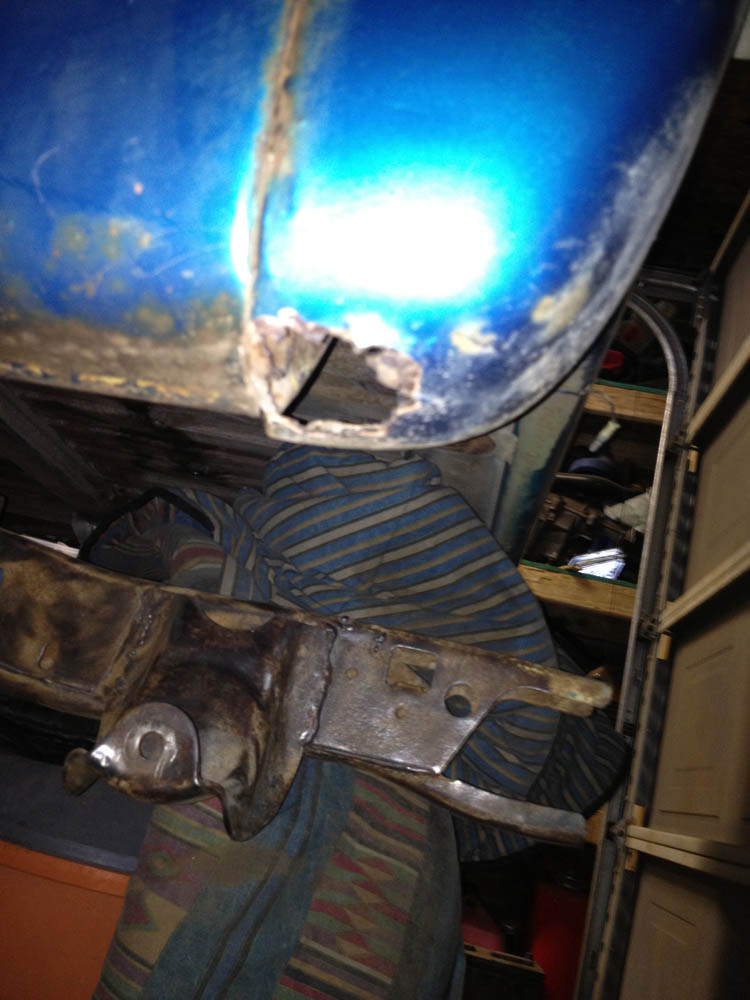
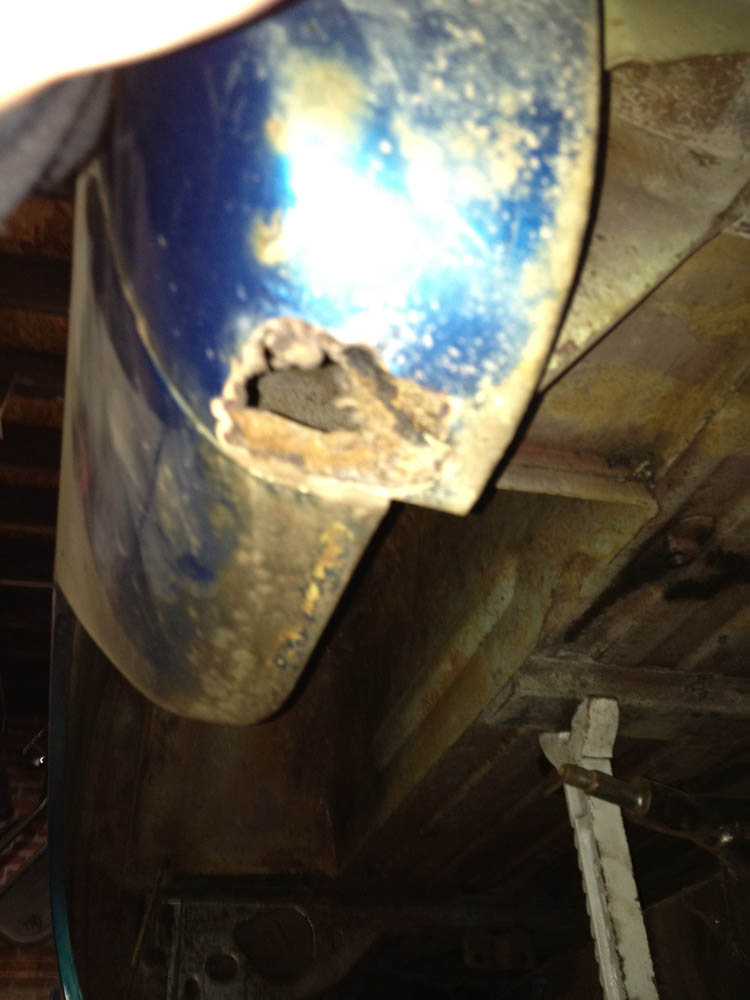
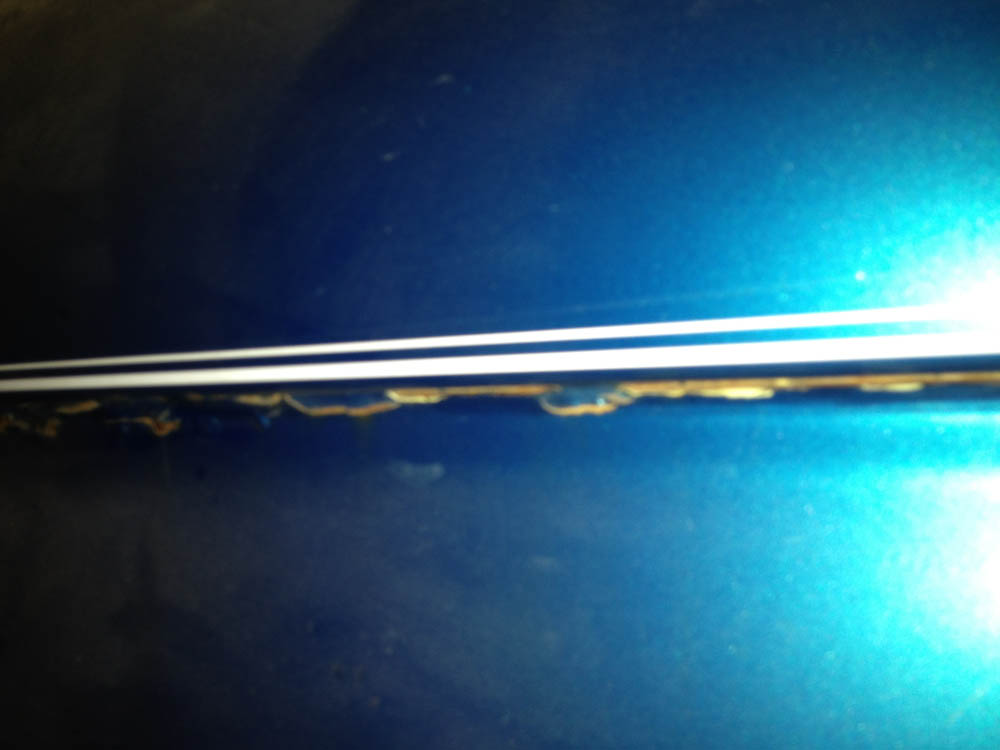
and so the last area(s) the quarter panels... the passenger side seems to be the worse bit. Not sure what to do besides to go and replace both panels.. which would really be a bummer since no other part of the quarter panel is rusted and Iam trying to keep the truck as original as possible.. anyway.. advice?
Drivers side quarter panel.
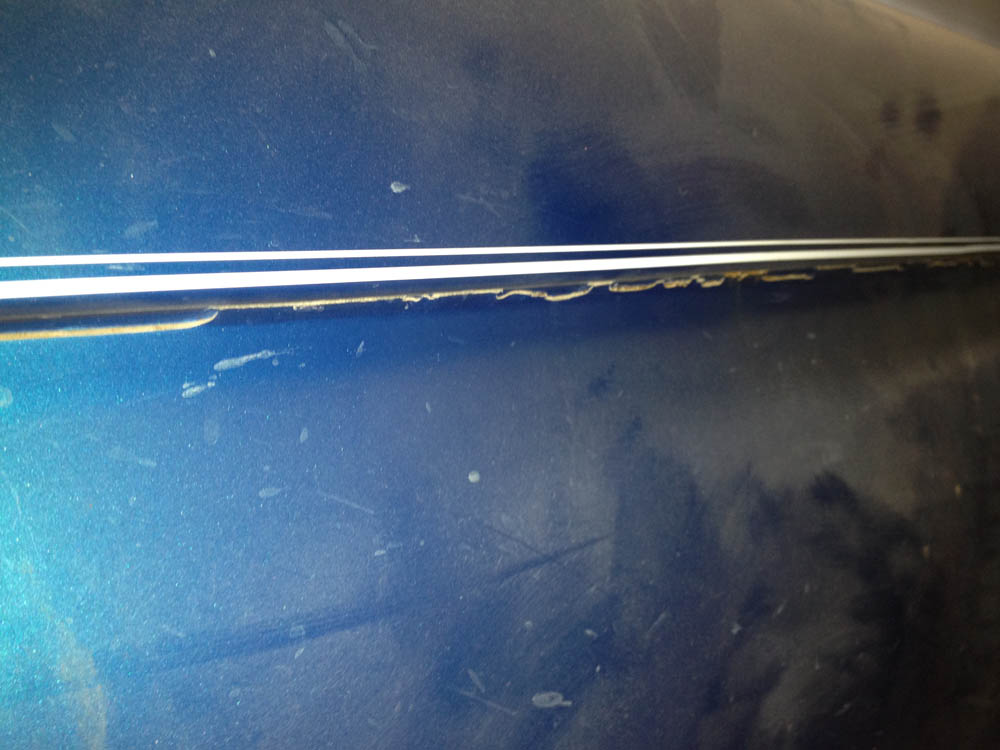
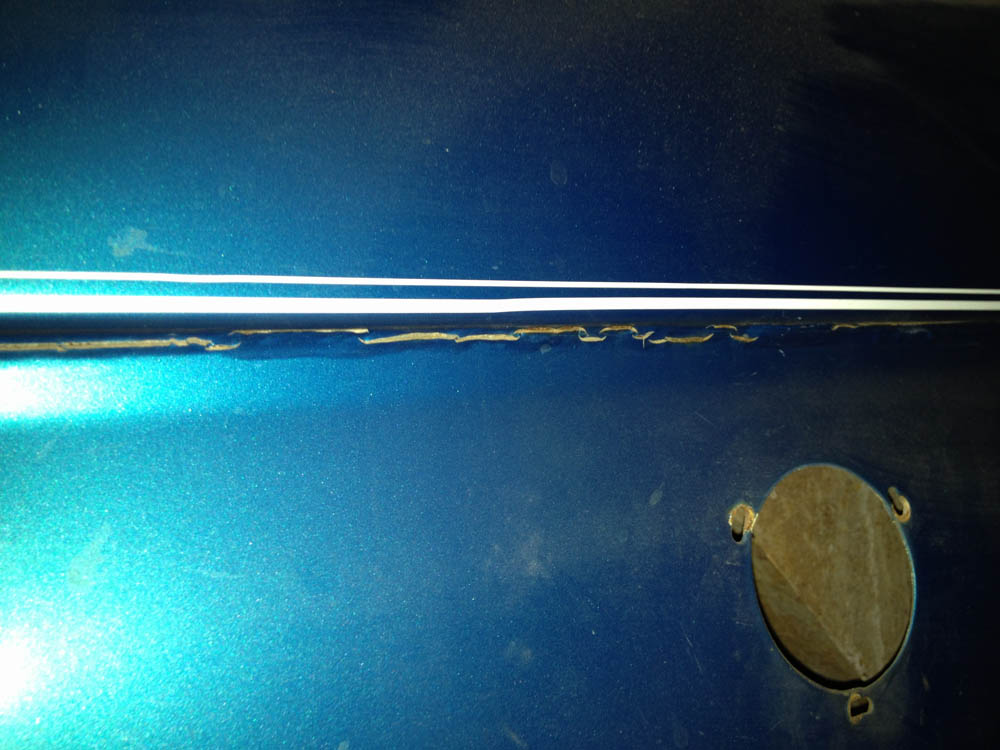
Passenger side quarter panel

Anyway those are my areas to work on... i know compared to some rigs its not that bad.. but I'm not a body guy and seeing how iam restoring this truck back to original and I want to make sure its done right. Any advice is welcome
I expect I can seal the frame and most of the body and then tackle the patches once the suspension is back together...so i have some time...
Anyway i have started thinking about the rust spots that need to be repaired and took a few photos of the problem areas. I have a good idea on what to do on most of the areas however a little advice is always welcome!
I'm fighting the urge to get the suspension together and then stripping down the tub and just get it blasted patched and then painted... but sadly its not in my budget right now... so reluctantly it can wait.
Anyway, here is a breakdown of what I have to patch, replace or ???
The front side walls of the engine bay are pretty obvious, patch them up (after i get the frame back on the body). Pretty straight forward.
Drivers Side
Passenger Side
Next up is the front side front door pillar post on the drivers side. I was thinking the whole post would have to be replaced. But maybe i can patch it and make sure i seal the inside real good with a decent rust inhibitor? i tried to get some pics up inside.. the rot really doesn't go up too far and I couldn't find any underneath or on the hinge side of the post... what would you guys do?
Drivers side pillar.
Passenger side door pillar...
My next areas are the two rear lower corner panels, one had been patched or partially patched as it turns out.. a little bondo on the bottom of the tail light panel.. feel right out when i hit it with the needler.. anyway thinking i should just make up new sections for each side and bend them into shape.. however it might be better to just replace both ends? thoughts?
Drivers side
Passenger side
and so the last area(s) the quarter panels... the passenger side seems to be the worse bit. Not sure what to do besides to go and replace both panels.. which would really be a bummer since no other part of the quarter panel is rusted and Iam trying to keep the truck as original as possible.. anyway.. advice?
Drivers side quarter panel.
Passenger side quarter panel
Anyway those are my areas to work on... i know compared to some rigs its not that bad.. but I'm not a body guy and seeing how iam restoring this truck back to original and I want to make sure its done right. Any advice is welcome
I expect I can seal the frame and most of the body and then tackle the patches once the suspension is back together...so i have some time...
OP
OP
landshark99
Bronco Guru
- Joined
- Oct 13, 2011
- Messages
- 1,401
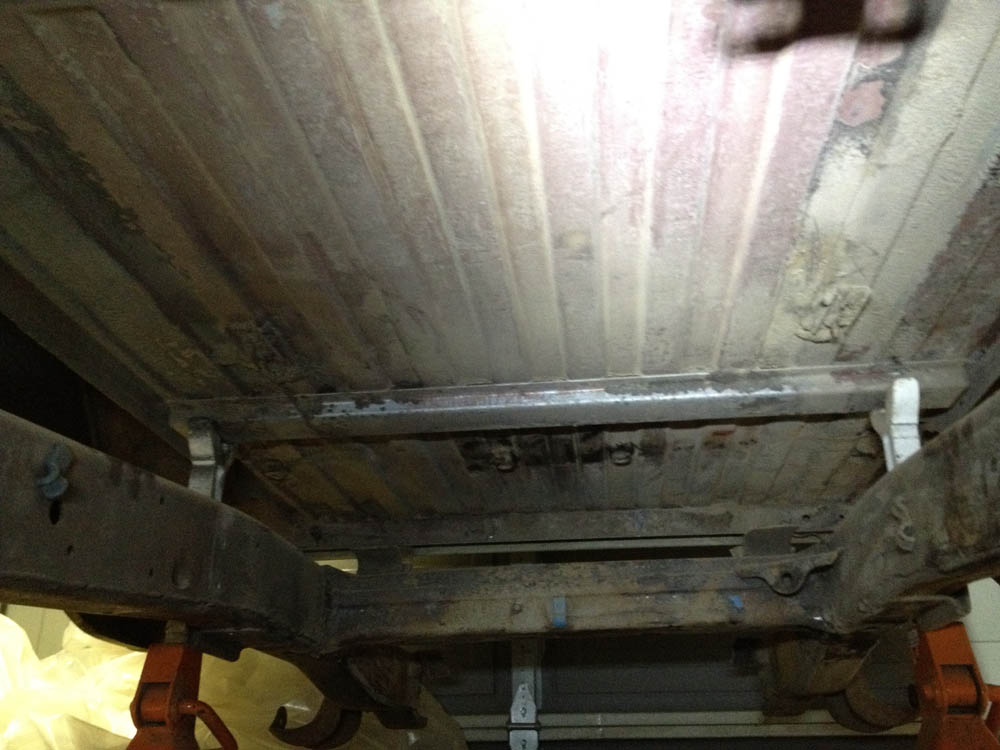
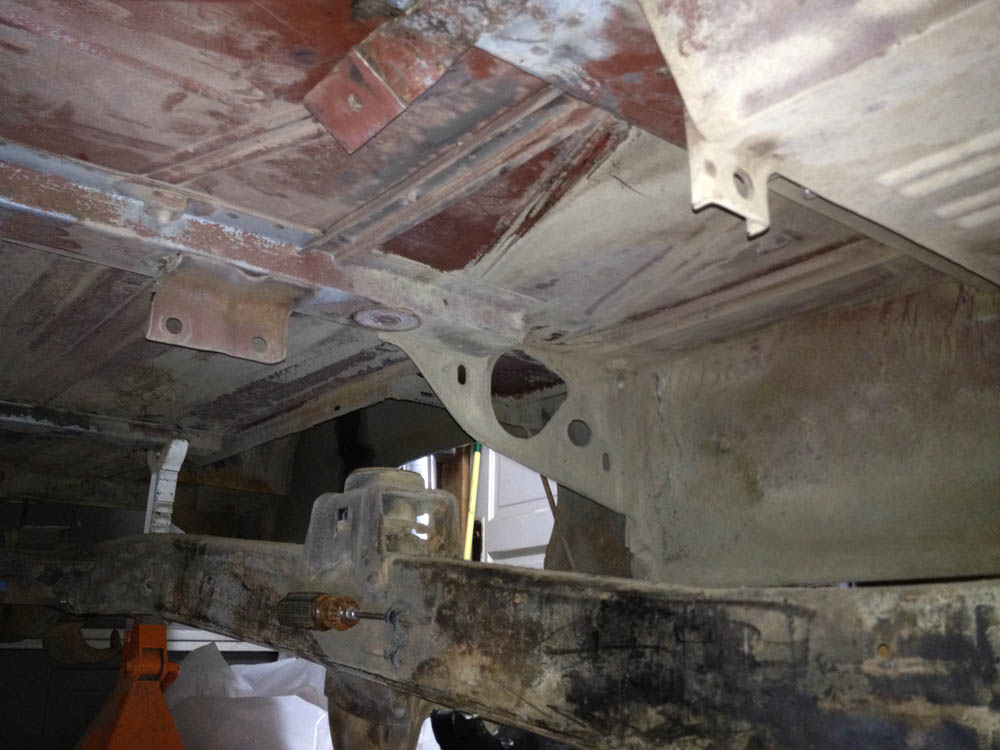
And just a few pics of the frame and underbody.. almost there..

got most of the dirt and sand out of the frame.. i will give it a good rinse and do the best i can to clean it up before i drag a rag soaked with por-15 through...

got most of the dirt and sand out of the frame.. i will give it a good rinse and do the best i can to clean it up before i drag a rag soaked with por-15 through...
sellitall
Bronco Guru
Once you start tearing into these vehicles it becomes a roller coater of emotion. You pull the carpet up and get a relief at the fact the floors look good. Then you poke a screwdriver in a lower taillight housing seeing a "dimple" in the metal to find a gallon of filler covering up a gaping hole.
All in all though you have a nice starting point. My rusty tub is probably 100 pound lighter than yours due to mother nature taking her share of metal. Keep up the good work. WE NEED MORE PICS!!!
All in all though you have a nice starting point. My rusty tub is probably 100 pound lighter than yours due to mother nature taking her share of metal. Keep up the good work. WE NEED MORE PICS!!!