• Just a reminder that you won't be able to start new posts or reply to existings posts in the Archive forum.

    This is where all the old posts go so they can still be used for reference and searched.
  • Welcome to ClassicBroncos! - You are currently viewing the forums as a GUEST. To take advantage of all the site features, please take a moment to register. It's fast, simple and absolutely free. So please join our community today!
    If you have problems registering or can't log into your account, please contact Admin.

Pulled trigger on a stroker... finally

OP
OP
Landho

Landho

Sr. Member
Joined
Aug 10, 2008
Messages
442
Loc.
Cypress, TX
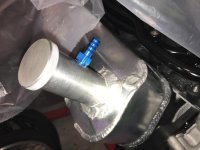
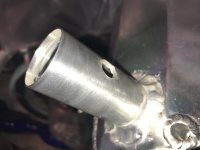
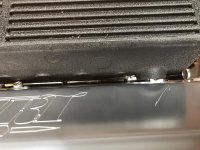
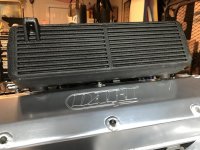
Oh, my passenger side "EFI breather ready" oil filler... my buddy did okay tig welding it, not as nice as the valve cover mfg, but it will do. Tapped and threaded with a nipple (I probably replace the blue nipple). Will fill the inside tube of the filler beneath the nipple with stainless wire mesh, also - the tube was welded onto the valve cover and will drill several small holes up into the valve cover (inside the welded on tube), this will basically act like a baffle/oil vapor collector - I hope.
 

Attachments

  • IMG_4600.jpg
    IMG_4600.jpg
    71.3 KB · Views: 35
  • IMG_4601.jpg
    IMG_4601.jpg
    56 KB · Views: 38

DirtDonk

Contributor
Bronco Guru
Joined
Nov 3, 2003
Messages
47,490
Lookin' great. Can't wait to see the fire-up video!:cool:

...Turned crank to make sure valve I am working on is at base lobe, assembly lubed stuff up, wiggled and turned push rod as I tightened stud nut onto rocker until no play, tightened about 2/5 turn (between 1/4 and 1/2),backed off a fraction, cinched Allen stud lock down, then tightened fraction w/ Allen stud already down.

Sounds good. But I wanted to check on one thing that does catch many, MANY first time hydraulic lifter adjuster type personages.;D
The "until no play" part can be misleading when you're feeling around the first time. As long as you go by "up and down" play and not "rotational" play, you're likely good to go.
The problem is that lots of people will turn the adjuster down until it's hard to turn the pushrod by hand. This can be WAY too far.
The pushrod is such a nice fit in there and well lubed to boot, that you can continue to spin them by hand way past the zero-lash point. So a light touch and an up-and-down movement is what you're working with.
I say a light touch because on some engines and if you still have your good GI Joe Kung Fu Grip, you can even compress the spring in the lifter if you are checking too aggressively. Skewing the readings.

Anyway, you may have done it just right, but I wanted to talk about one of the main pitfalls we see on hydraulic setups the first go-round. Many an engine has failed to fire up the first time due to valves not closing all the way because the rockers were adjusted too tight.

Paul
 
OP
OP
Landho

Landho

Sr. Member
Joined
Aug 10, 2008
Messages
442
Loc.
Cypress, TX
You are spot on - I was a bit confused in the zero lash thing and neither of my manuals had clear advice - when I became uncertain about the adjustment - specifically as you mention about zero lash ( rod rotation/play/ finger loose / 1/4 turn / etc) I just grabbed the phone and called for advice from the builder at the machine shop. Also, contacted both Dart and Scorpion, and then contacted comp cams.

Comp Cam lifters, spiders, and Rods. I followed their advice on up/down (none, but not so tight you can't spin rod, 1/4 to 1/2 turn). Since engine is dry (no oil) they recommend I check again after I prime and bump engine over (no start) to fill lifters and rods with oil - which I will do.

Dart, I followed their advice on torque, guide and rod alignment and install (start with exhaust guide first, align everything including rod and rocker, torque down guide, then check alignment again after adjusting lash)

Scorpion rollers, I followed their advice on side play, rocker alignment... setting lash advice was similar to Comp advice and they in fact suggested I contact comp since it is their lifters.

So - for zero lash - I made sure to be off lobe on the valve working on (intake is off, easy to see that), made sure lifter was not compressed or stuck, turned down rocker nut on to rocker while using up down spin and wiggle with rod and until no more up/down play. Tightened a little over 1/4 but not to 1/2

Fingers crossed an it.
 
OP
OP
Landho

Landho

Sr. Member
Joined
Aug 10, 2008
Messages
442
Loc.
Cypress, TX
Y'all are probably like "shut up, Trump is on TV" and I'm whatever posting everyday thing thing which has consumed me...


Removed that other vacuum line and filled it on the upper intake...

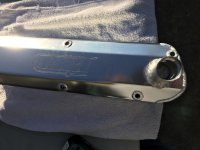
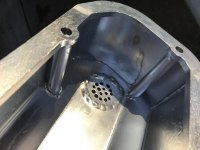
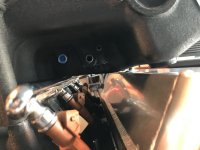
Drilled oil filler/baffle holes in the valve covers... couldn't get my screen idea to work well - will keep working in it - should be fine as is. I intentionally drilled bigger holes on bottom (as cover installed it would be bottom)... jankey, but should be fine.

Waiting on 1" plenum spacer and bigger intake manifold to heads gaskets to arrive... intake plenum sits almost 1/4" above block while resting on heads/gasket - but looks like the corks &/or some grey sealant should resolve that.
 

Attachments

  • IMG_4604.jpg
    IMG_4604.jpg
    97.4 KB · Views: 31
  • IMG_4607.jpg
    IMG_4607.jpg
    76 KB · Views: 29
  • IMG_4609.jpg
    IMG_4609.jpg
    129.7 KB · Views: 29
  • IMG_4610.jpg
    IMG_4610.jpg
    132.2 KB · Views: 29
  • IMG_4611.jpg
    IMG_4611.jpg
    68.6 KB · Views: 27
OP
OP
Landho

Landho

Sr. Member
Joined
Aug 10, 2008
Messages
442
Loc.
Cypress, TX
the heads are setup with 1.437" springs from Dart, with 130lbs seat pressure @1.800" and per dart and checked at machine shop, which is well with spec for the b303 or just about most stock or RV-ish hydraulic roller cams...
 
Top