• Welcome to ClassicBroncos! - You are currently viewing the forums as a GUEST. To take advantage of all the site features, please take a moment to register. It's fast, simple and absolutely free. So please join our community today!
    If you have problems registering or can't log into your account, please contact Admin.

Baja or Bust Build Thread

OP
OP
Swerve

Swerve

Sr. Member
Joined
Jul 31, 2014
Messages
526
Mounted the emergency brake handle...
 

Attachments

  • IMG_7435.jpg
    IMG_7435.jpg
    104.2 KB · Views: 104
  • IMG_7409.jpg
    IMG_7409.jpg
    105.2 KB · Views: 91
OP
OP
Swerve

Swerve

Sr. Member
Joined
Jul 31, 2014
Messages
526
Front axle from Currie showed up...nick of paint and then final install next weekend...
 

Attachments

  • IMG_0001.jpg
    IMG_0001.jpg
    91.2 KB · Views: 97
OP
OP
Swerve

Swerve

Sr. Member
Joined
Jul 31, 2014
Messages
526
Got some paint on it...
 

Attachments

  • IMG_0178.jpg
    IMG_0178.jpg
    110 KB · Views: 57
  • IMG_0179.jpg
    IMG_0179.jpg
    106.1 KB · Views: 49
Last edited:

BajaBronco

Contributor
Bronco Guru
Joined
Apr 30, 2003
Messages
3,932
really awesome! Now that Norra is over I'm really hoping we can come support you somehow in November....
 
OP
OP
Swerve

Swerve

Sr. Member
Joined
Jul 31, 2014
Messages
526
Front axle in (ball busting work doing it by myself!)...track bar in...migs coil cups...tie rod on (may go tro later)...rotors on...fairly productive day. (No making fun of my precarious jack stands)
 

Attachments

  • IMG_0196.jpg
    IMG_0196.jpg
    136.1 KB · Views: 79
  • IMG_0195.jpg
    IMG_0195.jpg
    86.5 KB · Views: 80
  • IMG_0194.jpg
    IMG_0194.jpg
    104.5 KB · Views: 81
  • IMG_0193.jpg
    IMG_0193.jpg
    108.1 KB · Views: 79
  • IMG_0192.jpg
    IMG_0192.jpg
    91.3 KB · Views: 81
  • IMG_0191.jpg
    IMG_0191.jpg
    105.3 KB · Views: 83
OP
OP
Swerve

Swerve

Sr. Member
Joined
Jul 31, 2014
Messages
526
My wheel spacers came today, so front wheels and tires on, and it rolls again! Coil springs shoved in tentatively to start figuring shock mounts and shock length. So far no Bronco lean at the front...
 

Attachments

  • IMG_0221.jpg
    IMG_0221.jpg
    71.7 KB · Views: 78
  • IMG_0220.jpg
    IMG_0220.jpg
    123.7 KB · Views: 75
  • IMG_0219.jpg
    IMG_0219.jpg
    135.2 KB · Views: 86
  • IMG_0218.jpg
    IMG_0218.jpg
    121.8 KB · Views: 78
OP
OP
Swerve

Swerve

Sr. Member
Joined
Jul 31, 2014
Messages
526
Thanks guys!

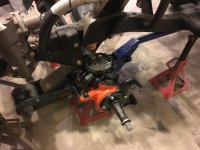
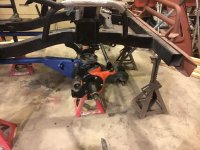
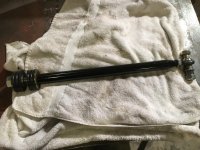
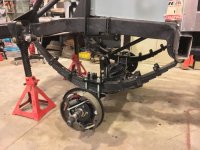
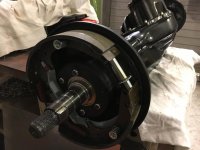
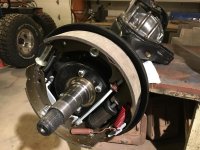
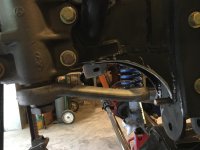
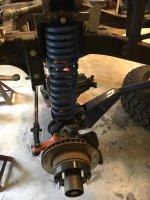
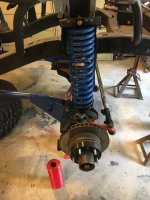
I removed the rear axle today for some final details. I tapped the bottom for a small, flush fitting drain plug.

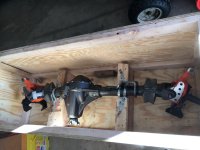
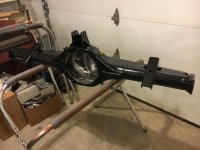
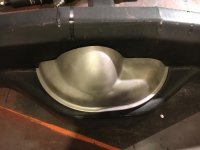
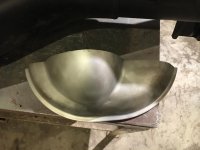
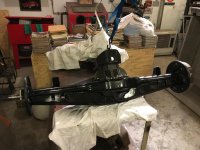
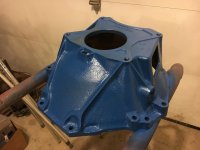
When I first ordered the rear axle housing, the advert stated that the center part was made from 1/4" steel. However, they neglected to include that the rear cover part of the center housing was not 1/4". The rear cover section is the same thin sheet metal as on a stock housing. After talking with them on the phone they told me that they did in fact make a thicker rear cover section and they sent one to me for free.

Today I finally got around to cutting, fitting and welding the thicker cover piece right on top of the existing thinner one, it is sort of laminated now. I didn't bother doing the section above the back brace as I figured that area should be out of harms way, I hope!

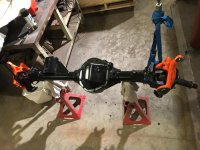
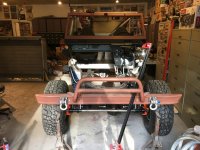
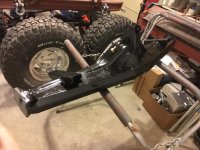
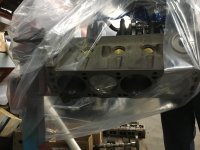
Got paint on my Wrap Trap and rattle canned the housing for good measure...
 

Attachments

  • IMG_0237.jpg
    IMG_0237.jpg
    113.1 KB · Views: 72
  • IMG_0236.jpg
    IMG_0236.jpg
    84 KB · Views: 68
  • IMG_0235.jpg
    IMG_0235.jpg
    154.4 KB · Views: 61
  • IMG_0232.jpg
    IMG_0232.jpg
    56.5 KB · Views: 60
  • IMG_0231.jpg
    IMG_0231.jpg
    71.3 KB · Views: 62
  • IMG_0230.jpg
    IMG_0230.jpg
    59.6 KB · Views: 64
  • IMG_0233.jpg
    IMG_0233.jpg
    66 KB · Views: 68
OP
OP
Swerve

Swerve

Sr. Member
Joined
Jul 31, 2014
Messages
526
Not the best photos but the short block is mostly assembled, engine should be finished and dyno'ed in a couple of weeks...
 

Attachments

  • IMG_0266.jpg
    IMG_0266.jpg
    88.5 KB · Views: 32
  • IMG_0267.jpg
    IMG_0267.jpg
    109.2 KB · Views: 35
OP
OP
Swerve

Swerve

Sr. Member
Joined
Jul 31, 2014
Messages
526
Thanks migs! I also got the rear backing plates dressed...

These are stock '76 rears, but they are no longer self adjusting, just my personal preference...

The spring between the bottom of the shoes that holds the adjuster is actually from a spring kit for '57 Chevy front, in case someone else was interested in converting their own from self adjusting...
 

Attachments

  • IMG_0272.jpg
    IMG_0272.jpg
    115.3 KB · Views: 46
Last edited:
OP
OP
Swerve

Swerve

Sr. Member
Joined
Jul 31, 2014
Messages
526
Thanks broncoitis...

I installed the center section for hopefully the last time. It's a Mosher Wavetrac, 4:88 to 1. The Warn full float axle shafts, spindles, seals, and the brake backing plates are all on. The rear housing is back under the leaf springs. The Wrap Trap is back in but it will need final adjustment later. I ran out of wheel bearing grease or it would be rolling again...A trip to NAPA in the morning will cure that...
 

Attachments

  • IMG_0280.jpg
    IMG_0280.jpg
    112.3 KB · Views: 78
  • IMG_0275.jpg
    IMG_0275.jpg
    105.6 KB · Views: 68
  • IMG_0274.jpg
    IMG_0274.jpg
    75.2 KB · Views: 55
  • IMG_0273.jpg
    IMG_0273.jpg
    106.7 KB · Views: 64
OP
OP
Swerve

Swerve

Sr. Member
Joined
Jul 31, 2014
Messages
526
I installed the parking brake cables and tentatively fabled up my parking brake system. Still some minor details to iron out, but it is functional as is. I assembled both rear Warn full float hub assemblies and installed the Warn premium locking hubs. Final torque on rear leaf spring u-bolts...Found out that I will need to get longer wheel studs on my spacers...two steps forward, one step back!
 

Attachments

  • IMG_0292.jpg
    IMG_0292.jpg
    94.7 KB · Views: 59
  • IMG_0291.jpg
    IMG_0291.jpg
    99.9 KB · Views: 55
  • IMG_0290.jpg
    IMG_0290.jpg
    106.3 KB · Views: 54
  • IMG_0297.jpg
    IMG_0297.jpg
    57.2 KB · Views: 52
OP
OP
Swerve

Swerve

Sr. Member
Joined
Jul 31, 2014
Messages
526
Today was mostly figuring out my front coil mounting. I used migs coil cups, and then I added 8 degree shims under them to get my coil springs nice and straight. This meant that I needed an 8 degree "washer" so the two coil cup bolt heads could seat flush. I bought a second pair of 8 degree shims and I cut one of them down the middle, tack welded them in place and through drilled.

For the top I made my own upper retainers from 3/16 steel. Much stronger than stock. I made them a little bit wider than stock as well, and I used 7/16 grade 8 hardware. I reinforced the lip with 1/8 steel too. Still some trimming left to do.

I radiused the upper track bar mount gussets that I had installed earlier. Pitman arm now has plenty of clearance. Later if I decide to go TRO I may need to do some more clearance.

Cleaned and painted my bell housing...
 

Attachments

  • IMG_0316.jpg
    IMG_0316.jpg
    132.7 KB · Views: 76
  • IMG_0317.jpg
    IMG_0317.jpg
    84.6 KB · Views: 61
  • IMG_0314.jpg
    IMG_0314.jpg
    74.1 KB · Views: 68
  • IMG_0315.jpg
    IMG_0315.jpg
    98.8 KB · Views: 67
  • IMG_0313.jpg
    IMG_0313.jpg
    105 KB · Views: 70
Last edited:
OP
OP
Swerve

Swerve

Sr. Member
Joined
Jul 31, 2014
Messages
526
Stopped by the machine shop on my way home...cylinder heads are ready for assembly...drilled and tapped for screw in rocker studs...

Fedex brought my carb hat today. I eventually plan on a snorkel type air intake, but it is still in the development stage...
 

Attachments

  • IMG_0323.jpg
    IMG_0323.jpg
    110.5 KB · Views: 35
  • IMG_0324.jpg
    IMG_0324.jpg
    127.3 KB · Views: 34
  • IMG_0325.jpg
    IMG_0325.jpg
    97 KB · Views: 45
Last edited:
Top