• Welcome to ClassicBroncos! - You are currently viewing the forums as a GUEST. To take advantage of all the site features, please take a moment to register. It's fast, simple and absolutely free. So please join our community today!
    If you have problems registering or can't log into your account, please contact Admin.

Transfer Seat Part 2

OP
OP
rydog1130

rydog1130

Sponsor/Vendor
Bronco Guru
Joined
Jun 19, 2014
Messages
4,029
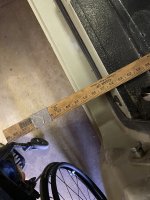
Was back out at my dads, did some measurements to make sure things are going to fit! I’ll be dismantling the lift and fitting the rear tower to the internal 3” square stock so I can weight test it. I’ll also mount my gear rack that will drive the in out function. Not sure if I’m going to weld it or counter sink and tap threaded holes to mount it. I’m leaning towards the threaded hole option. I also need to make a spacer that will hold my gear motor in the correct place.
IMG_6899.jpeg
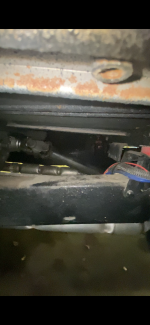
This is the space I’m working with under the truck. I should have plenty of clearance. My drive shaft was my biggest concern .
IMG_6865.png
 

nvrstuk

Contributor
Just a Bronco driver for over 50 yrs!
Joined
Jul 31, 2001
Messages
8,844
I'm watching this as well. Looking good, ingenious! :)
 
OP
OP
rydog1130

rydog1130

Sponsor/Vendor
Bronco Guru
Joined
Jun 19, 2014
Messages
4,029
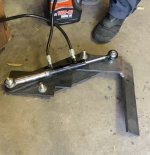
It’s funny how paper sometimes doesn’t always translate to real life. When I was designing this I was hoping I’d have enough clearance without anything coming into contact with itself but ran into my first bump literally! I noticed when extending the up down system the top arm would come into contacts to the drive arm that pushes the seat out. IMG_6917.jpeg IMG_6918.jpeg IMG_6920.jpeg

I drew a line where the up/down system would attach and ran it again an took some measurements. My cylinder is the biggest culprit. I could maybe try to move it or shorten it but then I loose length of travel which I don’t want to sacrifice. It’s got to be easy to get into not harder trying to transfer into something higher than where you’re allready sitting! So here’s where the cylinder would come into contact

IMG_6994.jpeg

IMG_7125.jpeg
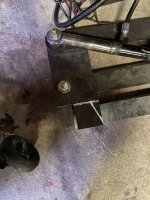
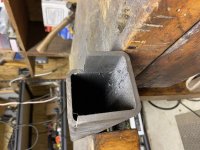
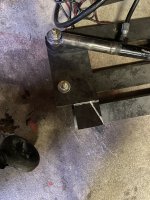
So I cut out a knotch or recess on my 3” inner square tube to match that triangle and will reweld it up to allow full travel of the parallel 4 link system.

IMG_7132.jpeg IMG_7139.jpeg

Once that’s welded up and looking pretty I’ll weld my plate on there that holds the 2 ends of the 4 link system and give it a weight test!
 
OP
OP
rydog1130

rydog1130

Sponsor/Vendor
Bronco Guru
Joined
Jun 19, 2014
Messages
4,029
Today I had my dad help me make a piece for the section I cut out so that it will fill the hole, add some structural integrity back and look clean. I used a 3/16 thick chunk of Angle iron to fit in there. It’ll look good and I don’t have to weld that inner corner now just the edges!
IMG_7185.jpeg
 
OP
OP
rydog1130

rydog1130

Sponsor/Vendor
Bronco Guru
Joined
Jun 19, 2014
Messages
4,029
Not much going on it was too cold to work on the barn but with the weather in the 40’s soon I’ll be back at it! I did manage to fit the piece and weld it in. I gave it a little grind job to smooth it out but it needs the flap disc treatment to finish it! I’m hoping to have that done by this week and possibly weld the vertical tower in that holds the parallel bars. Then I can hopefully perform the main load test on it …
IMG_7511.jpeg IMG_7522.jpeg IMG_7125.jpeg
 
Last edited:
OP
OP
rydog1130

rydog1130

Sponsor/Vendor
Bronco Guru
Joined
Jun 19, 2014
Messages
4,029
Got it all cleaned up, welded the two inner seams then fitted and spaced it up and took the big step of welding the rear vertical mount on! Next step is toss it back together on the slides and load test it! Fingers crossed it works!

IMG_7954.jpeg IMG_7955.jpeg IMG_7956.jpeg IMG_7957.jpeg IMG_7953.jpeg
 

stout22

Contributor
Bronco Guru
Joined
Dec 13, 2006
Messages
2,716
Loc.
Athens, AL
Just read back through your thread to get caught up. Hopefully the weather will cooperate and you can get it all back together soon.
 
OP
OP
rydog1130

rydog1130

Sponsor/Vendor
Bronco Guru
Joined
Jun 19, 2014
Messages
4,029
gonna be 40 degrees tomorrow warm enough for me to get a few hours on it!
 
OP
OP
rydog1130

rydog1130

Sponsor/Vendor
Bronco Guru
Joined
Jun 19, 2014
Messages
4,029
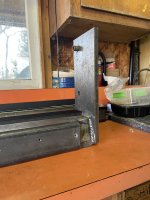
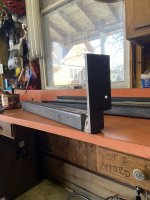
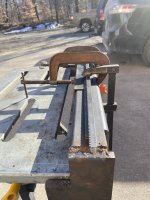
Got out today and man was it nice out! I cut my gear rack to 34” and got it centered on the arm. I really need to get an adjustable square for situations like this but sometimes you have to improvise, luckily I had an 1.25” piece of angle iron and and 1/4” x1/4” piece of square stock to get me 1.5” on center with the face of the gear rack. Got it clamped together and put a small stringer weld on each end and the middle. Not pictured but I also added a stop on the end to allow an 1.5” of gear rack once it reaches the end of it travel so my motor doesn’t spin off the end of the track. I’m going to make two plates with 3 holes on each end that will hold the outer box that the slides are connected to in order to keep it rigid. One plate will sit on top located under the passenger seat site and the other will be on the underside by the transmission tunnel. I’ll get those made up then toss it together and see how it does!
IMG_7968.jpeg IMG_7969.jpeg IMG_7971.jpeg
 
OP
OP
rydog1130

rydog1130

Sponsor/Vendor
Bronco Guru
Joined
Jun 19, 2014
Messages
4,029
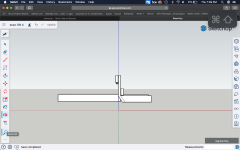
I forgot to post these initially but these are the 3D sketches i did in the beginning. A few things changed but this gives you the basic concept....

Screen Shot 2023-06-01 at 7.39.01 PM.png Screen Shot 2023-06-01 at 7.34.48 PM.png Screen Shot 2023-06-01 at 7.34.29 PM.png Screen Shot 2023-06-01 at 7.33.22 PM.png Screen Shot 2023-06-01 at 7.30.49 PM.png
 
OP
OP
rydog1130

rydog1130

Sponsor/Vendor
Bronco Guru
Joined
Jun 19, 2014
Messages
4,029
Had an hour to work on the seat system yesterday. I put the in/out arm back in its housing and trimmed the outter ends of the slides. I marked where my gear box to power the system needs to be placed and also where I need to mount my stop so the gear doesn’t run itself off the track. If I had more room in the bronco I could rely on the natural stop built into the slides but it’s just shy about an inch. I’ll need to mount my gear box in a way that I can put it on after this thing is in the truck so I’m thinking I can mount the left side of the outter box w/ the arm attached then wiggle the right side in and complete the box with some panels I can bolt on top where the passenger seat sits and then underneath the box where it will sit under the transmission tunnel. I like to design things that are fixable if they break instead of welding it all together. Maybe it wouldn’t break if I welded it all together though? Hmmm lol … I still like the option of a slide we’re to go out or I lost a tooth on a gear then it could be pulled out and fixed other than rebuilding a whole new unit. I think you’ll understand as I get further along with this thing. The main idea is here but it’s kind like solve as you move along as well!

IMG_8241.jpeg IMG_8242.jpeg IMG_8244.jpeg IMG_8243.jpeg
 
Last edited:
OP
OP
rydog1130

rydog1130

Sponsor/Vendor
Bronco Guru
Joined
Jun 19, 2014
Messages
4,029
Today was a measurement day and had a little help from my son! Just wanted to make sure my math was ok and I’d have enough clearance for the down/up four link to clear the rocker panel. From the top edge of the trans tunnel to the outer edge of the rocker it’s about 28” and when the slides hit their stop I have a distance of 30” to where my hydraulic cylinder rest so I have a robust 2” of clearance which is awesome because that means I can squeeze my seat in closer to the trans tunnel and I’ll be able to recline my seat without it hitting the roll bar! Win!!

IMG_8267.jpeg IMG_8268.jpeg IMG_8264.jpeg
 
OP
OP
rydog1130

rydog1130

Sponsor/Vendor
Bronco Guru
Joined
Jun 19, 2014
Messages
4,029
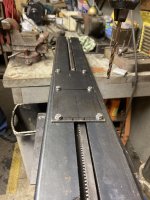
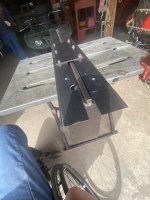
Slow progress but it’s forward progress and not “congress” lol 😂… anyways! I got my hole notched out so the window motor/gear box can fit, before I can mount it I need to finish “boxing in” the out box. Right now it’s just 2 separate half’s sliding each different way. So I thought I had some steel lying around that I could use but was coming up short, literally! I found a long piece of 2” wide 1/8” thick about 3ft long and thought I could weld 2 pieces together to make a 4” wide plate that I could bolt on the top portion. Well I should have just tacked it together because it ended up looking like a piece of bacon. The welds were solid lol but I’m embarrassed to post a picture of it lol! I did find an 8”x9” plate and cut it down the middle to make a top and bottom plate! They’re a little shorter than I’d like but it’ll work for now. Holes are drilled and just need to tap the holes on the outter box so I can fasten that plate and tie it together so they don’t move!

IMG_8324.jpeg IMG_8326.jpeg IMG_8327.jpeg IMG_8330.jpeg
 

nvrstuk

Contributor
Just a Bronco driver for over 50 yrs!
Joined
Jul 31, 2001
Messages
8,844
Fun following your post as you're figuring this out. Cool stuff happening!
 
OP
OP
rydog1130

rydog1130

Sponsor/Vendor
Bronco Guru
Joined
Jun 19, 2014
Messages
4,029
Fun following your post as you're figuring this out. Cool stuff happening!
Yeah alot of figuring as I go for sure, pretty excited though once I have this little gear box mounted I can test it out so hopefully we’ll see something after the next 2 updates worthy or not ha ha …
 
OP
OP
rydog1130

rydog1130

Sponsor/Vendor
Bronco Guru
Joined
Jun 19, 2014
Messages
4,029
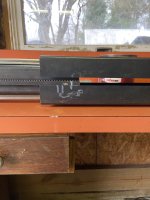
I tried to make a video but it’s just too long to upload here! All the reinforcement plates are in. I need shorter bolts on the bottom right side because my stop rides close to the bottom of the outter tube. I could cut it but buying 10mm vs 12 mm long bolts was easier. Those copper washers are temporary for now. Also all the bolts are 6mm in diameter. Why 6mm well that was the size that came with the slides so to keep everything consistent and not switching tools all the time here ya go lol! I almost got my gear box mounted but the bolts I bought for that were too long and I ran out of time. Next update it will be mounted and hopefully we’ll have power to test the jn out function!

IMG_8339.jpeg IMG_8340.jpeg IMG_8366.jpeg IMG_8367.jpeg IMG_8368.jpeg IMG_8372.jpeg IMG_8373.jpeg
 
Top