• Welcome to ClassicBroncos! - You are currently viewing the forums as a GUEST. To take advantage of all the site features, please take a moment to register. It's fast, simple and absolutely free. So please join our community today!
    If you have problems registering or can't log into your account, please contact Admin.

And the work begins for the fall*-My '73 build-up-* UPDATED 11/5

fireman1749

Sr. Member
Joined
Nov 27, 2005
Messages
970
Loc.
Clarksville, TN
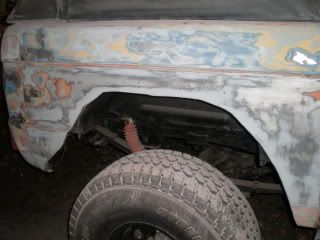
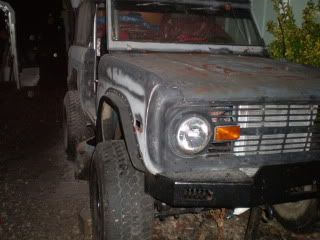
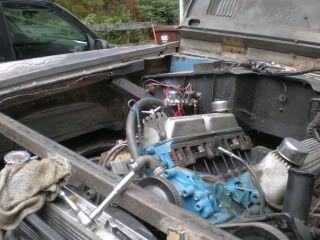
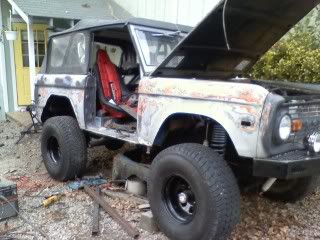
Today started the day that im going to finish my 1973 Bronco. Ive had it for almost 3 years now and its time to be rebuilt.

As it sits right now:
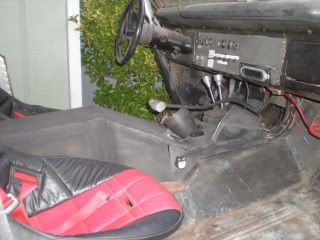
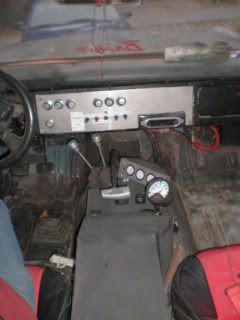
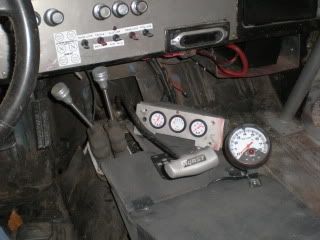
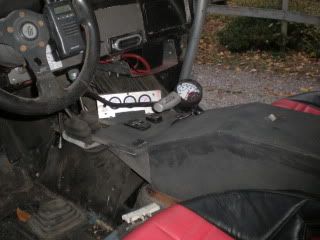
1973 model, stock 302, 3 speed, D20, D44, 9", both with Detroit Tru-tracs and 3.54's, tom woods drive shafts, 35x12.50's on black cragars, 5.5" progressive rate coils, blocks in rear, aluminum radiator, Ford Taurus electric fan, bucket seats, 6 point cage, custom dash, JB Fab twin sticks, rear half with spray in bed liner, no bumpers, Warflares, Bestop soft top, NO RUST ;D

In 3 months or less:
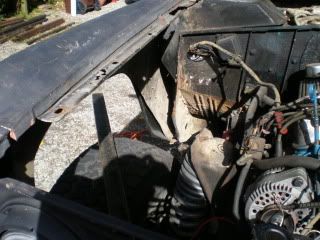
New 302, toploader 4 speed, full width D44 and 9", spooled rear, locked in front, 37-40's, beadlocks, rear springs or shackle flip, tubed front clip, finished interior with tubing added to cage and center console, bumpers, and much more

Here's some pics as it sits now and my to do list, i hope to work on it almost every day and get this thing done for once and be able to drive it. :cool:
 

Attachments

  • DSC00201.JPG
    DSC00201.JPG
    43.5 KB · Views: 39
  • DSC00179.JPG
    DSC00179.JPG
    48.9 KB · Views: 56
  • DSC00121.JPG
    DSC00121.JPG
    43.5 KB · Views: 59
  • DSC00241.JPG
    DSC00241.JPG
    31.2 KB · Views: 66
  • DSC00197.JPG
    DSC00197.JPG
    55.9 KB · Views: 74
  • DSC00126.JPG
    DSC00126.JPG
    75.3 KB · Views: 30
  • DSC00219.JPG
    DSC00219.JPG
    37.9 KB · Views: 24
  • DSC00204.JPG
    DSC00204.JPG
    42.9 KB · Views: 60
  • Bronco To-Do.pdf
    31.9 KB · Views: 15

SC74

Contributor
Bronco Guru
Joined
May 24, 2004
Messages
3,413
You've got your work cut out for you! I look forward to seeing your progress pics the next several months. You're not too far up the road from me (G'ville, SC) - hopefully we'll meet at one of the east coast rides sometime when both of our rigs are done.

Robert
 
OP
OP
fireman1749

fireman1749

Sr. Member
Joined
Nov 27, 2005
Messages
970
Loc.
Clarksville, TN
Yeah its been a while, about time to do something with it.

Yeah its still in Maggie, as soon as i can get it to run long enough to get it on a trailer its going to Brown cove to my brothers shop
 

73azbronco

Bronco Guru
Joined
Nov 11, 2007
Messages
7,841
Keep us posted, I'm in the same boat with the same year except C4 tranny. I'm interested what you do for front/rear diffs.
 
OP
OP
fireman1749

fireman1749

Sr. Member
Joined
Nov 27, 2005
Messages
970
Loc.
Clarksville, TN
Right now they both have Detroit Tru-Tracs which ill be selling the axles when I get full widths.

Did a little work on it today. The battery is charging right now so it may start and run this evening hopefully. I finally got the alternator bolted on and wired up, took the carb off to clean it and make sure its fine. Here's some pics..
 

Attachments

  • DSC00322.JPG
    DSC00322.JPG
    252.9 KB · Views: 22
  • DSC00323.JPG
    DSC00323.JPG
    217.2 KB · Views: 28
  • DSC00319.JPG
    DSC00319.JPG
    207.3 KB · Views: 46
  • DSC00321.JPG
    DSC00321.JPG
    227.6 KB · Views: 48
OP
OP
fireman1749

fireman1749

Sr. Member
Joined
Nov 27, 2005
Messages
970
Loc.
Clarksville, TN
And......................


It runs! Idles like its new.... its the first time its been started in 8 months... before i go any further im going to wire up the volt meter so i can see how the new alternator is doing but woo hoo it runs!
 
OP
OP
fireman1749

fireman1749

Sr. Member
Joined
Nov 27, 2005
Messages
970
Loc.
Clarksville, TN
Moved it today, tranny is coming out tomorrow so the toploader can go in... while its out im cleaning the whole undercarage and painting it all and running new brake lines.... pics will be up tomorrow
 
OP
OP
fireman1749

fireman1749

Sr. Member
Joined
Nov 27, 2005
Messages
970
Loc.
Clarksville, TN
Got the tranny and t-case out last night, took the tranny apart to get the gear selectors out, and put the new shifter on. If the rain will clear up a little im going to paint it all tonight and put it back up in there... heres some pics
 

Attachments

  • DSC00355.jpg
    DSC00355.jpg
    165.7 KB · Views: 41
  • DSC00350.jpg
    DSC00350.jpg
    206.2 KB · Views: 24
  • DSC00354.jpg
    DSC00354.jpg
    151.4 KB · Views: 26
  • DSC00344.jpg
    DSC00344.jpg
    159.3 KB · Views: 27
  • DSC00353.jpg
    DSC00353.jpg
    114.9 KB · Views: 19
OP
OP
fireman1749

fireman1749

Sr. Member
Joined
Nov 27, 2005
Messages
970
Loc.
Clarksville, TN
And it runs!!

Next step is getting the transmission tunnel done and building a center console :cool:
 

Attachments

  • DSC00360-1.jpg
    DSC00360-1.jpg
    219.4 KB · Views: 50
  • DSC00363.JPG
    DSC00363.JPG
    215.5 KB · Views: 11
  • DSC00358.JPG
    DSC00358.JPG
    248.2 KB · Views: 15
OP
OP
fireman1749

fireman1749

Sr. Member
Joined
Nov 27, 2005
Messages
970
Loc.
Clarksville, TN
Ok.... i was a little bored haha....

Plan on making it out of fiberglass coming down from the dash and also making it to where i can remove it for access to the tranny and t-case :-*
 

Attachments

  • 12.gif
    12.gif
    220 KB · Views: 93
OP
OP
fireman1749

fireman1749

Sr. Member
Joined
Nov 27, 2005
Messages
970
Loc.
Clarksville, TN
Little update...

Started on the bodywork for a little bit today... looks like im going to take it down to bare metal the whole body

Theres like 8 different colors in this thing so... oh and a sweet hole that was covered up with an excellent bondo job haha
 

Attachments

  • DSC00387.JPG
    DSC00387.JPG
    95.8 KB · Views: 26
  • DSC00390.JPG
    DSC00390.JPG
    104.6 KB · Views: 17
  • DSC00391.JPG
    DSC00391.JPG
    107.9 KB · Views: 19
  • DSC00392.JPG
    DSC00392.JPG
    116.6 KB · Views: 22
OP
OP
fireman1749

fireman1749

Sr. Member
Joined
Nov 27, 2005
Messages
970
Loc.
Clarksville, TN
I've been working on it a bunch lately now that I am living back in NC. Here's a little update more pics to come!

-Rewired most of the dash and all the switches. Ran all new wiring for the electric fan, lights, etc.
- Removed heater and all junk under dash and moved battery to under dash
-Began on a center console
-Started on the body work so the thing can be painted.


PA079621.jpg
PA079622.jpg
PA099626.jpg
PA099629.jpg
PA149632.jpg
PA079619.jpg
PA149633.jpg
PA149630.jpg
PA149637.jpg
PA149636.jpg
PA069617.jpg
 
Last edited:
OP
OP
fireman1749

fireman1749

Sr. Member
Joined
Nov 27, 2005
Messages
970
Loc.
Clarksville, TN
Little update for the day..

Interior is pretty much done except for the sheetmetal on the center and spraying Raptor Liner. The center console is made out of MDF board. All the dash wiring is finished finally!

As for under the hood, all that is left to do is a few little hoses and such and its ready for painting.

Next step: Body work!

Here's some pics

PA249645.jpg
PA249644.jpg
PA249643.jpg
PA249642.jpg
PA169641.jpg
 
Last edited:
OP
OP
fireman1749

fireman1749

Sr. Member
Joined
Nov 27, 2005
Messages
970
Loc.
Clarksville, TN
Here's some updates like anyone even cares but anyway...

Made an inboard shock mount. Im going to bolt it to the frame instead of welding it.

Started on the rocker panels and gaining some ground clearance.

Here's some pics

1105091614.jpg
1105091707.jpg
1105091716.jpg
 
Last edited:

eds66bronco

Bronco Guru
Joined
Aug 3, 2004
Messages
1,119
Loc.
Essex, Vermont
Nice work fireman... Keep plugging away. I spent about 2 years on mine but it is worth every minute with learning to do it yourself. Great you have such a solid starter to begin with. You would cry if you saw the rot-bucket i'm about to dig into... press on...
 
Top